RR # 21 4278 D GB F I ES Bauanleitung Building instructions Notice de construction Instruzioni di montaggio Instrucciones de montaje Abbildungen Illustrations Illustrations Illnstrazioni Iiustraciónes ... 25-31 Ersatzteile Replacement parts Pièces de rechanges Parti di ricambio Repuestos © Copyright by MULTIPLEX Modellsport GmbH & Co. KG 2015 # 26 4278 2 ... 10 11 ... 19 20 ... 35 36 ... 44 45 ... 53 54-56 Version 1.
Sicherheitshinweise für MULTIPLEX-Flugmodelle Das Modell ist KEIN SPIELZEUG im üblichen Sinne. D Mit Inbetriebnahme des Modells erklärt der Betreiber, dass er den Inhalt der Betriebsanleitung, besonders zu Sicherheitshinweisen, Wartungsarbeiten, Betriebsbeschränkungen und Mängel kennt und inhaltlich nachvollziehen kann. Dieses Modell darf nicht von Kindern unter 14 Jahren betrieben werden.
D Restrisiken Auch wenn das Modell vorschriftsmäßig und unter Beachtung aller Sicherheitsaspekten betrieben wird, besteht immer ein gewisses Restrisiko. Eine Haftpflichtversicherung ist daher obligatorisch. Falls Sie in einen Verein oder Verband eintreten, können Sie diese Versicherung dort abschließen. Achten Sie auf ausreichenden Versicherungsschutz (Modellflugzeug mit Antrieb). Halten Sie Modelle und Fernsteuerung immer absolut in Ordnung.
Machen Sie sich mit dem Bausatz vertraut! D MULTIPLEX – Modellbaukästen unterliegen während der Produktion einer ständigen Materialkontrolle. Wir hoffen, dass Sie mit dem Baukasteninhalt zufrieden sind. Wir bitten Sie jedoch, alle Teile (nach Stückliste) vor Verwendung zu prüfen, da bearbeitete Teile vom Umtausch ausgeschlossen sind. Sollte ein Bauteil einmal nicht in Ordnung sein, sind wir nach Überprüfung gern zur Nachbesserung oder zum Umtausch bereit.
Wichtiger Hinweis Dieses Modell ist nicht aus Styropor ™! Daher sind Verklebungen mit Weißleim, Polyurethan oder Epoxy nicht möglich. Diese Kleber haften nur oberflächlich und platzen im Ernstfall einfach ab. Verwenden Sie nur Cyanacrylat-/Sekundenkleber mittlerer Viskosität, vorzugsweise Zacki -ELAPOR® # 85 2727, der für ELAPOR® Partikelschaum optimierte und angepasste Sekundenkleber. Bei Verwendung von Zacki-ELAPOR® können Sie auf Kicker oder Aktivator weitgehend verzichten.
Herzlichen Glückwunsch zu Ihrem neuen MULTIPLEXROCKSTAR! Zum Bau des Modells benötigen Sie folgendes Werkzeug: 2x Zacki-Elapor # 85 2727 (KIT) (1xRR) 1x UHU Por (KIT) Heißklebepistole (KIT) mittleren Kreuzschlitzschraubendreher (KIT) mittleren Schlitzschraubdreher (KIT) Cuttermesser (KIT) Spitzzange (KIT) Inbusschlüssel 1,5 (KIT) Inbusschlüssel 3 (KIT) 10er Gabelschlüssel (KIT) 2,5mm Bohrer (KIT) Vor dem Bau: Überprüfen Sie die gelieferten Teile auf Ihre Vollständigkeit mittels der Stückliste auf Seite 9+10
es an den Rumpf anhalten. Schrauben Sie das fertig zusammengebaute Fahrwerk nun mit vier Inbus-Schrauben (M4x12) an den Rumpf. Abb. 23 + 24 Schieben Sie auf den Spornradbügel das Spornrad 70 auf und sichern Sie es mit dem Stellring 71. Abb. 25 3. Leitwerke (KIT+RR) Kleben Sie in die untere Hälfte des Höhenleitwerks 13 vier Scharnierachsaufnahmen 44 ein. Zwischen die inneren Scharnierachsaufnahmen kleben Sie die Hülse für die Höhenleitwerksbefestigung 38.
Befestigen Sie den Empfänger mit Klettband auf der Unterseite des M-Frames. Für eine feste Verbindung des Klettbandes am Holz empfehlen wir ein paar Tropfen Zacki hinzu zu geben. Zusätzlich können Sie den Empfänger mit einem Kabelbinder sichern. 9. Empfohlene Ruderausschläge 7. Endmontage des Flugzeugs (KIT+RR) Stecken Sie zunächst die untere Fläche an den Rumpf. Drehen Sie dazu den Rumpf auf den Rücken und führen Sie die Tragfläche mit der Nasenleiste in die Ecke zwischen Fahrwerk und Radverkleidung.
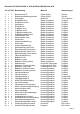
Stückliste KIT ROCKSTAR # 21 4278 & RR ROCKSTAR # 26 4278: Lfd.
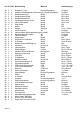
Lfd. Kit RR Bezeichnung 49 50 51 52 53 54 55 56 57 58 59 60 61 62 63 64 65 66 67 68 69 70 71 72 73 74 75 76 77 78 79 80 81 82 83 84 85 86 87 88 89 90 91 92 93 94 95 3 4 2 2 4 2 11 2 1 8 1 4 4 1 2 2 8 2 2 4 1 1 1 1 2 2 2 2 2 1 1 2 1 1 1 1 1 1 1 3 3 1 2 0 0 0 0 Seite 10 3 4 2 2 4 2 11 2 1 8 1 4 4 1 2 2 8 2 2 4 1 1 1 1 2 2 2 2 2 1 1 2 1 1 1 1 1 1 1 3 3 1 2 4 1 4 1 Material Ruderhorn „Twin“ Kunststoff gespritzt Aufnahme Kardanbolzen-Querruderverb.
Safety Information for MULTIPLEX model aircraft This model is NOT A TOY in the usual sense of the term. GB By operating the model the owner affirms that he is aware of the content of the operating instructions, especially those sections which concern safety, maintenance, operating restrictions and faults, and is capable of fulfilling these requirements. This model must not be operated by any child under fourteen years of age.
GB Residual risks Even if the model is operated in the correct manner, and you observe all safety aspects, there is always a certain residual risk. For this reason it is mandatory to take out third-party liability insurance. If you join a club or flying association, insurance is usually available or included in the annual fee. Make sure that your insurance cover is adequate (i.e. that it covers powered model aircraft). Always keep your models and your radio control equipment in perfect order.
Examine your kit carefully! GB MULTIPLEX model kits are subject to constant quality checks throughout the production process, and we sincerely hope that you are completely satisfied with the contents of your kit. However, we would ask you to check all the parts before you start construction, as we cannot exchange components which you have already worked on. If you find any part is not acceptable for any reason, we will readily correct or exchange it. Just send the component to our Model Department.
Important note This model is not made of Styrofoam™, and it is not possible to glue the material using white glue, polyurethane or epoxy; these adhesives only produce superficial joints, and simply break away under stress. Please be sure to use medium-viscosity cyano-acrylate glue exclusively, preferably Zacki ELAPOR® # 59 2727, which is optimised specifically for ELAPOR® particle foam. If you se Zacki ELAPOR® there is usually no need for cyano ‘kicker’ or activator.
Congratulations on your new ROCKSTAR! You will need the following tools to build the model: 2 x Zacki-Elapor # 85 2727 (KIT) (1xRR) 1 x UHU Por (KIT) Hot glue gun (KIT) Medium-sized cross-point screwdriver (KIT) Medium-sized slot-head screwdriver (KIT) Balsa knife (KIT) Pointed-nose pliers (KIT) 1.5 mm A/F allen key (KIT) 3 mm A/F allen key (KIT) 10 mm A/F open-ended spanner (KIT) 2.
Fit the tailwheel 70 on the axle of the tailwheel unit, and secure it with the collet 71. Fig. 25 3. Tail panels (KIT+RR) Glue four hinge pin supports 44 in the bottom half of the tailplane 13. Glue the sleeve 38 for the tailplane retainer screw between the inboard hinge pin supports as shown, then glue the bottom tailplane shell 13 to the top tailplane shell 12. Fig. 26 Glue the recessed hinge pin units 43 in the elevator 14. Glue the 3 mm Ø carbon fibre tube 72 in the long slot.
7. Final airframe assembly (KIT+RR) The first step is to attach the bottom wing to the fuselage: turn the fuselage onto its back, then guide the leading edge of the wing into the corner between the undercarriage and the undercarriage fairing. Connect the aileron lead to the receiver, then fold the wing’s trailing edge down onto the wing saddle, and engage the locating lug in the fuselage. The wing can now be finally positioned, and fixed to the fuselage using a single M5 x 35 mm plastic screw 47.
Partlist KIT ROCKSTAR # 21 4278 and RR ROCKSTAR # 26 4278: No. Kit RR Description Material Dimensions 1 2 3 4 5 6 7 8 9 10 11 12 13 14 15 16 17 18 19 20 21 22 23 24 25 26 27 28 29 30 31 32 33 34 35 36 37 38 39 40 41 42 43 44 45 46 47 48 KIT building instructions Model complaints form Decal sheet L.H. fuselage shell R.H. fuselage shell Cowl Fuselage hatch Top wing Bottom wing L.H. wing strut R.H. wing strut Tailplane, top Tailplane, bottom Elevator Elevator cover Rudder Rudder cover L.H.
No. Kit RR 49 50 51 52 53 54 55 56 57 58 59 60 61 62 63 64 65 66 67 68 69 70 71 72 73 74 75 76 77 78 79 80 81 82 83 84 85 86 87 88 89 90 91 92 93 94 95 3 4 2 2 4 2 11 2 1 8 1 4 4 1 2 2 8 2 2 4 1 1 1 1 2 2 2 2 2 1 1 2 1 1 1 1 1 1 1 3 3 1 2 0 0 0 0 3 4 2 2 4 2 11 2 1 8 1 4 4 1 2 2 8 2 2 4 1 1 1 1 2 2 2 2 2 1 1 2 1 1 1 1 1 1 1 3 3 1 2 4 1 4 1 Description Material „Twin“ control surface horn Inj.-moulded plastic Aileron link rod barrel support Inj.
Consignes de sécurités pour les modèles volants MULTIPLEX Le modèle n’est PAS UN JOUET. F En utilisant ce modèle, le propriétaire de celui-ci déclare avoir pris connaissance du contenu de la notice d’utilisation, particulièrement concernant les consignes de sécurités, l’entretien ainsi que les restrictions et défauts d’utilisations, et qu’il a bien compris le sens de ces consignes Ce modèle ne doit pas être utilisé par des enfants de moins de 14 ans.
l Ne volez jamais directement vers les personnes ou animaux. Volez le plus près possible au-dessus de personnes n’est pas une preuve de votre savoir-faire, mais expose ces personnes inutilement à un danger. Dans l’intérêt de tous, veillez en informer également les autres pilotes. Volez toujours de telle manière à ce que vous ne mettiez personne en danger. Pensez toujours que même la meilleure radiocommande peut être perturbée par des phénomènes externes.
Famillarisez-vous avec le kit d’assemblage! F Les kits d’assemblages MULTIPLEX sont soumis pendant la production à des contrôles réguliers du matériel. Nous espérons que le contenu du kit répond à vos espérances. Nous vous prions de vérifier le contenu (suivant la liste des pièces) du kit avant l’assemblage, car les pièces utilisées ne sont pas échangées. Dans le cas où une pièce ne serait pas conforme, nous sommes disposé à la rectifier ou à l’échanger après contrôle.
Information importante Ce modèle n’est pas en polystyrène™! De ce fait un collage avec de la colle blanche, polyuréthane ou époxy n’est pas possible. Ces colles ne tiennent que superficiellement et cassent sous une contrainte trop importante. N’utilisez que des colles cyanoacrylate / colle rapide de viscosité moyenne, de préférence notre Zacki-ELAPOR® # 59 2727 qui est optimisé pour la mousse type ELAPOR® et colle rapide correspondante.
Félicitations pour l’acquisition de votre nouveau modèle ROCKSTAR Multiplex.
12 13 28 27 16 17 79 6 7 24 21 23 62 20 18 22 14 15 19 25 26 10 11 8 5 4 9 pic. 01 73 74 73 74 77 44 43 37 72 67 41 70 40 36 33 31 61 34 75 48 47 85 56 46 49 10 45 39 35 50 55 51-53 60 57 64 66 42 78 81 71 58 63 38 75 54 32 80 69 29 30 65 68 pic.
44 5 44 39 31 33+34 28 69 40 pic. 03 pic. 04 pic. 05 pic. 06 37+37 27 pic. 07 pic. 08 4 31 28 73+74 pic. 09 Seite 26 pic.
pic. 12 pic. 11 26 pic. 13 pic. 14 55 54 56 58 58 pic. 15 pic. 16 58 pic. 17 pic.
32 18 45 10 pic. 20 pic. 19 62 19 63 65 65 58 67 pic. 21 pic. 22 68 22 pic. 23 pic. 24 12 44 13 71+55 70 Seite 28 38 pic. 25 pic.
43 15 49 14 72 pic. 28 pic. 27 53+55 48 pic. 29 pic. 30 pic. 31 pic. 32 17 43 16 42 53+55 pic. 33 41 pic.
61 86+87 82 83 65 80 85 81 pic. 35 84 pic. 36 24 35 23 36 10 30 77 29 78 36 pic. 37 25 pic. 38 36 37 77 11 79 36 50 pic. 39 8 49 pic. 40 53+55 75 35 50 9 pic. 41 Seite 30 pic.
pic. 43 pic. 44 pic. 45 pic. 46 51+55 75 51+55 100mm pic.
Montez la roulette arrière 70 sur le train arrière et maintenez-la en position avec la bague d’arrêt 71. Vue 25 3. Empennage (KIT+RR) Collez dans le plan fixe inférieur du stabilisateur 13 quatre supports de charnière 44. Collez entre les supports de charnière, la douille de fixation 38 du stabilisateur. Collez ensuite la partie inférieure du plan fixe sur sa partie supérieure 12. Vue 26 Collez les axes de charnière 43 dans la gouverne de profondeur 14. Collez le tube carbone 72 (Ø 3mm) dans la longue rainure.
7. Montage final du modèle (KIT+RR) Montez d’abord l’aile inférieure sur le fuselage. Retournez le fuselage et positionnez l’aile par son bord d’attaque entre le train d’atterrissage et les carénages de roue. Branchez maintenant les cordons servos des ailerons sur le récepteur. Rabattez ensuite le bord de fuite sur le fuselage et logez la patte dans le fuselage. L’aile peut maintenant être plaquée définitivement et vissée avec une vis plastique 47 (M5x35) sur le fuselage.
Liste de pièces KIT ROCKSTAR # 214278 & RR ROCKSTAR # 26 4278: Rep.
Rep.
Sicurezza per gli aeromodelli MULTIPLEX Il modello NON È UN GIOCATTOLO nel senso comune del termine. I Con la messa in funzione del modello l’utente dichiara di conoscere e aver capito il contenuto delle istruzioni per l’uso, in particolare le avvertenze sulla sicurezza, gli interventi di manutenzione, le limitazioni di funzionamento e i vizi. Questo modello non deve essere messo in funzione da bambini di età inferiore ai 14 anni.
I Rischi residui Anche se il modello viene messo in funzione secondo le norme e tenendo conto di tutti gli aspetti di sicurezza, sussiste sempre un determinato rischio residuo. Quindi è obbligatorio stipulare un’assicurazione di responsabilità civile. Nel caso foste socio di un’associazione o federazione, potete stipulare l’assicurazione anche in questa istituzione. Fare attenzione ad avere una protezione assicurativa sufficiente (aeromodello con motorizzazione).
Familiarizzate con il contenuto della scatola di montaggio! I Le scatole di montaggio per modelli della MULTIPLEX vengono sottoposte costantemente a controlli del materiale durante la produzione. Speriamo che siate soddisfatti del contenuto della scatola di montaggio. Vi preghiamo tuttavia, di controllare tutte le parti (consultando la lista materiale) prima dell’utilizzo, visto che le parti già lavorate non potranno essere sostituite.
Nota importante Questo modello non è in Styropor ™! Pertanto non è possibile incollare con colla vinilica, poliuretano o colla epoxy. Queste colle aderiscono solo superficialmente e non tengono in caso di emergenza. Utilizzare unicamente colla istantanea in cianoacrilato a viscosità media, preferibilmente Zacki ELAPOR® # 59 2727, perfezionata e adattata all’espanso ELAPOR®. Se utilizzate i prodotti Zacki-ELAPOR® potete rinunciare per lo più all’uso di kicker e attivatore.
Congratulazioni per il vostro nuovo Multiplex ROCKSTAR.
Spostare il ruotino di coda 70 sulla staffa del ruotino di coda e assicurarlo con l’anello di regolazione 71. Figg. 25 3. Piani di coda (KIT+RR) Incollare alla metà inferiore dell’impennaggio elevatore 13 quattro alloggiamenti assi a cerniera 44. Tra gli alloggiamenti interni assi a cerniera incollare la boccola per il fissaggio del piano di coda 38. Incollare successivamente la metà inferiore con la metà superiore del piano di coda 12. Fig.
7. Montaggio finale dell’aereo (KIT+RR) Inserire innanzitutto l’ala inferiore nella fusioliera. Girare a tal scopo la fusoliera sul retro e inserire la semiala con il bordo di entrata nell’angolo tra il carrello e il rivestimento della ruota. Quindi collegare il cavo degli alettoni alla ricevente. Piegare quindi il listello finale verso la fusoliera e inserire la linguetta nella fusoliera. Ora la semiala può essere completamente poggiata e avvitata con una vite di plastica 47 (M5x35).
Distinta base KIT ROCKSTAR # 21 4278 & RR ROCKSTAR # 2 64278: Pos. Kit RR Designazione 1 2 3 4 5 6 7 8 9 10 11 12 13 14 15 16 17 18 19 20 21 22 23 24 25 26 27 28 29 30 31 32 33 34 35 36 37 38 39 40 41 42 43 44 45 46 47 48 KIT Istruzioni per il montaggio Carta 80g/m² DIN-A4 Comunicazione di reclamo modelli, Carta 80g/m² DIN-A4 Decal Foglio adesivo stampato 700 x 1000mm Semiguscio della fusoliera sx. Elapor espanso Finito Semiguscio della fusoliera dx.
Pos.
Cuaderno de seguridad para modelos de aviones MULTIPLEX El modelo NO ES UN JUGUETE en el sentido habitual de la palabra. ES Con la puesta en marcha del modelo, el operador declara que conoce el contenido del manual de instrucciones, especialmente lo respectivo a consejos de seguridad, trabajos de mantenimiento y limitaciones de uso y carencias, pudiendo cumplir todo lo requerido. Este modelo no debe ser manejado por menores de 14 años.
ES Otros riesgos Incluso utilizando el modelo según las normas y respetando todos los aspectos de seguridad, siempre hay un riesgo determinado. Por tanto, un seguro de responsabilidad civil es obligatorio. En caso de que vaya a entrar en un club o una asociación, puede realizar la gestión del seguro por esa vía. Preste atención a los aspectos cubiertos por el seguro (aviones con motor). Mantenga siempre los modelos y la emisora en perfecto estado.
¡Familiarícese con su Kit! ES Durante la producción, los materiales de los kits MULTIPLEX se someten a continuos controles. Esperamos que el contenido del kit sea de su agrado. Aun así, le rogamos, que compruebe que todas las piezas (según la lista de componentes) están incluidas antes de empezar a montar, ya que cualquier pieza que haya sido manipulada no podrá cambiarse.
Aviso importante: ¡Este modelo no es de Styropor ™! Por tanto, no debe usar cola blanca, poliuretano o Epoxy para las uniones. Estos pegamentos solo producen una unión superficial y que se despega fácilmente. Utilice exclusivamente pegamentos con base de cianocrilato de viscosidad media, preferentemente Zacki -ELAPOR® # 59 2727, que está optimizado para las partículas de ELAPOR® y un pegamento instantáneo compatible. Al utilizar Zacki-ELAPOR® podría ahorrarse el uso de activador.
Le damos la enhorabuena por su nuevo Multiplex ROCKSTAR. Para montar el modelo necesitará las siguientes herramientas: 2x Zacki-Elapor # 85 2727 (KIT) (1xRR) 1x UHU Por (KIT) Pistola de cola caliente (KIT) Destornillador mediano de estrella (KIT) Destornillador mediano plano (KIT) Cuchilla (KIT) Alicates de punta (KIT) Llave allen 1,5 (KIT) Llave allen 3 (KIT) Llave fija del 13 (KIT) Broca de 2,5 mm.
Coloque la rueda de cola 70 en su soporte y fíjela con el collarín 71. Img. 25 3. Estabilizadores (KIT+RR) Pegue en la mitad inferior del estabilizador horizontal 13 cuatro soportes para bisagras 44. Entre los soportes para bisagras interiores, pegue el casquillo para la fijación del estabilizador horizontal 38. A continuación, pegue la mitad inferior del estabilizador con la mitad superior. Img. 26 Pegue en el timón de profundidad 14 los ejes de las bisagras de gargantilla 43.
7. Montaje final del avión (KIT+RR) Comience montado el ala inferior en el fuselaje. Para ello, ponga el fuselaje boca arriba y coloque el ala con el borde a ataque entre el tren de aterrizaje y la carena de las ruedas. Conecte ahora los cables de los alerones al receptor. Aproxime el borde de fuga al fuselaje y enganche la lengüeta al fuselaje. Ahora podrá fijar el ala en condiciones y usando un tornillo de la plástico 47 (M5x35) podrá fijarla.
Lista de partes KIT ROCKSTAR # 21 4278 / RR ROCKSTAR # 26 4278: Num. Kit RR Descripción 1 2 3 4 5 6 7 8 9 10 11 12 13 14 15 16 17 18 19 20 21 22 23 24 25 26 27 28 29 30 31 32 33 34 35 36 37 38 39 40 41 42 43 44 45 46 47 48 1 1 1 1 1 1 1 1 1 1 1 1 1 1 1 1 1 1 1 1 1 1 1 1 1 1 1 4 1 1 2 2 2 2 2 4 4 1 1 1 1 1 6 6 1 1 2 1 Seite 52 1 1 1 1 1 1 1 1 1 1 1 1 1 1 1 1 1 1 1 1 1 1 1 1 1 1 1 4 1 1 2 2 2 2 2 4 4 1 1 1 1 1 6 6 1 1 2 1 Material Dimensiones Instrucciones KIT Papel 80gr.
Num.
Ersatzteile / Spareparts # 22 4400 Rumpfteileset fuselage parts set # 22 4330 RR-Rumpf mit Dekor RR fuselage with decals # 224422 # 22 4402 # 22 44404 # 22 4426 Motorhaube / Akkudeckel Cowl / fuselage hatch Kabinenhaube / Spinner Canopy / spinner Seite 54
# 22 4412 # 22 4414 # 22 4406 # 22 4424 # 22 4416 # 22 4410 Kleinteilesatz / RR-Fahrwerk small parts set / RR landing gear Flächenstreben und Baldachin/ Radverkleidungen wing struts and cabane/ wheel pants Motorträger / Leitwerkssatz/ motor mount / tail set # 22 4408 Tragflächen oben + unten wings, top + bottom # 72 4370 Dekor # 73 3109 Prop 14x7“ # 33 3046 Seite 55
# 33 3046 Himax C 4220-0620 # 7 2236 MULTIcont BL-60 SD # 11 2088 Servo HS-82MG MULTIPLEX Modellsport GmBH & Co. KG. Westliche Gewerbestrasse 1 D-75015 Bretten-Gölshausen www.multiplex-rc.