
User Manual


16
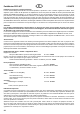
wing as indicated. Once you have test-own the model and
established the perfect battery position, mark this point to
ensure that the pack is always replaced in the same location.
Fig. 36
26. Settings (guide only)
Centre of Gravity (CG): approx. 110 - 120 mm aft
of the wing root leading edge
Longitudinal dihedral: 0°
Downthrust: 0 - 2° (motor shaft angled down)
Sidethrust: 0 - 2° (motor shaft angled to the right)
Adjustments are possible using the socket-head screws
33 in the rewall.
Control surface travels:
Measured at the widest point of the control surfaces
Ailerons: 65 mm
Elevator: 65 mm
Rudder: 90 mm
Dual Rates on elevator and ailerons: 30 - 50%
Exponential: ailerons 30%, elevator 50%
Note: when you apply “right aileron”, the right-hand aileron
- as seen from the tail, looking forward - should deect up.
If you cannot obtain the stated control surface travels by
making adjustments at the transmitter, you may need to
re-install the appropriate swivel pushrod connector in a
different hole.
27. Test-ying
Wait for a day with at-calm conditions or very little wind.
Carry out all initial adjustments beforehand, in the calm of
your workshop!
Longitudinal dihedral = 0°. The design of the model auto-
matically sets this correctly.
28. Balancing:
Start by balancing the model within the stated range. Once
you have completed the initial test-ights, you can ne-tune
the setting as follows: y straight and level at half-throttle,
and roll the model inverted. If you now have to apply a great
deal of “down” to hold level ight, the model is nose-heavy;
the CG must be shifted further aft. If the machine climbs
whilst inverted, without requiring elevator correction, the
CG is too far aft. When balanced correctly, the model will
require slight down-elevator for level inverted ight.
29. Correcting straight and level ight:
First the static balance: support the model by the spinner
and the rudder: with the fuselage level, the wings should
remain horizontal. If not, add ballast to the lighter wingtip.
On the next ight, y the aeroplane at minimum throttle (just
enough power to keep the model in the air), hold it straight
and level, and adjust the trims for straight ight. Now switch
to inverted and check the straight ying characteristics. If
necessary, adjust the wingtip ballast after landing the model.
30. Sidethrust:
Apply full throttle and y the model straight and level past
yourself before pulling up into a vertical climb. When ascen-
ding vertically the model should not exhibit any tendency
to veer off to right or left. If this is not the case, adjust the
sidethrust to correct the fault. Repeat the test several times,
as any sidewind will tend to falsify the model’s track.
31. Downthrust:
Apply full throttle and y the model straight and level until
it arrives at your location, so that you have a clear view of
the model from one side. Pull the aircraft up into a vertical
climb: it should continue to climb vertically, and not fall away
forward or back. If this is not the case, adjust the motor
downthrust to correct the fault.
After these checks you may nd it necessary to repeat the
CG tests.
32. Aileron differential:
Fly three or four rolls to the right at half-throttle; if the
aircraft veers to the right during this manoeuvre, you need
to increase the aileron differential. If it veers to the left,
i.e. against the direction of rolling, you should reduce the
aileron differential.
33. Preparations for the rst ight
For the rst ight wait for a day with as little breeze as
possible; the evening hours often offer calmer conditions.
It is essential to carry out a range-check before the rst
ight! Please follow the instructions laid down by your RC
system manufacturer.
The transmitter battery and ight pack must be fully charged
in accordance with the manufacturer’s recommendations.
Before switching the system on, ensure that your chosen
channel is free; this does not apply if you are using a 2.4
GHz system.
If you are unsure about any point, do not y the model! If
you cannot identify and cure the problem, send the whole
RC system (including battery, switch harness and servos)
to your system manufacturer for checking.
34. Safety
Safety is the First Commandment when ying any model
aircraft. Third party insurance is mandatory. If you join a
model club, suitable cover will usually be available through
the organisation. It is your personal responsibility to ensure
that your insurance is adequate (i.e. that its cover includes
powered model aircraft). Make it your job to keep your
models and your radio control system in perfect order at all
times. Check and observe the correct charging procedure
for the batteries you are using. Make use of all sensible
safety systems and precautions which are advised for
your system. An excellent source of practical accessories
is the MULTIPLEX main catalogue or our website www.
multiplex.de
MULTIPLEX products are designed and manufactured
exclusively by active modellers for practising modellers.
Always y with a responsible attitude. You may think that
ying low over other people’s heads is proof of your piloting
skill; others know better. The real expert does not need to
prove himself in such childish ways. Let other pilots know
that this is what you think too, as it is in all our interests.