
Owner manual

Roboinject Manual
8
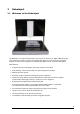
Operation summary:
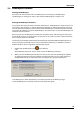
Instead of having a vast amount of different pull down menus, there is one clearly structured
menu bar and also a toolbar presenting commonly used commands. Therefore, you will quickly
become familiar with the Roboinject.
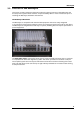
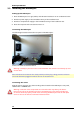
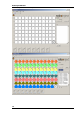
The first step is to set up your "virtual" well plate according to your "real" well plate.
Enter a unique ID for the plate and / or assign a file name. The virtual well plate is then visualized
in a X x Y grid (for example, 12 x 8 for a standard 96 well plate) as the real one, and therefore
it is easy to overview and to handle.
Define up to eight different injection samples and select the respective velocity of injection.
Enter the respective sample volume.
Finally, assign the different injection samples to a selection of wells, rows or columns. To allow
maximal flexibility, you can inject up to four samples per cell - even on different days - and assign
injection depth and injection volume for every cell independently.
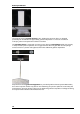
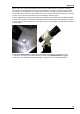
Fill the injection needle with mineral oil and lock it to the injector's luer connector.
Start the injection sequence by mouse click. The "Injection Wizard" will open and guide you
through a quick and easy alignment procedure. Finally, you start the injection and it will proceed
automatically until finished or interrupted by the user.
Information about the plate and the current state of all wells is displayed and updated online on
the screen.
You may save the well plate and load it later on the Roboocyte to proceed with your experiment.