MT5600DSVD User Guide Model MT5600DSVD P/N S0000169 Revision B Copyright © 1998–2001 by Multi-Tech Systems, Inc. All rights reserved. This publication may not be reproduced, in whole or in part, without prior expressed written permission from Multi-Tech Systems, Inc. Multi-Tech Systems, Inc. makes no representations or warranties with respect to the contents hereof and specifically disclaims any implied warranties of merchantability or fitness for any particular purpose.
MultiModemDSVD User Guide Contents Chapter 1: Introduction Introduction ............................................................................................................................. 2 Product Description ................................................................................................................ 2 Features ....................................................................................................................................
MultiModemDSVD User Guide Contents Chapter 4: AT Commands, S-Registers & Result Codes AT Commands ...................................................................................................................... 23 AT Command Summary ..................................................................................................... 24 Voice Commands .................................................................................................................. 39 S-Registers .....................
MultiModemDSVD User Guide Contents Appendix E: Upgrading the Modem Introduction ........................................................................................................................... 71 Upgrade Overview ............................................................................................................... 71 Step 1: Identify the Modem Firmware ............................................................................... 71 Step 2: Identify the Current Firmware Version ......
1 Introduction
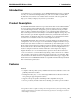
MultiModemDSVD User Guide 1 Introduction Introduction Congratulations on your purchase of your MultiModemDSVD! You have acquired not only one of the finest intelligent data, fax, and voice modems available, but a modem that can transmit voice and data at the same time. This user guide will help you to install, configure, test, and use your modem. Product Description The MultiModemDSVD modem incorporates both the ITU-T V.
MultiModemDSVD User Guide 1 Introduction Data • Supports the ITU-T V.90 and K56flexTM standards for data transmission speeds up to 56K bps while maintaining compatibility with lower-speed modems. Note: Under the 56K bps standards, you can asymmetrically download data from an ISP at speeds up to 53K bps, whereas you can upload only at speeds up to 33.6K bps. • Supports the enhanced ITU-T V.34 standard, with data transmission speeds to 33.6K bps, while maintaining compatibility with lower-speed modems.
MultiModemDSVD User Guide 1 Introduction What Is in Your Modem Package? Your modem package has several components. Make sure you have them all before trying to operate your modem.
2 Installation
MultiModemDSVD User Guide 2 Installation Introduction This chapter shows step-by-step how to set up your MultiModemDSVD and configure your communications software to work with it.
MultiModemDSVD User Guide 2 Installation Step 1: Mount the Feet The modem comes with a strip of self-adhesive plastic feet, which you can optionally mount on the bottom of the modem. To install the feet, simply peel them from their paper strip and press them into the recesses on the bottom of the modem. Figure 2-1. Mounting the feet. Step 2: Change the Speaker Jumper This step is required only if you intend to connect a monophonic speaker to your modem.
MultiModemDSVD User Guide 2 Installation J10 Speaker Mode Closed: stereo (default) Open: mono J10 Figure 2-2. Location of speaker jumper. Changing the Speaker Jumper The speaker jumper (J10) is behind the internal speaker near the external speaker jack (see Figure 2-2). • To use the MultiModemDSVD with a monophonic external speaker, remove the jumper plug from the J10 jumper pins. You can store it by placing it on one jumper pin.
MultiModemDSVD User Guide 2 Installation Step 3: Connect the Modem to Your System Placing the modem in a convenient location, connect it to your computer’s serial port, to the telephone line, to AC power, and, optionally, to your telephone. For voice operations, connect it to the supplied headset or, optionally, to a microphone and a speaker or sound card. Note: Do not turn on the modem until you have made all the connections. PWR RS232 PHONE LINE Figure 2-3. Modem connections.
MultiModemDSVD User Guide 2 Installation Note: The Federal Communications Commission (FCC), Industry Canada, and other government agencies may impose certain restrictions on equipment connected to public telephone systems. For more information, see Appendix A. Phone Connection For voice-only calls, you can optionally plug a telephone into the modem’s PHONE jack. Microphone Connection Plug the microphone plug of the supplied headset into the MIC jack on the side of the modem.
MultiModemDSVD User Guide 2 Installation Step 4: Install the Modem Driver If you use Windows 95, Windows 98, Windows Me, Windows NT 4.0, or Windows 2000, you must install the modem driver. (If you use Windows 3.1 or another operating system, skip this step and go to Step 5.) The modem driver is used by Windows to control the modem. Installing the Modem Driver 1. Make sure your modem is connected properly, and then turn on your computer.
MultiModemDSVD User Guide 2 Installation Step 5: Install and Configure Your Software You may use either the communication program included with your modem or a third-party program. Communication programs designed for Windows 95/98/Me and Windows NT/2000 normally do not need to be manually configured, since they use the Plug and Play configuration supplied by the Windows modem driver.
3 Operation
MultiModemDSVD User Guide 3 Operation Introduction Like any modem, your MultiModemDSVD operates only under the control of a communication program, such as the one included with the modem. It also operates under other general-purpose data communication programs, such as Windows Terminal and HyperTerminal. For information on how to use the modem with the communication program of your choice, please refer to the program’s documentation.
MultiModemDSVD User Guide 3 Operation OH Off-Hook. The OH LED lights when the modem is off-hook, which occurs when the modem is dialing, online, or answering a call. The LED flashes when the modem pulse-dials. TR Terminal Ready. The TR LED lights when a datacomm program initializes the modem. It means the modem is ready for an outgoing or incoming call. It goes off when the datacomm program disconnects the COM port. When it goes off, a connected modem will disconnect.
MultiModemDSVD User Guide 3 Operation • POP server address • Mail or SMTP address • News or NNT server address Dial-Up Networking Whether you use the Internet for e-mail or for browsing the Web, to connect to it through your modem, you must first set up a remote-node client program. The one in Windows 95, 98, Me, NT 4.0, and 2000 is called Dial-Up Networking.
MultiModemDSVD User Guide 3 Operation 6. Follow the instructions provided by your ISP for browsing the the Internet, reading e-mail, and accessing information. For further information on Dial-Up Networking or Microsoft Client for NetWare Networks, see Windows Help. Dial-Up Networking in Windows Me To install Dial-Up Networking Dial-Up Networking is automatically installed with Windows Me. To create a connection entry 1.
MultiModemDSVD User Guide 3 Operation 10. Click Continue, and then click Restart to finish the installation. 11. When the installation is complete, reboot the computer. To create a connection entry 1. Double-click the My Computer icon, and then double-click the Dial-Up Networking icon. 2. In the Dial-Up Networking dialog box, click the New button. 3. In the New Phonebook Entry wizard, follow the directions to create a connection entry. To dial your Internet access provider 1.
MultiModemDSVD User Guide 3 Operation Fax Operation Using the PhoneTools program included with your modem, you can use your modem to send and receive faxes directly from your computer. The following procedure uses print capture, which enables you to fax a document directly from the Windows application in which you created it without opening PhoneTools. 1. Create a document in a Windows application, such as a word processor, graphic editor, or spreadsheet.
MultiModemDSVD User Guide 3 Operation To Answer a Voice Call in Speakerphone Mode 1. In the terminal window of your communications application, type AT and press ENTER. The modem will respond with OK. 2. Type AT&F and press ENTER to reset the modem to its default configuration. 3. Type AT#CLS=8#VRN=0#VLS=6S0=0 and press ENTER to initialize the modem for speakerphone mode. 4. To answer a call in speakerphone mode upon receipt of a RING message, type ATA and press ENTER.
MultiModemDSVD User Guide 3 Operation 5. You will hear some high pitched tones, then a static-like sound after the remote modem picks up your call. You will see a CONNECT response on your terminal. You can then send data to the remote modem and talk to the remote user by speaking into the microphone 6. To hang up, type +++ATH and press ENTER.
4 AT Commands, S-Registers & Result Codes
MultiModemDSVD User Guide 4 AT Commands, S-Registers, and Result Codes AT Commands AT commands are used to control the operation of your modem. They are so called because each command must be preceded by the characters AT to get the ATtention of the modem. AT commands can be issued only when the modem is in command mode or online command mode. The modem is in command mode whenever it is not connected to another modem.
MultiModemDSVD User Guide 4 AT Commands, S-Registers, and Result Codes AT Command Summary Command: Values: Description: AT Command: Values: Description: ENTER Key n/a Press the ENTER or RETURN key to execute most commands. Command: Values: Description: A Answer n/a Answers an incoming call before the final ring. Command: Values: Description: A/ Repeat Last Command n/a Repeats the last command string. Do not precede this command with AT. Do not press ENTER to execute.
MultiModemDSVD User Guide 4 AT Commands, S-Registers, and Result Codes Return to command mode after dialing. (Place at end of dial string.) ! Hook flash. Causes the modem to go on-hook for the time specified in S29, then off-hook again . @ Wait for silence. Causes the modem to wait for 5 seconds of silence before processing the next part of the command. If silence is not detected within the time set in register S7, the modem returns a NO ANSWER or BUSY code. ^ Toggle data calling tone on or off.
MultiModemDSVD User Guide Command: Values: Default: Description: Ln L0 L1 L2 L3 4 AT Commands, S-Registers, and Result Codes Monitor Speaker Volume n = 0, 1, 2, or 3 1 Select low volume. Select low volume. Select medium volume. Select high volume. Note: Use the M command to turn the speaker on or off. Command: Value: Default: Description: L5 Display Legacy Parameters 5 None Displays the current values for the error correction, flow control, data compression, and serial port speed commands.
MultiModemDSVD User Guide Command: Values: Default: Description: On O0 O1 4 AT Commands, S-Registers, and Result Codes Return Online to Data Mode 0 or 1 None Exit online command mode and return to online data mode without a retrain. Normally used after a +++ escape (see +++AT escape sequence). Exit online command mode and return to online data mode after a retrain.
MultiModemDSVD User Guide Command: Values: Default: Description: Wn W0 W1 W2 4 AT Commands, S-Registers, and Result Codes Connect Message Control n = 0, 1, or 2 0 The CONNECT result code reports the serial port speed only. The CONNECT result code reports the line speed, the error correction protocol, and the serial port speed, respectively. The CONNECT result code reports the line speed only.
MultiModemDSVD User Guide 4 AT Commands, S-Registers, and Result Codes Command: Values: Default: Description: &Cn Data Carrier Detect (DCD) Control n = 0 or 1 1 &C0 Forces the DCD circuit to always be high. &C1 DCD goes high when the remote modem’s carrier signal is detected, and goes low when the carrier signal is not detected.
MultiModemDSVD User Guide Command: Values: Default: Description: 4 AT Commands, S-Registers, and Result Codes &En V.42bis Data Compression n = 14 or 15 15 &E14 V.42bis data compression disabled. &E15 V.42bis data compression enabled. Note: This command controls only V.42bis data compression, whereas the %C command controls both V.42bis and MNP-5 data compression. The command in effect is the one last entered. See also the L5 command.
MultiModemDSVD User Guide 4 AT Commands, S-Registers, and Result Codes Command: Values: Default: Description: &Mn Communications Mode n=0 0 This command determines the DTR operating mode. The modem treats the &M command as a subset of the &Q command. &M0 Selects direct asynchronous operation. Note that the command sequence &M0\N0 selects normal buffered mode, but the command sequence \N0&M0 selects direct mode. This is because the \N0 command is analogous to the &Q6 command.
MultiModemDSVD User Guide &T3 &T4 &T5 &T6 &T7 &T8 Command: Values: Default: Description: &V0 4 AT Commands, S-Registers, and Result Codes Start local digital loopback, V.54 Loop 2. If no connection exists, ERROR is returned. Enables acknowledgment for remote digital loopback request. Ignores acknowledgment for remote digital loopback request. Requests a remote digital loopback, V.54 Loop 2, without selftest. If no connection exists, ERROR is returned.
MultiModemDSVD User Guide 4 AT Commands, S-Registers, and Result Codes Command: &Zy=x Store Telephone Number Values: y = 0–3 x = Dialing command Default: None Description: Stores telephone dial string x in memory location y. Each telephone number dial string can contain up to 34 digits. Dial the stored number using the command ATDS=y. Note: DTR dialing uses the number stored in memory location 0.
MultiModemDSVD User Guide Command: Values: Default: Description: 4 AT Commands, S-Registers, and Result Codes %U PCM Code Selection n = 0 or 1 0 Specifies the PCM code type for 56K modulation. Note, however, that the modem automatically selects the code type if the server sends the proper ID. %U0 Selects µ-Law coding—used in North America and Japan. %U1 Selects A-Law coding—used outside North America and Japan. Note: See also the +MS= command.
MultiModemDSVD User Guide \K0 \K1 \K2 \K3 \K4 \K5 Command: Values: Default: Description: \Nn \N0 \N1 \N2 \N3 \N4 \N5 Command: Values: Default: Description: \Vn \V0 \V1 4 AT Commands, S-Registers, and Result Codes Online command mode. The modem receives a \Bn command from the computer: Clear data buffers and send break to the remote modem. Same as \K0. Send break immediately to the remote modem. Same as \K2. Send break to the remote modem in sequence with the transmitted data. Same as \K4.
MultiModemDSVD User Guide 4 AT Commands, S-Registers, and Result Codes Command: +MS= Modulation Selection Values: See description. Default: See description. Description: This extended-format command selects modulation and, optionally, enables or disables automode, specifies the lowest and highest connection rates, selects µ-Law or A-Law codec type, and specifies the highest transmit rate using one to five subparameters.
MultiModemDSVD User Guide 4 AT Commands, S-Registers, and Result Codes Modulation Possible rates (bps) 1 0 V.21 300 1 V.22 1200 2 V.22bis V.23 2400 or 1200 1200 V.32 9600 or 4800 11 V.32bis V.34 12 2 V.90 56 3 K56flex 64 69 Bell 103 Bell212 14400, 12000, 9600, 7200, or 4800 33600, 31200, 28800, 26400, 24000, 21600,19200, 16800, 14400, 12000, 9600, 7200, 4800, or 2400 56000, 54667, 53333, 52000, 50667, 49333, 48000, 46667, 45333, 44000, 42667, 41333.
MultiModemDSVD User Guide Command: -SDR=n Values: Default: Description: 4 AT Commands, S-Registers, and Result Codes Distinctive Ring Control 0–7 0 This command enables or disables detection and reporting of distinctive ring. One, two, or three distinctive ring types can be simultaneously enabled depending upon the value of n. The detected ring type is reported in the verbose result code by appending the ring type number to the end of the RING message. -SDR=0 Disables distinctive ring.
MultiModemDSVD User Guide 4 AT Commands, S-Registers, and Result Codes Command: $SBn Serial Port Baud Rate Values: n = speed in bits per second Default: 57600 Description: $SB300 Set serial port to 300 bps. $SB1200 Set serial port to 1200 bps. $SB2400 Set serial port to 2400 bps. $SB4800 Set serial port to 4800 bps. $SB9600 Set serial port to 9600 bps. $SB19200 Set serial port to 19200 bps. $SB38400 Set serial port to 38400 bps. $SB57600 Set serial port to 57600 bps.
MultiModemDSVD User Guide Command: -SSE=n Values: Default: Description: -SSE=0 -SSE=1 4 AT Commands, S-Registers, and Result Codes DSVD Enable/Disable n = 0 or 1 0 Disable DSVD. Enable DSVD. Note: DSVD mode can be enabled by either the -SSE=1 or the -SMS=1 command, and disabled by either -SSE=0 or -SMS=0. Command: #BDR=n Baud Rate Select Values: n = 0–48 Default: 0 Description: #BDR=0 Enables autobaud detection on the serial port interface. #BDR=n 1
MultiModemDSVD User Guide 4 AT Commands, S-Registers, and Result Codes S-Registers Certain modem values, or parameters, are stored in memory locations called Sregisters. Use the S command to read or to alter the contents of S-registers (see previous section). Register Unit Range Default Description S0 1 ring 0, 1–255 1 Sets the number of rings before the modem answers. ATS0=0 disables autoanswer completely. S1 1 ring 0–255 0 Counts the rings that have occurred.
MultiModemDSVD User Guide Register Unit 4 AT Commands, S-Registers, and Result Codes Range Default Description S18 seconds 0–255 0 Sets the length of time that the modem conducts an &T test before it returns to the command mode. If the value is zero, the test must be terminated from command mode by issuing an &T0 or H command. When S18 is non-zero, the modem returns the OK message upon test termination.
MultiModemDSVD User Guide Register Unit 4 AT Commands, S-Registers, and Result Codes Range Default Description 6 Reserved. 7 An MNP connection is attempted and if it fails, a normal modem connection is established. S37 decimal 0 0 S38 seconds 0–254, 255 20 Sets the delay between the modem’s receipt of the H command to disconnect (or highto-low transition of DTR if the modem is programmed to follow the signal), and the disconnect operation. Applies only to errorcorrection connections.
MultiModemDSVD User Guide Register 4 AT Commands, S-Registers, and Result Codes Unit Range Default Description S86 decimal 0, 3–23 n/a When the modem issues a NO CARRIER result code, a value is written to this register to help determine the reason for the failed connection. S86 records the first event that contributes to a NO CARRIER message. Use the S86? command to read the value. 0 Normal disconnect; no error occurred. 3 Call Waiting caused disconnect. 4 Physical loss of carrier.
MultiModemDSVD User Guide 4 AT Commands, S-Registers, and Result Codes Result Codes In command mode your modem can send the following responses, called result codes, to your computer. Result codes are used by communications programs and can also appear on your monitor.
MultiModemDSVD User Guide 4 AT Commands, S-Registers, and Result Codes Terse Verbose Description 62 63 64 66 67 69 70 77 78 79 80 81 84 91 150 151 152 153 154 155 156 157 158 159 160 161 162 165 166 167 168 169 170 171 172 173 174 175 176 177 180 180 181 181 182 182 183 183 184 184 CONNECT 24000 Connected at 24000 bps CONNECT 26400 Connected at 26400 bps CONNECT 28800 Connected at 28800 bps COMPRESSION CLASS 5 Connected with MNP Class 5 data compression COMPRESSION V.42 bis Connected with V.
MultiModemDSVD User Guide 4 AT Commands, S-Registers, and Result Codes Terse Verbose Description 185 185 186 186 187 187 188 188 189 189 190 190 191 191 192 192 193 193 194 194 +F4 CONNECT 37333 CARRIER 37333 CONNECT 38667 CARRIER 38667 CONNECT 41333 CARRIER 41333 CONNECT 42667 CARRIER 42667 CONNECT 45333 CARRIER 45333 CONNECT 46667 CARRIER 46667 CONNECT 49333 CARRIER 49333 CONNECT 50667 CARRIER 50667 CONNECT 53333 CARRIER 53333 CONNECT 54667 CARRIER 54667 +FCERROR Connected at 37333 bps (V.
5 Solving Problems
MultiModemDSVD User Guide 5 Solving Problems Introduction Your modem was thoroughly tested at the factory before it was shipped. If you are unable to make a successful connection, or if you experience data loss or garbled characters during your connection, it is possible that the modem is defective. However, it is more likely that the source of your problem lies elsewhere. The following symptoms are typical of problems you might encounter: • None of the LEDs light when the modem is on.
MultiModemDSVD User Guide 5 Solving Problems The Modem Does Not Respond to Commands 4 Make sure the modem is plugged in and turned on. (See “None of the Indicators 4 4 4 4 4 4 4 4 Light.”) Make sure you are issuing the modem commands from the data communications software, either manually in terminal mode or automatically by configuring the software. (You cannot send commands to the modem from the DOS prompt.
MultiModemDSVD User Guide 5 Solving Problems Windows 9x: Right-click on My Computer, select Properties from the menu, click on the Device Manager tab, double-click on Ports, then double-click on the communication port your modem is connected to. In the port’s Properties sheet, click on the Resources tab to see the port’s input/output range and interrupt request. If another device is using the same address range or IRQ, it appears in the Conflicting Device List.
MultiModemDSVD User Guide 4 5 Solving Problems string to replace X4 with X3, which will cause the modem to ignore dial tones (note, however, that X3 is not allowed in some countries, such as France and Spain). If the modem reports BUSY, the other number might be busy, in which case you should try again later, or it might indicate that you have failed to add a 9, prefix to the phone number if you must dial 9 for an outside line.
MultiModemDSVD User Guide 4 5 Solving Problems If you were online with a BBS or an online service like CompuServe, it might have hung up on you because of lack of activity on your part or because you exceeded your time limit for the day. Try again. The Modem Cannot Connect When Answering 4 Autoanswer might be disabled. Turn on autoanswer in your datacomm program or send the command ATS0=1 (ATS0=2 if you have Caller ID service) to your modem in terminal mode.
MultiModemDSVD User Guide 4 4 4 5 Solving Problems Make sure the flow control method you selected in software matches the method selected in the modem. If you are using the modem with a Macintosh, you might have the wrong cable for hardware flow control. If you are running under Windows 3.1 and have a 16550AFN UART, you might need to turn on the 16550’s data buffers and/or replace the Windows serial driver, COMM.DRV.
Appendixes
MultiModemDSVD User Guide A Regulatory Compliance Appendix A: Regulatory Compliance FCC Part 68 Telecom 1. This equipment complies with part 68 of the Federal Communications Commission Rules. On the outside surface of this equipment is a label that contains, among other information, the FCC registration number. This information must be provided to the telephone company. 2. The suitable USOC jack (Universal Service Order Code connecting arrangement) for this equipment is shown below.
MultiModemDSVD User Guide A Regulatory Compliance Manufacturer: Model Number: FCC Registration No: Ringer Equivalence: Modular Jack (USOC): Multi-Tech Systems, Inc. MT5600DSVD AU7USA-24713-M5-E 0.3B RJ11C or RJ11W (single line) Service Center in USA: Multi-Tech Systems, Inc. 2205 Woodale Drive Mounds View, MN 55112 U.S.A. (763) 785-3500 (763) 785-9874 Fax FCC Part 15 This equipment has been tested and found to comply with the limits for a Class B digital device, pursuant to Part 15 of the FCC Rules.
MultiModemDSVD User Guide A Regulatory Compliance Fax Branding Statement The Telephone Consumer Protection Act of 1991 makes it unlawful for any person to use a computer or other electronic device, including fax machines, to send any message unless such message clearly contains the following information: • Date and time the message is sent • Identification of the business or other entity, or other individual sending the message • Telephone number of the sending machine or such business, other entity, or i
MultiModemDSVD User Guide A Regulatory Compliance EMC, Safety, and R&TTE Directive Compliance The CE mark is affixed to this product to confirm compliance with the following European Community Directives: • Council Directive 89/336/EEC of 3 May 1989 on the approximation of the laws of Member States relating to electromagnetic compatibility; and • Council Directive 73/23/EEC of 19 February 1973 on the harmonization of the laws of Member States relating to electrical equipment designed for use within certai
MultiModemDSVD User Guide A Regulatory Compliance 4. This device is equipped with pulse dialing, while the Telecom standard is DTMF tone dialing. There is no guarantee that Telecom lines will always continue to support pulse dialing. Use of pulse dialing, when this equipment is connected to the same line as other equipment, may give rise to ‘bell tinkle’ or noise and may also cause a false answer condition. Should such problems occur, the user should not contact the Telecom Faults Service.
MultiModemDSVD User Guide B Technical Specifications Appendix B: Technical Specifications Your MultiModemDSVD modem meets the following specifications: Trade Name MultiModemDSVD™ Model Number MT5600DSVD Server-to-Client Data Rates K56flex or V.90 speeds when accessing an ISP type K56flex or V.
MultiModemDSVD User Guide B Technical Specifications Data Modulation FSK at 300 bps, PSK at 1200 bps, QAM at 2400, 4800, and 9600 bps (non-trellis), QAM with trellis-coded modulation (TCM) at 9600, 12,000, 14,400, 16,800, 19,200, 21,600, 24,000, 26,400, 28,800, 31,200, 33,600, and 56,000 bps Fax Modulation V.21 CH2 FSK at 300 bps (half duplex) V.27ter DPSK at 4800 and 2400 bps V.29 QAM at 9600 and 7200 bps V.17TCM at 14400, 12000, 9600, and 7200 bps Carrier Frequencies ITU-T V.
MultiModemDSVD User Guide B Technical Specifications Voice Compression and Sampling Rate PCM 128, 8000 Hz, or IMA ADPCM, 8000 Hz, (selectable via #V commands). Note that your computer system should have a processing speed of at least 75 MHz to take full advantage of the telephony features of this product. Transmit Level -11 dBm (dial-up) Frequency Stability ±0.01% Receiver Sensitivity -43 dBm under worst-case conditions AGC Dynamic Range 43 dB Impedances Microphone input: 2.
MultiModemDSVD User Guide C Loopback Tests Appendix C: Loopback Tests Introduction Each time you turn on your modem, it performs an automatic self-test to ensure proper operation. Your modem also has three diagnostic tests: local analog loopback, remote digital loopback, and local digital loopback. These ITU-T V.54 loopback tests isolate telephone circuit and transmission problems.
MultiModemDSVD User Guide C Loopback Tests 3. Type AT&T1 and press ENTER. This places your modem in analog loopback mode in the originate mode. A CONNECT message should appear on your display. The modem is now out of command mode and in a pseudo-online mode. 4. Note that the CD LED is on. If you are set for 14,400 bps or higher, a speed LED should be on. If the CD LED is not on, there is a defect in your modem. 5. Enter characters from your keyboard.
MultiModemDSVD User Guide C Loopback Tests 3. Dial the remote modem and establish your online connection. 4. Type the escape sequence +++AT and press ENTER to bring your modem into online command mode. 5. Type AT&T6 and press ENTER. The local modem responds to this command by transmitting an unscrambled marking signal, which causes the remote modem to place itself in digital loopback mode. Then the local modem exits online command mode and enters data mode. 6. Enter data from your keyboard.
MultiModemDSVD User Guide C Loopback Tests 3. Type the escape sequence +++AT and press ENTER to bring your modem into online command mode. 4. Type AT&T3 and press ENTER. Once you receive an OK message from your modem (if responses are enabled), your modem is placed in digital loopback mode. 5. Have someone enter data from the remote keyboard. For this test, typing multiple uppercase U characters is a good way to send an alternating test pattern of binary ones and zeros.
MultiModemDSVD User Guide D Warranty, Service, and Technical Support Appendix D: Warranty, Service, and Technical Support Limited Warranty Multi-Tech Systems, Inc. (MTS) warrants that this product will be free from defects in material or workmanship for a period of five years from the date of purchase or, if date of purchase is not provided, five years from the date of shipment, unless otherwise limited or prohibited by law.
MultiModemDSVD User Guide D Warranty, Service, and Technical Support A Returned Materials Authorization (RMA) is not required. Return shipping charges (surface) will be paid by MTS. Please include inside the shipping box a description of the problem, a return shipping address (must have street address, not P.O. Box), a telephone number, and if the product is out of warranty, a check or purchase order for repair charges.
MultiModemDSVD User Guide D Warranty, Service, and Technical Support Internet Sites Multi-Tech maintains a Web site at http://www.multitech.com and an ftp site at ftp://ftp.multitech.com Ordering Accessories SupplyNet, Inc., can supply you with replacement power supplies, cables and connectors for select Multi-Tech products. You can place an order with SupplyNet via mail, phone, fax or the Internet at the following addresses: Mail: SupplyNet, Inc.
MultiModemDSVD User Guide E Upgrading the Modem Appendix E: Upgrading the Modem Introduction Your modem is controlled by semi-permanent software, called firmware, which is stored in flash memory. Firmware is nonvolatile; that is, it remains stored in memory when the modem is turned off. However, it can be changed by either the manufacturer or the user as bugs are fixed or new features are added.
MultiModemDSVD User Guide E Upgrading the Modem Step 2: Identify the Current Firmware Version Identify the current version of the firmware at the Multi-Tech Web site. If your modem already has the current firmware, there is no need to update it. 1. Using your favorite Web browser, go to http://www.multitech.com/SUPPORT/MultiModemDSVD/firmware.asp. 2. Scroll down the table to your modem model number. 3. Look at the firmware version number for your modem (the first number after the model number). 4.
MultiModemDSVD User Guide E Upgrading the Modem 2. In the program’s terminal window, type AT&V and press ENTER to list your modem’s current parameters. 3. Record your parameters by saving the screens and sending them to your printer. 4. Type AT&F and press ENTER to clear your stored parameters and reset your modem to factory default. 5. Close the terminal program. Step 6: Upgrade the Modem’s Firmware Before you begin the following procedure, read the README.
Index
MultiModemDSVD User Guide A abort timer, 41 analog loopback test, 64 Answer command, 24 answering machine capabilities, 3 assembling the modem, 7 Asynchronous Communications Mode command, 31 AT commands, 3, 23–39 #BDR=, 40 #CID=, 38 #CLS=, 40 #MDL?, 40 #MFR?, 40 #REV?, 40 #VLS=, 40 $SB, 39 %C, 33 %E, 33 %L, 33 %Q, 33 %U, 34, 37 &C, 29 &D, 12, 29 &E, 29, 30 &F, 12, 30 &G, 30 &J, 30 &K, 30 &M, 31 &P, 31 &Q, 31 &S, 31 &T, 31 &V, 32 &W, 12, 32 &Y, 32 &Z=, 33 **, 38 +++AT, 39 +MS=, 36 +MS=?, 36 +MS?, 36 -K, 37 -
MultiModemDSVD User Guide error control, setting, 43 error correction, 3 disabling, 64, 65, 66 Error Correction Mode Selection command, 35 escape character, 41 escape sequence, 23, 39 escape sequence guard time (S12), 41 F fallback, 26 fax, 3 fax communications, 19 faxing from a Windows program, 19 FCC regulations, 56–57 firmware displaying version, 25 upgrading, 71–73 flash dial modifier (!), 42 flash memory, 71 Flash Memory Download command, 38 Flash Wizard upgrade utility, 72 flow control, 30, 54 Flow C
MultiModemDSVD User Guide S32, 42 S33, 42 S35, 42 S36, 42 S37, 43 S38, 43 S46, 43 S48, 43 S86, 44 S95, 35, 44 setting, 27 safety, 6 Select Maximum MNP Block Size command, 34 Select Profile command, 32 serial cable, 50 serial port, 12, 39, 50, 51, 53 Serial Port Baud Rate command, 39 servicing your modem, 57 Set Register Value command, 27 Single Line Connect Message command, 35 sleep mode timer (S24), 42 software, communication, 12 solving problems, 49–54 sound card, 6, 8, 10 speaker, 7, 8 internal jumper, 8