Model Nr.
Deel 1: BEDIENING VAN DE LED TV 1. Belangrijke veiligheidsvoorschriften Onjuist gebruik kan brand of elektrische schokken veroorzaken. Om dit te voorkomen, dient u de richtlijnen te volgen voor het installeren, gebruiken en reinigen van dit apparaat. Om de veiligheid en levensduur van de LED-tv te garanderen, dient u de onderstaande punten zorgvuldig door te lezen voordat u het apparaat gaat gebruiken: Via de Aan/Uit-toets van dit product wordt de tv niet volledig van de stroomtoevoer afgesloten.
2. Belangrijkste functies 1- Geschikt voor analoog RGB signaal; 2- Geschikt voor CVBS signaal (analoog videosignaal); 3- Geschikt voor HDMI signaal; 4- Geschikt voor ontvangst SCART-signaal; 5- Geschikt voor ontvangst tv-signaal; 6- Twee ingebouwde 5W luidsprekers, twee sets audioaansluitingen; 7- Infraroodafstandsbediening voor alle functies.
2. Combineer geen gebruikte batterijen met nieuwe batterijen en gebruik geen combinatie van verschillende soorten (bijvoorbeeld zink-koolstof- en alkalinebatterijen). 3. Probeer batterijen niet opnieuw op te laden, kort te sluiten, te demonteren, te verhitten of te verbranden. 4. Als u gebruikte batterijen afdankt, dient u daarbij de plaatselijk geldende voorschriften in acht te nemen. Gooi batterijen niet weg bij het huishoudafval.
DC IN USB 1 2 HDMI1 Beschrijving connectoren HDMI2 3 SCART PC AUDIO VGA 4 5 6 13 10 9 7 COAX 8 YPbPr CVBS R 11 L RF IN (3) Afbeelding van aansluitingspunten 12 CI SLOT Status indicatorlampje Wanneer het apparaat is ingeschakeld, brandt het indicatorlampje blauw. Het indicatorlampje brandt rood als de TV op Standby-modus staat. 1. Voedingsingang voor de LED-TV (gelijkstroom 12 V), sluit hier de voedingsadapter op aan. 2. USB-aansluiting. Sluit hier uw externe USB-apparaten op aan.
- Overzicht afstandsbediening Afbeelding afstandsbediening Beschrijving toetsen afstandsbediening 1. SOURCE STANDBY– De TV naar de stand-by schakelen en inschakelen 2. MUTE – Geluid dempen 3. EJECT– Uitwerpen DVD 4. NUMBER BUTTONS– Nummer TV-kanaal of teletekst pagina selecteren 5. FAV– Open favoriete kanalen menu 10+– Tweecijferig TV-kanaal selecteren 6. Keer terug naar het vorige TV kanaal 7. ASPECT– Displaygrootte wijzigen 8. AUDIO– Selecteer een audio-syteem 9.
- Verbinding tussen verschillende ingangssignalen A) Verbinden met een pc-signaal U kunt uw LED-tv gebruiken als monitor voor uw pc met behulp van een VGA-kabel (niet bijgeleverd). COAX YPbPr CVBS R L RF IN CI SLOT 1. VGA-ingang (vergeet niet de schroeven aan te draaien) 2. PC Audio-ingang 3.
CI SLOT RF IN B) De externe AV-apparaten aansluiten met behulp van de Composiet- ingangen 2 3 COAX YPbPr CVBS R 1 L 1. Linker- en rechteraudio-ingang 2. CVBS-/composiet video-ingang 3. YPbPr/componentingang 4. Voedingsingang (gelijkstroom 12 V) DC IN USB HDMI1 HDMI2 SCART PC AUDIO VGA USB HDMI1 HDMI2 SCART PC AUDIO VGA L (C) Aansluiting voor tv-signaal COAX YPbPr CVBS R 1. Ingang kabel/antenne (75 Ω) 2.
Stappen voor het aansluiten: * Zorg dat de stroomtoevoer van de LED-tv is uitgeschakeld; * Sluit de antennekabel (CATV) aan op de corresponderende antenne-ingang (75 Ω ANT) aan de achterzijde van de LED-tv. Sluit het andere uiteinde van de antennekabel aan op de antenneaansluiting in de muur of uw digitale kabel-/satellietontvanger; U kunt nu de reguliere kabeltelevisieprogramma’s bekijken.
CI SLOT E) Aansluiting voor extern apparaat (USB) COAX YPbPr CVBS R L RF IN 1. Ingang extern apparaat 2.
8- Belangrijkste bedieningsinstructies De LED-tv inschakelen Wanneer de STANDBY-toets wordt ingedrukt en de LED-tv wordt ingeschakeld, verandert het indicatorlampje aan de voorzijde van de LED-tv van rood naar groen. Wanneer de LED-tv wordt ingeschakeld, verschijnt de inputmodus op het scherm. Wanneer de LED-tv met behulp van de STANDBY-toets wordt uitgeschakeld, gaat de LED-tv in de stand-by modus en gaat het indicatorlampje rood branden.
Dempen (MUTE) 1. Druk op de MUTE-toets om het geluid tijdelijk uit te schakelen. Het Mute-pictogram verschijnt op het scherm. 2. Druk nogmaals op de MUTE-toets om het geluid weer in te MUTE schakelen. Het Mute-pictogram verdwijnt. Opmerking Wanneer de LED-tv wordt uitgeschakeld, wordt de dempfunctie automatisch uitgeschakeld. Het gewenste tv-kanaal selecteren U kunt de numerieke toetsen op de afstandsbediening gebruiken om rechtstreeks tv-kanalen te selecteren.
4. Keuze via EPG (Elektronische Programmagids) Door deze functie komt een kanalenoverzicht voor een periode van een week in beeld. 1. Druk op de EPG-toets om de elektronische programmagids op het scherm te krijgen. PROGRAMME GUIDE 10 Apr 2007 14:00- 15:00 10 Apr 2007 14:23 Barnaby (John Nettles) questions the guilt of a woman who is on trial for the murder of her best friend. 10 Apr 14.E4 28.ITV4 32.Fitm4+1 75.
2- PVR Basisinstructies 1. De opslaglocatie van een bestand. Druk op de ▲/▼toets om Optie te kiezen in het hoofdmenu Druk op de ▲/▼toets om PVR File System te kiezen, druk daarna op OK. Druk op de ▲/▼toets om Select Disk te kiezen, druk daarna op OK. Gebruik het externe apparaat (USB) om de tevoren ingestelde opname uit te voeren. In deze interface kunt u van indeling wisselen.
3. Als de opslagruimte van de schijf te klein is, verschijnt een waarschuwingssignaal. Dan stopt de opname automatisch en de normale televisieuitzending wordt hervat. 4. Druk op de indextoets om de informatie over de lijst van opgenomen programma’s te zien. Druk op de DISPLAY-toets om de details van het programma te zien. Recorded li st Programme Delete INFO index OK LET OP: u kunt de details zien over DATUM / TIJD / DUUR / PROGRAMMA NAAM / KANAALNAAM / BESCHRIJVING Manier 2: Timeshift 1. Druk op T.
RECORDER 1 YLE TV1 Start Time 15 Minute 08Hour Dec Month 07 Date End Time 03 Minute 09 Hour Dec Month - 07 Date Mode once OK + Back 3. Als de ingestelde tijd strijdig is met een eerdere instelling, verschijnt een waarschuwing. Timer Overlay 21 TMF 13 Jul 2007 03:00 4 . De tijd van de opname verschijnt. Daarna komt automatisch het huidige kanaal weer in beeld. 3 Sec.
10- Bedieningsinstructies Media LET OP: Sluit het USB-apparaat aan voor u het Mediamenu kiest, druk daarna de SOURCE-toets in om de Input-bron op Media te zetten. Druk op de◄ / ► toets om Media te kiezen in het bronmenu, druk daarna op OK. Druk op de ◄ / ► toets om de optie die u wilt aanpassen in het hoofdmenu Media te kiezen, druk daarna op OK . Fotomenu Druk op de ◄ / ► toets om FOTO te kiezen in het hoofdmenu, druk daarna op OK.
Flower00.jpg Win Recorder HOME.jpg Flower01.jpg Flower.jpg River.jpg Delete F Druk op de ◄ / ► toets om het bestand te kiezen in het bestandskeuzemenu, druk daarna op de OK om de afbeelding weer te geven. Bij het aanklikken van de door u gekozen optie verschijnt de bestandsinformatie rechts in beeld, terwijl middenin een preview van de afbeelding wordt getoond. Flower00.
Druk op de ◄ / ► toets om de return-optie te kiezen om terug te keren naar het vorige menu. Bij het aanklikken van de door u gekozen optie verschijnt de bestandsinformatie rechts in beeld, terwijl er muziek middenin het beeld verschijnt. 1 C:\ Record O Win try.mp3 best.mp3 thank.mp3 1 Album: (2005/01... Title: 1khz-10db Bit Rate: 320K Artist: BCD103 Sampling: 44K happy.mp3 Delete Maybet.mp3 angel.
Druk op de ◄ / ► toets om het menu onderaan te kiezen, druk daarna op OK. Druk op de menutoets om terug te keren naar het vorige menu en op EXIT om het gehele menu te verlaten. Druk op de ▼toets om het menu onderaan te verbergen. Filmmenu Druk op de◄ / ► toets om MOVIE in het hoofdmenu te kiezen, druk daarna op OK. Druk op de menutoets om terug te keren naar het vorige menu en verlaat het menu om te stoppen. Druk op de ◄ / ►toets om de drivedisk te kiezen die u wilt zien, druk daarna op OK.
11-Teletekst Het uiterlijk van de teletekstpagina’s kan, afhankelijk van de omroepmaatschappijen variëren. Teletekst is alleen beschikbaar als het gekozen kanaal teletekst uitzendt. Het indrukken van de TEXT-toets in de Teletekst-modus schakelt het apparaat naar TV. In de Teletekst-modus kan nog wel het volume worden aangepast naar het gewenste luisterniveau. Paginakeuze De pagina’s kunnen worden gekozen door invoeren van het paginanummer, met behulp van de cijfertoetsen op de afstandsbediening.
12- Bediening van het menu U kunt bepaalde parameters van de LED-tv in het menu aanpassen. Lees de onderstaande beschrijvingen zorgvuldig door om meer inzicht te krijgen in de parameters die kunnen worden aangepast. Invoer-modus: PC 1.Druk op de Menu -toets om het hoofdmenu te openen. 2.Gebruik de pijltjestoets RECHTS om het SCHERMMENU, het beeld (PICTURE), het geluid (SOUND), de tijd (TIME), het slot (LOCK) of de instelling (SETUP) te selecteren. 3.Druk op de Exit-toets om het menu te sluiten.
TITEL MENU SUBMENU BEELD INSTRUCTIES 1. Beeldmodus Zorg met behulp van de pijltjestoetsen Omhoog/Omlaag dat de aanduiding voor de Beeldmodus (Picture Mode) geel gemarkeerd wordt. Met de pijltjestoetsen Links/Rechts kunt u een beeldmodus selecteren (DYNAMIC, STANDARD, MILD, PERSONAL). 2. Contrast Zorg met behulp van de pijltjestoetsen Omhoog/Omlaag dat de aanduiding voor CONTRAST geel gemarkeerd wordt. Met de pijltjestoetsen Links/Rechts kunt u het contrast aanpassen.
Picture mode Standard Contrast BEELD 50 Brightnes PICTURE ANNEL 0 Colour 50 Tint 50 Sharpness 30 Colour Temp Noise Reduction Move NAAM VAN MENU GELUID Return 7. Kleurtemperatuur Zorg met behulp van de pijltjestoetsen Omhoog/Omlaag dat de aanduiding voor Kleurtemperatuur (Color Temperature) geel gemarkeerd wordt. Met de pijltjestoetsen Links/Rechts kunt u de voor uw ogen optimale kleurtemperatuur selecteren. U kunt kiezen tussen Normaal (Normal), Warm, en Koud (Cold). 8.
NAAM VAN MENU SUBMENU TIME Sleep Timer Off Auto Standby OSD Timer Off 5S INSTRUCTIES 1. Slaaptimer Zorg met behulp van de pijltjestoetsen Omhoog/Omlaag dat de aanduiding voor Slaaptimer (Sleep Timer) geel gemarkeerd wordt. Met de pijltjestoetsen Links/Rechts kunt u de slaaptimer selecteren. TIME CHANNEL TIJD Move Return Select Exit 2. Auto Standby Druk op de Omhoog/omlaag toets om Auto Standby te selecteren, druk daarna op OK om in het submenu te komen.
SUBMENU INSTELLINGEN NAAM VAN MENU OSD Language INSTRUCTIES English TT Language Hearing Impaired West Off PVR File System SETUP Aspect Ratio 16:9 Blue Screen First Time Installation Off Reset Software Update(USB) Move Return Exit Select INSTELLINGEN Please select an OSD Language English Espanol Francais Deutsch Portugues Nederlands OK D 25 1. OSD Taal Zorg met de pijltjestoetsen Omhoog/Omlaag dat de aanduiding voor Taal (OSD Language) geel gemarkeerd wordt.
Invoer-modus: AV/SCART/HDMI/DVD/Component/MEDIA 1.Druk op de MENU toets om het hoofdmenu weer te geven. 2.Gebruik de RECHTS pijltjestoets om het menu voor beeld (Picture), het geluid (Sound), de tijd (Time), het slot (Lock) of de instellingen (SETUP) te kiezen. 3.Druk op EXIT om het menu te verlaten. TITEL MENU SUBMENU BEELD INSTRUCTIES 1. Beeldmodus Zorg met behulp van de pijltjestoetsen Omhoog/Omlaag dat de aanduiding voor de Beeldmodus (Picture Mode) geel gemarkeerd wordt.
Picture mode Standard Contrast BEELD 50 Brightnes PICTURE ANNEL 0 Colour 50 Tint 50 Sharpness 30 Colour Temp Noise Reduction Move NAAM VAN MENU GELUID Return 7. Kleurtemperatuur Zorg met behulp van de pijltjestoetsen Omhoog/Omlaag dat de aanduiding voor Kleurtemperatuur (Color Temperature) geel gemarkeerd wordt. Met de pijltjestoetsen Links/Rechts kunt u de voor uw ogen optimale kleurtemperatuur selecteren. U kunt kiezen tussen Normaal (Normal), Warm, en Koud (Cold). 8.
NAAM VAN MENU SUBMENU TIME Sleep Timer Off Auto Standby OSD Timer Off 5S INSTRUCTIES 1. Slaaptimer Zorg met behulp van de pijltjestoetsen Omhoog/Omlaag dat de aanduiding voor Slaaptimer (Sleep Timer) geel gemarkeerd wordt. Met de pijltjestoetsen Links/Rechts kunt u de slaaptimer selecteren. TIME TIJD Move Return Select Exit 2. Auto Standby Druk op de Omhoog/omlaag toets om Auto Standby te selecteren, druk daarna op OK om in het submenu te komen.
SUBMENU INSTELLINGEN NAAM VAN MENU OSD Language INSTRUCTIES English TT Language Hearing Impaired West Off PVR File System SETUP Aspect Ratio 16:9 Blue Screen First Time Installation Off Reset Software Update(USB) Move Return Exit Select 1. OSD Taal Zorg met de pijltjestoetsen Omhoog/Omlaag dat de aanduiding voor Taal (OSD Language) geel gemarkeerd wordt. Met de pijltjestoetsen Links/Rechts kunt u het menu in de volgende talen instellen: NEDERLANDS, DUITS, SPAANS, PORTUGEES, FRANS, ENGELS.
Invoermodus: ATV 1.Druk op de Menu -toets om het hoofdmenu te openen. 2.Gebruik de pijltjestoets Rechts om het kanaal (CHANNEL) het beeld (PICTURE), het geluid (SOUND), de tijd (TIME), het slot (LOCK) of de instellingen (SETUP) te selecteren. 3.Druk op de EXIT-toets om het menu te sluiten. SUBMENU KANAAL NAAM VAN MENU INSTRUCTIES 1.
TITEL MENU SUBMENU BEELD INSTRUCTIES 1. Beeldmodus Zorg met behulp van de pijltjestoetsen Omhoog/Omlaag dat de aanduiding voor de Beeldmodus (Picture Mode) geel gemarkeerd wordt. Met de pijltjestoetsen Links/Rechts kunt u een beeldmodus selecteren (DYNAMIC, STANDARD, MILD, PERSONAL). 2. Contrast Zorg met behulp van de pijltjestoetsen Omhoog/Omlaag dat de aanduiding voor CONTRAST geel gemarkeerd wordt. Met de pijltjestoetsen Links/Rechts kunt u het contrast aanpassen.
Picture mode Standard Contrast BEELD 50 Brightnes PICTURE ANNEL 0 Colour 50 Tint 50 Sharpness 30 Colour Temp Noise Reduction Move NAAM VAN MENU GELUID Return 7. Kleurtemperatuur Zorg met behulp van de pijltjestoetsen Omhoog/Omlaag dat de aanduiding voor Kleurtemperatuur (Color Temperature) geel gemarkeerd wordt. Met de pijltjestoetsen Links/Rechts kunt u de voor uw ogen optimale kleurtemperatuur selecteren. U kunt kiezen tussen Normaal (Normal), Warm, en Koud (Cold). 8.
NAAM VAN MENU SUBMENU TIME Sleep Timer Off Auto Standby OSD Timer Off 5S INSTRUCTIES 1. Slaaptimer Zorg met behulp van de pijltjestoetsen Omhoog/Omlaag dat de aanduiding voor Slaaptimer (Sleep Timer) geel gemarkeerd wordt. Met de pijltjestoetsen Links/Rechts kunt u de slaaptimer selecteren. TIME CHANNEL TIJD Move Return Select Exit 2. Auto Standby Druk op de Omhoog/omlaag toets om Auto Standby te selecteren, druk daarna op OK om in het submenu te komen.
SUBMENU INSTELLINGEN NAAM VAN MENU OSD Language INSTRUCTIES English TT Language Hearing Impaired West Off PVR File System SETUP Aspect Ratio 16:9 Blue Screen First Time Installation Off Reset Software Update(USB) Move Return Exit Select INSTELLINGEN Please select an OSD Language English Espanol Francais Deutsch Portugues Nederlands OK D 34 1. OSD Taal Zorg met de pijltjestoetsen Omhoog/Omlaag dat de aanduiding voor Taal (OSD Language) geel gemarkeerd wordt.
Invoermodus: DTV 1.Druk op de Menu-toets om het hoofdmenu te openen. 2.Gebruik de pijltjestoets RECHTS om het slot (LOCK) het beeld (PICTURE), het geluid (SOUND), de tijd (TIME) of de instellingen (SETUP) te selecteren. 3.Druk op de Exit-toets om het menu te sluiten NAAM VAN MENU INSTRUCTIES MENU KANAAL 1. Automatische afstemming (Auto Tuning) Selecteer met de Omhoog/Omlaag toets automatische afstemming (Auto Tuning), druk daarna op OK om het automatisch zoeken te starten.
NAAM VAN MENU MENU KANAAL Deze optie heeft meerdere functies. Gebruik de blauwe toets om het huidige kanaal over te slaan. Gebruik de FAV toets om het huidige kanaal als favoriet in te stellen. Als het huidige kanaal al een van uw favorieten is, drukt u nogmaals op de FAV toets om het kanaal als normaal kanaal te kiezen.
TITEL MENU SUBMENU BEELD INSTRUCTIES 1. Beeldmodus Zorg met behulp van de pijltjestoetsen Omhoog/Omlaag dat de aanduiding voor de Beeldmodus (Picture Mode) geel gemarkeerd wordt. Met de pijltjestoetsen Links/Rechts kunt u een beeldmodus selecteren (DYNAMIC, STANDARD, MILD, PERSONAL). 2. Contrast Zorg met behulp van de pijltjestoetsen Omhoog/Omlaag dat de aanduiding voor CONTRAST geel gemarkeerd wordt. Met de pijltjestoetsen Links/Rechts kunt u het contrast aanpassen.
Picture mode Standard Contrast BEELD 50 Brightnes PICTURE ANNEL 0 Colour 50 Tint 50 Sharpness 30 Colour Temp Noise Reduction Move NAAM VAN MENU GELUID Return 7. Kleurtemperatuur Zorg met behulp van de pijltjestoetsen Omhoog/Omlaag dat de aanduiding voor Kleurtemperatuur (Color Temperature) geel gemarkeerd wordt. Met de pijltjestoetsen Links/Rechts kunt u de voor uw ogen optimale kleurtemperatuur selecteren. U kunt kiezen tussen Normaal (Normal), Warm, en Koud (Cold). 8.
NAAM VAN MENU MENU TIJD Clock TIME CHANNEL TIJD Move NAAM VAN MENU Return INSTRUCTIES 01/Jan 01:39 Time Zone GMT Sleep Timer Off Auto Standby OSD Timer Off 5S Select Exit MENU SLOT Lock System INSTRUCTIES Off Set Password Block Program LOCK CHANNEL Move SLOT Return Parental Guidance Off Key Lock Off Select Block D 39 1. Klok Toont de huidige systeemtijd. Niet beschikbaar. 2.
SUBMENU INSTELLINGEN NAAM VAN MENU OSD Language INSTRUCTIES English TT Language Hearing Impaired West Off PVR File System SETUP Aspect Ratio 16:9 Blue Screen First Time Installation Off Reset Software Update(USB) Move Return Exit Select INSTELLINGEN Please select an OSD Language English Espanol Francais Deutsch Portugues Nederlands OK D 40 1. OSD Taal Zorg met de pijltjestoetsen Omhoog/Omlaag dat de aanduiding voor Taal (OSD Language) geel gemarkeerd wordt.
LED LED 1366*768 48 1366*768 AUTO 2 x 5 Watt 33 W Afstandsbediening, voedingsadapter, voedingskabel, twee AAA-batterijen, instructiehandleiding, garantiekaart Schroevendraaier met schroeven (3 stuks) TV voet D 41
D 42
E D 43
D 44
OK OK D 45
D 46
[ Repeat ] D 47
D.DISP D.DISP D.DISP D.DISP D.DISP D.DISP D.DISP D.DISP D.DISP D.
8 9 10 [ Subtitles ] D 49
12 D 50
13 D 51
10+ 10+ D 52
D 53
4 OK OK D 54
SCREEN SAVER Selecteer de screensaver aan of uit.
OK D 56
OK ENGLISH GERMAN SPANISH PRENCH PORTUGUESE DUTCH OK PORTUGEES OK D 57
ENGLISH GERMAN SPANISH PRENCH PORTUGUESE DUTCH OK PORTUGEES OK ENGLISH GERMAN SPANISH PRENCH PORTUGUESE DUTCH OFF OK PORTUGEES OK D 58
ENGLISH GERMAN SPANISH PRENCH PORTUGUESE DUTCH OK PORTUGEES D 59 OK
D 60
Bevestiging van de voet en wandmontage instructies 1. Bevestiging van de voet Om de voet te bevestigen, plaatst u de voet aan de onderzijde van de TV en bevestigt u de 3 schroeven met een schroevendraaier. 2.
Instructies met betrekking tot de bescherming van het milieu Gooi dit apparaat aan het einde van de levensduur niet weg bij het huishoudelijke afval. Lever het apparaat in bij een inzamelpunt voor het recyclen van elektrische en elektronische apparatuur. Het symbool op het product, de gebruiksinstructies of de verpakking biedt informatie over de wijze waarop het product moet worden weggegooid. De materialen zijn recycleerbaar zoals door de desbetreffende markeringen wordt aangeduid.
Part 1 : LED TV OPERATION 1- Important Safety Precaution Incorrect usage will cause fire or electric shock. To prevent this, please do as required when you are installing, using and cleaning this machine. To insure your safety and extend the life span of LED-TV, please read the following items carefully before using: The On/Off key on this product does not fully disconnect the TV from the main power supply. Unplug the power cord from the AC outlet before connecting any Audio / Video cables to the LED TV.
2- Main functions 1- Can be connected with analog RGB input 2- Can be connected with CVBS input 3- Can be connected with HDMI input. 4- Can receive SCART signal 5- Can receive TV signal 6- Built-in 2 x 5W speakers, 2 sets audio input 7- Full function Infra-red remote control 8- Coaxial Audio output 9- Support USB for PVR and Media play 10- Support CI slot 11- Support DVD playback 3- Fitting the Remote Control Batteries The remote unit is operated with 2 x AAA size batteries. 1.
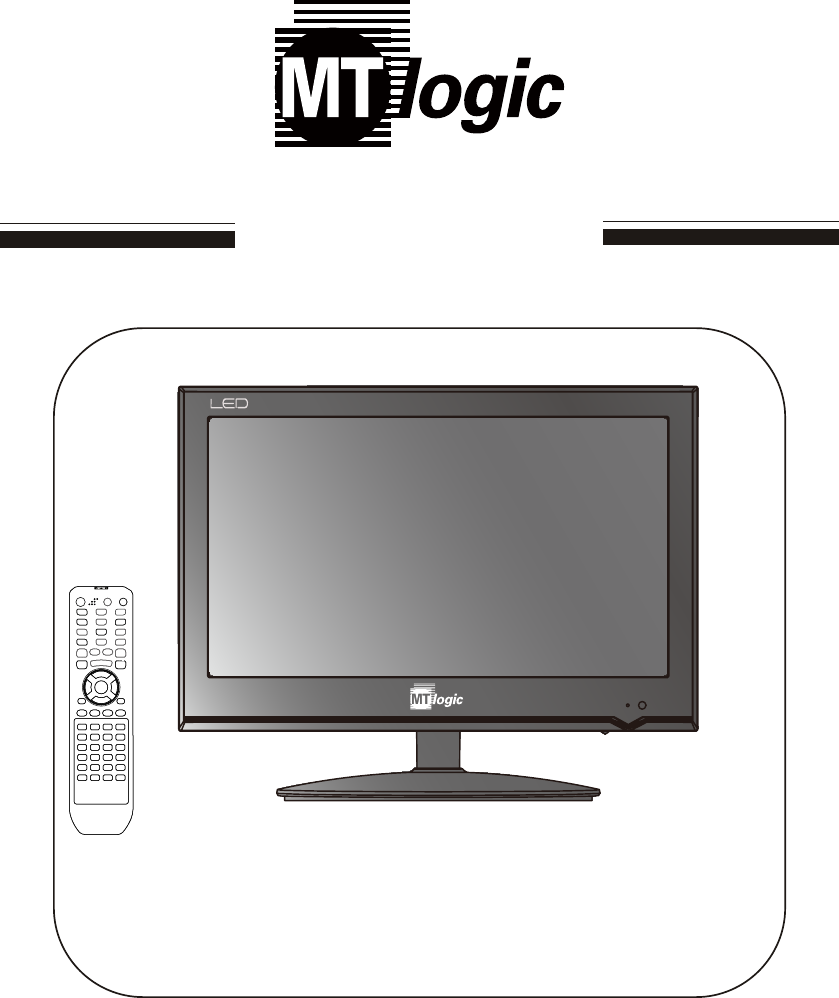
2. Do not combine a used battery with a new one or mix battery type (Zinc Carbon with Alkaline). 3. Do not attempt to charge, short-circuit, disassemble, heat or burn used batteries. 4. Dispose the used batteries according to your local authorities guidelines. Do not put it into your household waste. 4- Product Overview 5- Control Panel Overview INPUT MENU VOL- VOL+ CH.- SOURCE MENU CH.+ STANDBY STANDBY 1.
DC IN USB 1 2 HDMI1 HDMI2 3 SCART PC AUDIO VGA 4 5 6 13 10 9 7 COAX 8 YPbPr CVBS R 11 L RF IN (3) Illustration of Connectors 12 CI SLOT Indicator Light Status When the unit is on, the indicator light turns blue. The indicator light is red when the TV is in standby mode. Connector’s descriptions 1. DC 12V power input for the LED TV, connects power supply adaptor here. 2. Connects to portable USB device. 3.
OK E5
7- Connection between different input signals CI SLOT A) Connect with PC signal You can use your LED-TV as a monitor for your personal computer using a VGA cable(not supplied). COAX YPbPr CVBS R L RF IN 2. PC Audio Input 3.
RF IN 2 3 YPbPr CVBS R 1 L Left & Right Audio input. CVBS / composite video input. YPBPR/component Input. DC12V power input COAX 1. 2. 3. 4. CI SLOT B) Connect to external AV devices using Composite and YPBPR inputs DC IN Connection steps USB HDMI1 HDMI2 SCART PC AUDIO VGA 4 RF IN (C) Connect with TV signal COAX YPbPr CVBS R L 1. Antenna / 75Ω aerial input. 2. DC 12V power input.
Connection steps * Make sure that the power of the LED-TV is off; * Connect an antenna cable (CATV) to the corresponding interface connector (75 Ω ANT) on the back of the LED-TV. Connect the other end of the antenna cable to the antenna connector on the wall or on your digital cable / satellite receiver. Now you are able to view regular cable TV; * Turn on the power of the LED-TV; * Press the SOURCE button to set the video input mode of the LED-TV to “ATV” or “DTV” mode.
COAX YPbPr CVBS R L RF IN CI SLOT E) Connect with external device( USB ) 1. External device input. 2. DC 12V power input. external device the external device LED SOURCE DC IN USB 2 1 external HDMI1 HDMI2 SCART PC AUDIO VGA the LED Media COAX YPbPr CVBS R L RF IN CI SLOT F) Connect with HDMI signal 1. HDMI x2 input 2. DC 12V power input.
8- Basic operating instructions Turn on the LED-TV When the STANDBY button is pressed and the LED-TV is turned on, the indicator light on the front of the LED-TV changes from red to blue. When the LED-TV is turned on, the input mode is displayed on the screen. When the LED-TV is turned off using the STANDBY button, the LED-TV will go into standby mode and the indicator light turns red. Energy Saving Regarding to energy saving this TV has a standard stand-by timer of 4 hours.
Mute 1. Press the MUTE button to mute the sound temporarily. A Mute icon appears on the screen. MUTE 2. Press the MUTE button again to restore the sound. The Mute icon disappears. Note When you turn the LED-TV off, the mute function is cancelled automatically. Select the TV channel you want You can use the number keys on the remote control to directly select TV channels. The LED-TV can store up to 99 channels (1 to 99), and you can press the keys on the remote control or on the panel to make a selection.
4. Selection by EPG(Electronic Programme Guide) This function allows a channel schedule to be displayed for a time interval of one week. 1.Press the EPG button to display the Electronic Programme Guide on the screen. PROGRAMME GUIDE 10 Apr 2007 14:00- 15:00 10 Apr 2007 14:23 Barnaby (John Nettles) questions the guilt of a woman who is on trial for the murder of her best friend. 10 Apr 14.E4 28.ITV4 32.Fitm4+1 75.
2- PVR Basic instructions 1. The storage location of your file Press ▼ / ▲ button to select Option in the main menu. Press ▼ / ▲ button to select PVR File System, then press OK button to enter. Press ▼ / ▲ button to select Select Disk , then press OK button to enter. Use the external device(USB) to do appointment record. You can switch partition in this interface Select Disk Select Disk C: Check PVR File System Start USB Disk USB 0 Disk C Format Time Shift Size Speed Free Record Limit 6 Hr.
3. When the storage space of Disk is insufficient, it will produce a warning message, then it stops recording automatically and return to normal broadcast television. 4. Press index button to see the information of the recorded list . Press DISPLAY button to see the detail of the program. Recorded li st Programme Delete INFO index OK NOTE: You can see detail about the DATE/TIME/DURATION /PROGRAM NAME/CHANNEL NAME/DESCRIPTION Mode2:Time shift 1. Press T.SHIFT button to start Timeshift.
RECORDER 1 YLE TV1 Start Time 15 Minute 08Hour Dec Month 07 Date End Time 03 Minute 09 Hour Dec Month - 07 Date Mode once OK + Back 3.When the time appointment is in conflict ,it will produce a warning message. Timer Overlay 21 TMF 13 Jul 2007 03:00 4 . The time of the record is coming/appearing . it will change to current channel automatically. 3 Sec.
10- Media operating instructions Note:Before operating Media menu,Plug in USB device,then press SOURCE button to set the Input Source to Media . Press ◄ / ► button to select Media in the Source menu, then press OK button to enter. Press ◄ / ► button to select the option you want to adjust in the main Media menu, then press OK button to enter. Photo Menu Press ◄ / ► button to select PHOTO in the main menu, then press OK button to enter. Press exit button to return back to the previous menu.
Flower00.jpg Win Recorder HOME.jpg Flower01.jpg Flower.jpg River.jpg Delete F Press ◄ / ► button to select in the file selecting menu, then press OK button to display picture. When highlighting the option you select,the file information will appear on the right and picture will be previewed in the center. Flower00.
Press ◄ / ► button to select return option to go back to the previous menu. When highlighting the option you select,the file information will appear on the right. 1 C:\ Record O Win try.mp3 best.mp3 thank.mp3 1 Album: (2005/01... Title: 1khz-10db Bit Rate: 320K Artist: BCD103 Sampling: 44K happy.mp3 Delete Maybet.mp3 angel.mp3 Year: 2005 Size: 2426KBytes Press ◄ / ► button to select the file you want to listen in the file selecting menu,then press OK button to play.
Movie Menu Press ◄ / ► button to select MOVIE in the main menu, then press OK button to enter. Press exit button to return to the previous menu. Press ◄ / ► button to select drive disk you want to watch, then press OK button to enter. Press ◄ / ► button to select return option to go back to the previous menu. When highlighting the option you select,the file information will appear on the right and movie will be previewed in the center. Press OK button to play the selected movie.
11 Digital Teletext Some digital channels have a digital version of the traditional teletext service.Usually if the channel that you are viewing has this digital teletext there will be an on-screen display showing how this service can be accessed.For most channels that have this digital teletext service is accessed by pressing the RED or TEXT button. Once started follow the on-screen instruction to navigate through the available information.
12 LED SCREEN MENU the SETUP the TIME the LOCK or SCREEN Auto Adjust Auto Adjust H-Offset H-Offset V-Offset V-Offset Auto Adjust SCREEN SCREEN H-Offset 50 V-Offset 50 Size 50 Phase 50 Position Reset ard 0 Exit E 21 4. Size Press Up /Down button to select Size,then press OK button to enter sub-menu.Press Left / Right button to adjust display size.
PICTURE MODE (Dynamic; Standard;Mild;Personal) This can only be adjusted in the PERSONAL mode. Picture mode Standard Contrast 50 Brightnes PICTURE ANNEL 0 Colour 50 Tint 50 Sharpness 30 Colour Temp Noise Reduction Move Return Normal Middle Select This can only be adjusted in the PERSONAL mode.
Colour temperature Picture mode 50 Brightnes 0 Colour PICTURE ANNEL 50 Tint 50 Sharpness 30 Colour Temp Noise Reduction Move Return COLOUR TEMPERATURE Standard Contrast Normal Middle Select Exit (Standard;Music;Movie;Sports;Personal). Sound Mode Treble SOUND CHANNEL Move Return Standard 50 Bass 50 Balance Auto Volume SPDIF Mode 0 Off Off AD Switch Off Select Exit Auto Volume Press UP / Down button to select Auto Volume, then press OK button to select On or Off. 6.
1. Sleep Timer Off Auto Standby OSD Timer Off 5S TIME CHANNEL Move Return Select Exit 2. Auto Standby Press Up / Down button to select Auto Standby, then press OK button to enter sub-menu. Press Up / Down / Left /Right button to select. 3. LOCK 1. Lock System Press Up / Down button to select Lock System, then press OK button to make the following 3 options valid. (Default password is ‘0000’.) 2.
SETUP OSD OSD OSD Language DUTCH, PORTUGUESE, English TT Language Hearing Impaired West Off PVR File System SETUP Aspect Ratio 16:9 Blue Screen First Time Installation Off Reset Software Update(USB) Move Return Exit Select 2. TT Language (not available in PC) Press Up / Down button to select TT then press OK button to enter sub-menu.Press Up / Down / Left / Right button to select. 3.
AV/SCART/HDMI/Component/Media LOCK,the SETUP menu PICTURE MODE This can only be adjusted in the PERSONAL mode.
Picture mode 50 Brightnes 0 Colour PICTURE ANNEL 50 Tint 50 Sharpness 30 Colour Temp Noise Reduction Move Return Select Move Return Normal Middle Exit Sound Mode Treble SOUND CHANNEL COLOR TEMPERATURE Standard Contrast Standard 50 Bass 50 Balance Auto Volume SPDIF Mode 0 Off Off AD Switch Off Select Exit Auto Volume Press UP / Down button to select Auto Volume, then press OK button to select On or Off. 6.
1. Sleep Timer Off Auto Standby OSD Timer Off 5S TIME CHANNEL Move Return Select Exit 2. Auto Standby Press Up / Down button to select Auto Standby, then press OK button to enter sub-menu. Press Up / Down / Left /Right button to select. 3. LOCK 1. Lock System Press Up / Down button to select Lock System, then press OK button to make the following 3 options valid. (Default password is ‘0000’.) 2.
SETUP OSD OSD OSD Language ENGLISH. English TT Language Hearing Impaired West Off PVR File System SETUP Aspect Ratio 16:9 Blue Screen First Time Installation Off Reset Software Update(USB) Move Return Exit Select DUTCH, PORTUGUESE, 2. TT Language Press Up / Down button to select TT then press OK button to enter sub-menu.Press Up / Down / Left / Right button to select. 3.
ATV LOCK the CHANNEL SETUP. TIME CHANNEL 1. Auto Tuning Press Up / Down button to select Auto Tuning, then press OK button to start auto search. 2. DTV Manual Tuning Press Up / Down button to select DTV Manual Tuning, then press OK button to enter password to enter sub-menu.
PICTURE MODE (Dynamic; Standard;Mild;Personal) This can only be adjusted in the PERSONAL mode. Picture mode Contrast Brightnes PICTURE ANNEL 0 50 Tint 50 Sharpness Return 50 Colour Colour Temp Noise Reduction Move Standard Select 30 Normal Middle This can only be adjusted in the PERSONAL mode.
Colour temperature Picture mode 50 Brightnes 0 Colour PICTURE ANNEL 50 Tint 50 Sharpness 30 Colour Temp Noise Reduction Move Return Select Move Return Normal Middle Exit Sound Mode Treble SOUND CHANNEL COLOUR TEMPERATURE Standard Contrast Standard 50 Bass 50 Balance Auto Volume SPDIF Mode 0 Off Off AD Switch Off Select Exit Auto Volume Press UP / Down button to select Auto Volume, then press OK button to select On or Off. 6.
1. Sleep Timer Off Auto Standby OSD Timer Off 5S TIME CHANNEL Move Return Select Exit 2. Auto Standby Press Up / Down button to select Auto Standby, then press OK button to enter sub-menu. Press Up / Down / Left /Right button to select. 3. LOCK 1. Lock System Press Up / Down button to select Lock System, then press OK button to make the following 3 options valid. (Default password is ‘0000’.) Lock System 2.
SETUP OSD OSD OSD Language DUTCH, PORTUGUESE, English TT Language Hearing Impaired West Off PVR File System SETUP Aspect Ratio 16:9 Blue Screen First Time Installation Off Reset Software Update(USB) Move Return Exit Select 2. TT Language Press Up / Down button to select TT then press OK button to enter sub-menu.Press Up / Down / Left / Right button to select. 3. Hearing Impaired Press Up / Down button to select Hearing Impaired, then press OK button to select On or Off. SETUP 4.
DTV CHANNEL, LOCK CHANNEL 1. Auto Tuning Press Up / Down button to select Auto Tuning, then press OK button to start auto search. Auto Tuning DTV Manual Tuning ATV Manual Tuning Programme Edit Signal Information CHANNEL CI Information Move Return Select Exit DTV Manual Tuning - UHF CH 12 CHANNEL + No Signal Bad Freq: 226.25Mhz Good xi ATV Manual Tuning - Current CH 45 Auto Color System Sound System BG Fine-Tune 55.25 AFC Search On Menu t 2.
CHANNEL This option has two functions. ·Use Blue button to skip the current channel. ·Use FAV button set the current channel to your favorite channel. If the current channel already is one of your favorite channels, press FAV button again to set it to a normal channel. Program Edit 1 7 Digital 2 7 HD Digital 3 7 Digital 1 5 7 Digital 3 6 AFD0, 16:9 L 4 7 Digital 2 7 AFD0, 4:3 8 AFD1, 16:9 9 AFD1, 4:3 10 AFD2, 16:9 Delete OK CHANNEL --- Skip Fav Menu CI Information -------- E 36 5.
PICTURE MODE (Dynamic; Standard;Mild;Personal) This can only be adjusted in the PERSONAL mode. Picture mode Contrast Brightnes PICTURE ANNEL 0 50 Tint 50 Sharpness Return 50 Colour Colour Temp Noise Reduction Move Standard Select 30 Normal Middle This can only be adjusted in the PERSONAL mode.
Picture mode 50 Brightnes 0 Colour PICTURE ANNEL 50 Tint 50 Sharpness 30 Colour Temp Noise Reduction Move Return Select Move Return Normal Middle Exit Sound Mode Treble SOUND CHANNEL COLOR TEMPERATURE Standard Contrast Standard 50 Bass 50 Balance Auto Volume SPDIF Mode 0 Off Off AD Switch Off Select Exit Auto Volume Press UP / Down button to select Auto Volume, then press OK button to select On or Off. 6.
TIME CHANNEL Move Return Clock Time Zone 01/Jan 01:39 GMT Sleep Timer Off Auto Standby OSD Timer Off 5S Select 1. Clock Display the current system time.It’s not available. 2. Time Zone Press Up / Down button to select Time Zone, then press OK button to enter sub-menu.Press Up / Down / Left /Right button to select time zone. 3. Exit 4. Auto Standby Press Up / Down button to select Auto Standby, then press OK button to enter sub-menu. Press Up / Down / Left /Right button to select. 5. LOCK 1.
SETUP OSD OSD OSD Language English TT Language Hearing Impaired ENGLISH. West Off PVR File System SETUP Aspect Ratio 16:9 Blue Screen First Time Installation Off Reset Software Update(USB) Move Return Exit Select DUTCH, PORTUGUESE, 2. TT Language Press Up / Down button to select TT then press OK button to enter sub-menu.Press Up / Down / Left / Right button to select. 3. Hearing Impaired Press Up / Down button to select Hearing Impaired, then press OK button to select On or Off. SETUP 4.
13- Product specifications Items Relevant illustrations LED 48 Resolution 1366* 768 (best resolution 1366 * 768) LED PAL B/G - AUTO - SECAM L Features Input interface Audio(1) Left,right audio input interface Audio(2) Left,right audio input interface X2 High Quality Audio/Video input socket for connecting an external device fitted with an HDMI output Headphone Output 2x5W Portuguese Rated power consumption 33 W Accessories E 41
E 42
E the rear of the TV. When inserting the Disc incorrectly, you may damage the DVD Press OK or play button to star from the highlighted content.
E 44
OK OK E 45
E 46
D.DISP D.
D.DISP 8.
9. Language 10. Subtitle 11.
12.Repeat A-B 13.
Press numeric buttons to select the contents directly.For number over 10,press 10+ button first.(e.g. File number 15,press 10+ then 5.
E 52
4 Press button to move and highlight between different sub-menu.
SCREEN SAVER Select the screen saver on or off.
OK E 55
OK GERMAN SPANISH FRENCH PORTUGUESE DUTCH OK PORTUGUESE OK The default language setting is DUTCH.
ENGLISH GERMAN SPANISH FRENCH PORTUGUESE DUTCH OK OK The default language setting is DUTCH. GERMAN GERMAN SPANISH FRENCH PORTUGUESE DUTCH OK OK The default language setting is DUTCH.
GERMAN SPANISH FRENCH PORTUGUESE DUTCH OK OK The default language setting is DUTCH.
E 59
Base Assembly and Wall Mount instructions 1.Attaching the TV Stand To attach the stand, place the stand on the nect of the TV,insert and tighten the 3 screws with the screwdriver. 2.
Instructions on environment protection Do not dispose of this product in the usual household garbage at the end of its life cycle; hand it over at a collection point for the recycling of electrical and electronic appliances. The symbol on the product, the instructions for use or the packing will inform about methods for disposal. The materials are recyclable as mentioned in its marking.