
User guide


ManageEngine Firewall Analyzer :: User Guide
120
Zoho Corp.
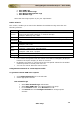
Creating a Report Profile
Click the Add Report Profile link to create a new report profile. You can click this link
from the sub tab, the left navigation pane, or the My Reports section in the Reports
tab.
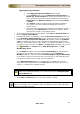
Step 1: Select Devices and Filters
1. For Report Profile Name, enter a unique name for the report profile.
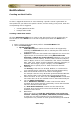
2. Select the 'Want to assign this profile to any 'Guest' privilege user' check
box, if you want to assign this profile to a guest user to view. On selecting the
check box, the drop down box containing the 'Guest' privilege users
appears besides the selection. Select the specific user to whom you want to
assign this profile to view. This option is useful for MSSPs and large enterprises,
where the user demands a report and confirm the report profile solves the
purpose.
3. Select the devices (firewalls, squid, ...) to report on. If you want to report on all
the devices sending logs to a specific syslog port, then select the Select All
Devices check box.
4. You can specify the filters on log data, in the section Choose the Filters. Follow
the instructions available for Setting Log Filters to know more about operations
on Include and Exclude filters.
5. Click Next to continue to the next step of the wizard. Click Cancel to exit the
wizard.
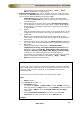
Step 2: Select Report Type and Schedule
This step lets you specify which reports to include as part of this report profile, and set
up schedules to generate this report profile automatically.
1. From the list of Available Reports, select the reports that you want to include in
this report profile. All the pre-defined reports are listed, along with custom
reports that you have previously set up. Below the Available Reports list, Add
link with icon is available to create custom report. Clicking the link, opens the
Define New Report screen pops up.
Look up Define New Report to know more about adding a new report to this
list
2. You can save the report in PDF and also can customize the PDF report by
selecting the Customize images for PDF Reports , whereby you can provide
your own Cover image (820 by 612 pixels) and Footer image (37 by 547
pixels).
3. In the Schedule & Email Options section, choose the format of report to be
Emailed using Send report as: PDF CSV radio buttons. Choose a Schedule
Type to schedule this report to be automatically generated at specific time
intervals. Choose from hourly, daily, weekly, or monthly schedules, or choose to
run this report only once. For Daily, and Only once schedules, you can set the
TimeFilter for Custom Hours, Only Working Hours, or Only NonWorking
Hours.