
Installation Guide
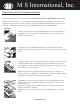

4. Trowel or wipe o surplus grout from slate with a damp sponge. Rinse
several times with clean water, changing the water as oen as necessary so it
remains clear. It is very important to do this as you go along.
5. Aer grout has set hard to the touch, clean surface of slate and along grout
line by rubbing briskly with a clean piece of cloth.
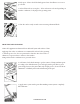
1.
Apply slate sealer with a large clean cloth or with a paint pad, apply in a thin coat.
Sealer or enhancer will dry to the touch within two hours, however it is advisable to
stay o the oor for 24 hours.
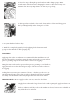
6. Let joints harden for three days.
7. Wash oor completely again by freely applying fresh clean water with
sponge on the entire oor and sponging dry.
FINISHING
Applying clear sealer or enhancer is recommended aer installation to seal
the slate tiles and the grout lines using the same sealer used as a grout release
prior to grouting, wipe of all excess sealer so there is no fogging.
Using the same sealer used as grout release prior to grouting, to seal the oor,
apply the 2nd coat on the tiles and grout, wipe of all excess sealer so there is
no fogging.
Sealing slate is necessary, it is a matter of choice – whether you choose to re-
tain the natural beauty of the slate or apply a chemical sealer that is available
in a shiny or matte nish. Sealers may be purchased at retail stone dealers.
HELPFUL HINTS: Do not apply a sealer over wet, waxed or oiled slate.
www.msistone.com