
User's Manual
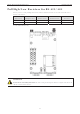


NPort W2150A/W2250A Series Initial IP Configuration
3-6
The NPort will reboot with the new IP settings. You can telnet to the new IP to login again.
Using the Serial Console to an Assign IP
Address
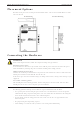
Before using the NPort’s serial console, turn off the power and use a serial cable to connect the NPort
console port to your computer’s serial port. Port 1 on the NPort serves as the console port. Use Port 1
connecting to the console port with a serial-based terminal or terminal emulator program, such as Windows
HyperTerminal. You may also download PComm Lite at www.moxa.com
. The terminal type should be set as
ANSI or VT100, and the serial communication parameters should be set as 19200, 8, N, 1 (19200 for baud
rate, 8 for data bits, None for parity, and 1 for stop bits). As soon as the connection is open, you will be
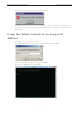
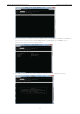
presented with a text menu displaying the NPort W2150A/W2250A Series general settings. Please refer to
Chapter 4 for a description of the available settings. The following instructions, we recommend using
PComm Terminal Emulator, which can be downloaded free of charge from
www.moxa.com, to carry out the
configuration procedure.
1. Connect your PC’s serial port to the NPort’s console port.
2. Open your terminal emulator program, such as Windows HyperTerminal. We recommend using PComm
Terminal Emulator, which can be downloaded for free at www.moxa.com
.
3. In your terminal emulator program, configure the communication parameters for the serial port on the
PC. The parameters should be set to 19200 for baud rate, 8 for data bits, None for parity, and 1 for
stop bits.