
User Manual

- 7 -
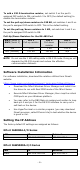
WLAN
IP
Netmask
Static
192.168.127.254
255.255.255.0
If the NPort is configured for DHCP but the DHCP server cannot be found,
the NPort will use factory default IP settings.
NOTE
If you have forgotten the NPort’s IP address, use the Device
Search Utility from your PC to locate the NPort. After searching
the LAN for NPort units, the
Device
Search Utility will display the
IP address of each unit.
NOTE
(
For the NPort IAW5000A-I/O Series)
Ethernet Bridge Disabled (default):
Only one network
interface can be active at a time. If the Ethernet link is active, the
WLAN will be inactive. If the WLAN is active, the Ethernet link will
be inactive.
Ethernet Bridge Enabled:
The LAN and WAN will both be
active. Go to the web console,
find the network settings page,
and set Ethernet Bridge to Enabled.
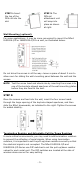
Open the web console to make the configuration changes as follows:
STEP 1: Open your web browser.
STEP 2: In the address bar, enter the default IP address (for the NPort
IA5000A-I/O Series, it is 192.168.127.254; for the NPort IAW5000A-I/O
Series, it is 192.168.126.254)
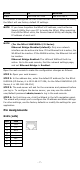
STEP 3: The web server will ask for the username and password before
you log in. To configure the device server, you may use the default
user/default password admin/moxa to log in the web console.
STEP 4: For first-time use, click the Wizard in the left navigation panel.
The wizard will prompt you to configure the IP address and basic settings.
For other settings, use the factory defaults or modify the settings for your
application.
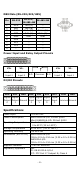
Pin Assignments
RJ45 (LAN)
Pin
LAN
1
Tx+
2
Tx-
3
Rx+
4
–
5
–
6
Rx-
7
–
8
–