
User Manual


- 15 -
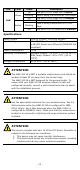
WARNING
EXPLOSION HAZARD
Substitution of any component may impair suitability for Class I,
Division 2.
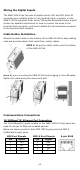
Software Setup
This section covers the software setup for the AWK-3131A.
How to Access the AWK
Before installing the AWK device (AWK), make sure that all items in the
package checklist are provided in the product box. You will also need
access to a notebook computer or PC equipped with an Ethernet port.
• Step 1: Select a suitable power source and plug in the AWK.
The AWK can be powered by DC power ranging from 12 VDC to 48
VDC or by a PoE PSE via an Ethernet connection.
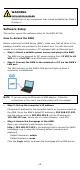
• Step 2: Connect the AWK to the notebook or PC via the AWK’s
LAN port.
The LED indicator on the AWK’s LAN port will light up when a
connection is established.
NOTE
If you are using an Ethernet-to-USB adapter, follow the
instructions in the user’s manual provided with the adapter.
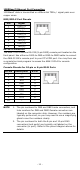
• Step 3: Set up the computer’s IP address
Choose an IP address for the computer that is on the same subnet as
the AWK. Since the AWK’s default IP address is 192.168.127.253,
and the subnet mask is 255.255.255.0, set the IP address to
192.168.127.xxx, where xxx is a value between 1 and 252.
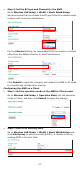
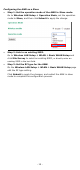
• Step 4: Access the homepage of the AWK.
Open your computer’s web browser and type
http://192.168.127.253 in the address field to access the AWK’s
homepage. Log in using the following default username and
password:
Default Username: admin
Default Password: moxa
Click the Login button to access the homepage of the AWK device.