
User`s manual


3-2 Smartio C168H/PCI User’s Manual
Installing the Driver
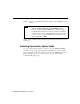
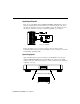
The key step in installing the Windows NT driver for your Moxa Smartio C168H/PCI
board is the Moxa Smartio/Industio Configuration Panel, shown below. You will
either click on Add, Remove, or Property, depending on whether you are installing
the driver for the first time, removing the driver, or simply updating the configuration.
l If you are installing a board for the first time, or you are installing an additional
board, you will use the Add button.
l If you would like to remove a board, you will use the Remove button.
l To update the configuration properties of a particular board, you will use the
Property button.
The following sections contain details of how to add, configure, and remove a driver.
First Time Installation
In this section we give the procedure you should follow to install the Smartio
C168H/PCI driver for the first time under Windows NT 3.51/4.0. To begin with, make
sure that all of the boards have been properly plugged into your system’s PCI slots,
as described in the previous chapter.
1. Log onto your NT system as the administrator.
2. From the Windows NT desktop, click on Start
à
Control Panel to open the
Control Panel.