
Installation guide


Table Of Contents
- 5 -
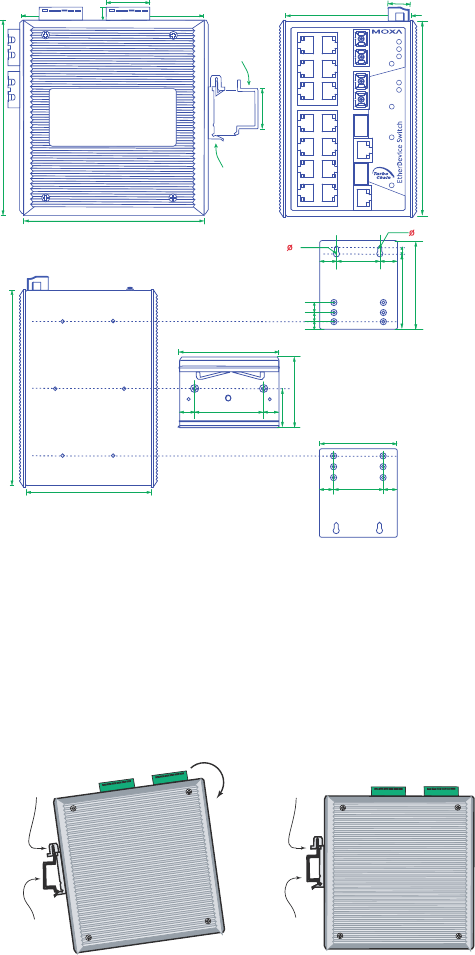
Mounting Dimensions (unit = mm)
PWR1
PWR2
FAULT
100M
1000M
TX
13
11
9
14
12
10
7
5
3
8
6
4
1
2
100M
10M
TX
RX
16
RX
G2
G1
EDS-518A-MM-SC
1000M
15
100M
Rear View
Side View
Front View
Wall Mounting Kit
DlN-Rail Kit
DlN-Rail Kit
DlN-Rail
127.52
46
70
7.75
30.50
7.75
9
36.9113.4
00.53
30.00
00.531
00.531
0.79
71.01
15.00
86.80
00.531
7.5 55 7.5
02.72
03.84
3.5
6
13.9
18.2
6
13.9
10
10
5
08.66
50.75
MSTR/HEAD
CPLR/TAIL
DIN-Rail Mounting
The aluminum DIN-Rail attachment plate should already be fixed to the back
panel of EDS-518A when you take it out of the box. If you need to reattach
the DIN-Rail attachment plate to EDS-518A, make sure the stiff metal spring
is situated towards the top, as shown by the following figures.
STEP 1—Insert the top of the
DIN-Rail into the slot just below the
stiff metal spring.
STEP 2—The DIN-Rail attachment
unit will snap into place as shown in
the following illustration.
metal
spring
DIN-Rail
metal
spring
DIN-Rail
To remove the EDS-518A from the DIN-Rail, simply reverse Steps 1 and 2
above.