
Specifications


2-4 WS2000 Wireless Switch System Reference Guide
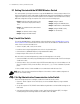
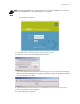
Step 3: Set the Basic Switch Setting
1. Enter a System Name for the wireless switch. The specified name appears in the lower-left corner of
the configuration screens, beneath the navigation tree. This name can be a useful reminder if multiple
Symbol wireless switches are being administered.
2. Enter a text description of the location of the switch in the System Location field. This text is used as
a reminder to the network administrator and is also used to set the location variable if the switch is
administered using SNMP.
3. In the Domain Name field, enter the name of the domain this switch is a member of. This value is
returned along with the system name for a Reverse DNS Query on the switch.
4. Enter an email address for the administrator in the Admin Email Address field. The switch uses this
address for sending SNMP-related and other administration-related messages to the administrator.
5. Enter the IP address of the DNS Name Server in the DNS Server IP Address field. The switch uses this
field to resolve FQDN information provided in the NTP configuration page. See Specifying a Network
Time Protocol (NTP) Server for more information.
6. Select the Country for the switch from the drop-down menu. Selecting the correct country is extremely
important. Each country has its own regulatory restrictions concerning electromagnetic emissions and
the maximum RF signal strength that can be transmitted by Access Ports. To ensure compliance with
national and local laws, be sure to set this field accurately.
7. Click Apply to save changes. Unapplied changes are lost if the administrator navigates to a different
screen.