
Specifications


Switch Administration 7-51
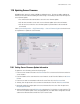
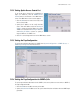
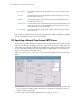
7.11.2 Setting Up the Access Control List
To set up the Access Control list as specified by a
range of IP addresses, click the SNMP Access
Control button at the bottom of the SNMP Access
screen. The SNMP Access Control screen appears:
1. Click the Add button to create a new entry in the
Access Control table.
2. Specify the IP address for the user(s) that have
access. Enter an IP address only in the Starting IP
Address column to specify an address for a single
SNMP user. Enter both the Starting IP Address
and Ending IP Address columns to specify a
range of addresses for SNMP users.
3. Click Ok to save changes and return to the SNMP Access screen.
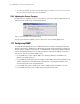
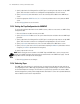
7.11.3 Setting the Trap Configuration
To set the trap notification destination for SNMP, select System Configuration --> SNMP Access -->
SNMP Trap Configuration from the left menu.
7.11.4 Setting the Trap Configuration for SNMP v1/v2c
To set the trap notification destination for the SNMP v1/v2c servers, add one or more entries to SNMP v1/
v2c Trap Configuration table.
1. Click the Add button to add a new entry to the table.
2. Specify a Destination IP addresses for the systems that will receive notification when an SNMP trap is
generated.