WPS870G User Guide Regulatory, Warranty, and Copyright Information WARNING: TO PREVENT FIRE OR SHOCK HAZARD, DO NOT EXPOSE THIS PRODUCT TO RAIN OR MOISTURE. THE UNIT MUST NOT BE EXPOSED TO DRIPPING OR SPLASHING. DO NOT PLACE OBJECTS FILLED WITH LIQUIDS, SUCH AS VASES, ON THE UNIT. CAUTION: TO ENSURE REGULATORY COMPLIANCE, USE ONLY THE PROVIDED POWER AND INTERFACE CABLES. CAUTION: DO NOT OPEN THE UNIT.
User Guide • Connect the equipment into an outlet on a circuit different from that to which the receiver is connected. • Consult the dealer or an experienced radio/TV technician for help. WPS870G CAUTION: Changes or modifications not expressly approved by Motorola for compliance could void the user’s authority to operate the equipment. FCC Declaration of Conformity Motorola, Inc.
User Guide WPS870G Table of Contents Section 1: Overview ______________________________________ 1 Features .................................................................................................................................................1 Safety Instructions................................................................................................................................2 Package Contents .........................................................................................
WPS870G User Guide Server Status ................................................................................................................................. 38 Printer Status ................................................................................................................................. 39 Network Settings.................................................................................................................................40 Network Setting ................................
User Guide WPS870G Using IPP Printers...............................................................................................................................70 Section 7: Troubleshooting _______________________________ 71 Contact Information ............................................................................................................................71 Hardware and LAN Solutions...........................................................................................................
User Guide WPS870G Section 1: Overview This chapter provides an overview of your Wireless Print Server's features. Features Congratulations on the purchase of your new Wireless Print Server! Your Wireless Print Server (WPS870G) is designed to provide a simple and efficient network printing solution. It is packed with features, including: Wireless LAN Support. Wireless stations supporting the IEEE 802.11g standard (backwards compatible with 802.11b) can interoperate with the Wireless Print Server.
WPS870G User Guide Safety Instructions For your own safety, and to protect your Wireless Print Server, please observe the following safety advice: Unplug this device from its power source before cleaning. Use only a slightly dampened cloth for cleaning. Do not use liquid or aerosol cleaners. Avoid using this device near water. Exposure to water poses an electric-shock hazard. Do not place the Wireless Print Server on an unstable surface. The device may fall causing serious damage to the device.
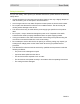
User Guide WPS870G Package Contents You should find the following items packaged with your Wireless Print Server. If any items are missing, contact your dealer immediately.
WPS870G User Guide WPS870G Physical Description The following sections describe the physical characteristics of your WPS870G. For instructions on installing your WPS870G, see Section 2:Installation. Back of WPS870G The following illustration shows the back panel: Power Power Parallel Parallel Port Reset USB LAN USB Restore Button Port Ethernet Port Feature Description Power The receptacle where you plug in the power adapter.
WPS870G User Guide Test Print and Restore Button The Wireless Print Server is fitted with a Restore button. This button has two functions: Prints a test page containing all current settings (if your printer supports this) Restores the factory default settings Power Parallel Reset USB LAN Restore Button To generate a diagnostic test page: Note: PostScript printers are unable to print this page. If you have a PostScript printer attached, the test page will not be printed.
WPS870G User Guide Front of WPS870G The following illustration shows the front panel: LAN Wireless USB Parallel 1 2 3 4 LED Indicators There are four LED indicators on the front of the unit. The LED indicator modes are described in the following table. LED Color Condition Status 1.
WPS870G User Guide LED 4.
WPS870G User Guide Section 2: Installation Overview The WPS870G is designed to support many different platforms and the configuration required depends upon the environment in which it is installed: The Wireless Print Server requires some configuration but is mostly plug-and-play if there is a DHCP server on your network. A Windows-based setup Wizard provided on the CD-ROM simplifies this task. Computers using the WPS870G require configuration.
User Guide WPS870G A dynamically assigned IP address might change, which means you might have to alter the Print Port if you manually set up TCP/IP printing and if you power off and on the WPS870G. The Print Server utility, however, will handle the IP assignment from a DHCP server for you. The method you choose depends on what you have available and how you want to work with the WPS870G.
WPS870G User Guide Inferring an IP Address Using the example above, 192.168.10.10 is the IP address assigned to your Ethernet adapter. This tells you that you should assign an IP address beginning with 192.168.10.x. The last number, possibly 11 in this case, could be free. 1 Use the ping command (just like using ipconfig – see above) to verify if the address is free, type ping 192.168.10.11. 2 If you do not see the word “reply,” then most likely the IP address is free.
WPS870G User Guide 2 With the other end of the same Ethernet cable, plug it into the LAN port of your WPS870G. 3 Plug in the power plug to the WPS870G and the other end into an electric outlet. The LAN LED illuminates when successfully connected. Computer to WPS870G Connection If you are connecting the WPS870G directly to your computer, that computer must first be equipped with an Ethernet adapter card. Use a crossover Ethernet cable for this procedure; a crossover cable is not supplied.
WPS870G User Guide Installation Wizard Setup Procedure The Windows-based Installation Wizard supplied on the CD-ROM, runs on Windows 98SE, Windows ME, Windows 2000, and Windows XP. Using this Installation Wizard is the recommended method to configure the Print Server. Installation Notes The screenshots seen here may differ slightly, depending upon your version of the Installation Wizard. However, the functionality is the same.
User Guide WPS870G The Configure Device Name and Domain window is displayed: 5 Type a descriptive name for the Device Name. 6 Select the Domain on which you wish to use the WPS870G. The domain displayed is the domain currently in use. Most likely WORKGROUP is fine if using a domain. 7 Click Next when finished.
WPS870G User Guide The Configure IP Address Settings window is displayed: 8 9 Select the type of connection you chose at Before You Begin, a Choice: – Obtain IP Address Automatically – using a wireless router with a DHCP server – Static Assigned IP Address – manually assigned IP address If you selected Static Assigned IP Address, enter an unused IP address from the range used on your LAN. Also enter the appropriate Subnet Mask and Gateway IP Address.
WPS870G User Guide 11 Confirm that the information you entered is correct by clicking Back. If all settings are correct, then click Next (from the previous window) and Next again. The Set Print Server Password window is displayed. 12 It is recommended that you change the default password of ‘motorola’. Leaving this field blank keeps the default password. 13 Click Next. The Configure Your Print Server Wireless Settings window is displayed: 14 Enter or select the information required.
WPS870G User Guide Item Description Channel If you selected Ad-Hoc network, then select the wireless channel of that network. 15 Once the information is entered, click Next. The Confirm Print Settings Window is displayed for your review. 16 If necessary, click Back to revise any settings. If everything is correct, click Accept. 17 If you did not select any wireless security (Open/No Encryption), skip to step 19.
User Guide – WPS870G If you selected WPA-PSK, the Wireless Security Settings window is displayed: 18 Match the type of security used by the wireless network. – For WEP security, if you select Pass-phrase as your Key Input Method, enter the pass-phrase and click Generate Keys. – For WPA-PSK, type in the required pass-phrase. Once entered, click Next and confirm the settings. 19 Once all settings are acceptable, click Accept. The Print Server Configuration Complete! window is displayed.
WPS870G User Guide If you set up your WPS870G by directly connecting to a computer and not through a router, you might encounter this window. It may be necessary to click Refresh more than once to see your wireless information. You also can try re-powering your WPS870G and then clicking Refresh again. Your WPS870G has been successfully configured and will work with your wireless adapter. Continue following the instructions to install the Wireless Print Server Utility.
User Guide 1 WPS870G Choose one of the following: – Continue with the Installation Wizard to install the Print Server utility by clicking Next. – Or, if installing for the first time, insert the CD-ROM and from the main window of the Installation Wizard, click Install the Wireless Print Server Utility. – Or, if you have installed already and would like to add a new printer port, click Start > Programs > Motorola Wireless Print Server Utility > Wireless Print Utility Setup.
WPS870G User Guide 3 Click OK. The Configure Printer Port window is displayed: 4 If your printer appears in the Existing Printers list, select it and click Connect. Otherwise, click Add New Printer. The Add Printer Wizard window is displayed: Windows 98 5 Windows ME Locate the Manufacturer and your printer, or use the Have Disk option if appropriate, and click Next.
User Guide WPS870G The Add Printer Wizard window is displayed: 6 Select the newly added Port. Look for the description of “PrintServer” because your installation will vary. In the example above, P2 represents the second Port (USB) on the WPS870G. Once selected, click Next. 7 Keep or replace the driver as needed and click Next. The Name Your Printer window is displayed. Motorola recommends changing the Printer name to indicate that this printer is attached to your Wireless Print Server.
WPS870G User Guide WPS870G Utility Installation for Windows 2000 It is highly recommended that you install the Print Server utility on every client computer that accesses the WPS870G. The following procedure installs the Print Server utility. 1 Choose one of the following: – Continue with the Installation Wizard to install the Print Server utility by clicking Next.
User Guide WPS870G The ADDPORT window is displayed, indicating you have successfully added the port. 3 Click OK. The Configure Printer Port window is displayed: 4 If your printer appears in the Existing Printers list, select it and click Connect. Otherwise, click Add New Printer.
WPS870G User Guide The Select the Printer Port window is displayed: 5 Select Use the following port: and scroll down until you see PrintServer Port in the Description column. Select that port and click Next. The Add Printer Wizard window is displayed: 6 Locate the Manufacturer and your printer, or use the Have Disk option if appropriate, and click Next.
User Guide 7 WPS870G Keep or replace the driver as needed and click Next. The Name Your Printer window is displayed: Motorola recommends changing the Printer name to indicate that this printer is attached to your Wireless Print Server. 8 Click Next. The Printer Sharing window is displayed: 9 Click “Do not share this printer” and click Next. 10 Click Yes or No to print a Test Page and click Next. 11 Click Finish to complete the Print Utility setup. Your Wireless Print Server is now ready to be used.
WPS870G User Guide 12 If the Printer Port Setup window is still open, you can set up another printer or click Close to exit the window. After you have finished the initial installation setup program on the CD-ROM, your WPS870G is up and running and ready for advanced wireless configuration. See Section 3: Wireless Security Configuration for configuring the strongest security settings and Section 4: Web-Based Management for configuring the WPS870G.
User Guide 3 WPS870G Click OK. The Configure Printer Port window is displayed: 4 If your printer appears in the Existing Printers list, select it and click Connect. Otherwise, click Add New Printer.
WPS870G User Guide The Add Printer Wizard window is displayed: 5 Locate the Manufacturer and printer, or use the Have Disk option if appropriate, and click Next. 6 Keep or replace the driver as needed and click Next. The Name Your Printer window is displayed: Motorola recommends changing the Printer name to indicate that this printer driver is attached to your Wireless Print Server. 7 Click Next. The Printer Sharing window is displayed.
User Guide 8 WPS870G Click Do Not Share This Printer and click Next. The Print Test Page window is displayed: 9 Click Yes or No to print a Test Page and click Next. The Completing the Add Printer Wizard is displayed. 10 Click Finish to complete the Print Utility setup. Your Wireless Print Server is now ready to be used. To print from an application, select the printer you have just configured from the Print dialog box of the application.
WPS870G User Guide Existing Printer Driver Configuration This situation is for a printer you already have installed and want to use with the WPS870G. Once you have successfully installed the WPS870G, a Printer Port (named PrintServer) for the WPS870G has been created on your computer. You can use this Printer Port for existing printers already installed on your system. By redirecting an existing printer to use the PrintServer port, you can then wirelessly print to your installed printer.
User Guide WPS870G Section 3: Wireless Security Configuration This section provides a suggested security set up for the WPS870G. You need an installed WPS870G for this procedure. Overview Wireless networks require configuration so that wireless devices can talk to one another. But they also require security configuration so that outsiders can’t use your wireless network. Failure to configure these settings properly could compromise your network to wireless hackers.
WPS870G User Guide Wireless Security Setup The wireless settings configured here represent the strongest settings possible for the WPS870G. If your wireless network does not support them, then match the strongest settings available on the network to which you are connecting. 1 From the main menu, click Control Panel to access Device Security. The Device Security window is displayed: 2 In the Login Password field, enter your Login Password.
WPS870G User Guide From the chart below, select the type of security that matches your wireless network. The type of authentication selected determines the type of encryption you can select. Strongest Security Medium Security No Security Authentication Authentication Authentication WPA-PSK Shared or Open Open Encryption Encryption Encryption TKIP WEP128 or WEP64 None 7 For the strongest authentication, select WPA-PSK from the Authentication options.
WPS870G User Guide Section 4: Web-Based Management This section explains how to configure the WPS870G using your Web browser. Overview The WPS870G uses an HTTP server, which allows you to connect to the Wireless Print Server and configure it using your web browser. Most browsers should work, provided they support tables and forms. You use an IP address to log on to the Print Server’s Web-based Management Utility.
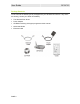
User Guide WPS870G Network Layout Diagrams Below are examples of the two methods to work with your WPS870G in a home environment.
WPS870G User Guide Connecting to the WPS870G The screenshots seen here are intended for reference only; your version of firmware may differ slightly. Your WPS870G must have received an IP address for you to connect to it, either by manually assigning it or by being assigned an IP address by your router. 1 Start your Web browser. 2 In the URL field, enter http:// followed by the IP address of the WPS870G, for example: 192.168.10.3. This is the IP address you assigned during installation.
User Guide WPS870G Help, Restart, and Logout Click the appropriate command to execute the action. Help Accesses the online help guide. Restart Restarts your session with the Configuration Utility. When Restart flashes, the change you made requires that you restart the unit. For convenience, it is recommended that you finish all of your configuration changes and then restart the unit. Logout PAGE 37 Logs out of the print server’s Configuration Utility.
WPS870G User Guide Status Two windows are available for the Status section - Server and Printer. Each provides up-to-date information about the status of the WPS870G and attached printer(s). Server Status The initial window provides information about your WPS870G connections. Click Status > Server Status to access the window. The Server Status window is displayed: Review the Server Status page for details about your printer server functions.
WPS870G User Guide Item Description Printer Type Lists the printer(s) connected to the WPS870G’s ports, if any. Networking Info If a network is configured and connected, the information about that network appears below this heading. Lists connection information that your WPS870G is using: Dynamic or Static IP address assignment Current IP address Subnet Mask Default Gateway Wireless Info Lists the current information configured for the wireless interface.
WPS870G User Guide The printers attached to the WPS870G are displayed along with basic information. Click Refresh to update the status of the printers. Network Settings Network Settings allows you to change how you want to log on to the WPS870G. Network Setting Click Network Settings to access the window. The Network Settings window is displayed: You have two options at this point, either DHCP or Set IP Address.
WPS870G User Guide Item Description Gateway Address The address of the gateway used to reach a specified destination; for example, on a network or the Internet. Gateways are devices that route packets between the different physical networks. If your network segment uses a router or gateways, type its IP address here. Otherwise, leave the address as 0.0.0.0. Delay before reconnection attempts Sets how long the WPS870G should wait before retrying a TCP/IP connection that is lost.
WPS870G User Guide Wireless Settings Wireless Settings allows you to update wireless parameters, enabling you to successfully connect to your wireless network. For example, use Wireless Basic window to enter the Network Name (SSID) and select the type of Wireless Encryption to use. Wireless Basic Click Wireless Settings > Wireless Basic to access the window. The Wireless Basic window is displayed: Item Description Network Name (SSID) Type the Network Name used by your wireless network.
WPS870G User Guide Item Description Mode Select the type of wireless standard for your wireless network if Ad-Hoc is selected: Compatibility (11b/g) Performance (11g only) Legacy (11b only) Select the appropriate mode. If using multiple access points supporting both 802.11b and 802.11g, select Compatibility (11b/g). Link Info Click to view the performance of your wireless access or Ethernet connections.
WPS870G User Guide Wireless Security The Wireless Security window allows you to configure the security settings for your WPS870G. Select the settings necessary to match the encryption used by your wireless network. Click Wireless Settings > Wireless Security to access the window. The Wireless Security window is displayed: Item Description Authentication Authentication establishes either an open or secure verification of communication with an access point (AP).
WPS870G User Guide Item Description Encryption Match the type of wireless encryption used by the wireless network. This security setting encrypts your wireless transmission. Disabled – No encryption used WEP 64 – Wired Equivalent Privacy - 64-bit strength (provides 4 Keys) WEP 128 – Wired Equivalent Privacy - 128-bit strength (provides 2 Keys) TKIP (Temporal Key Integrity Protocol) - changes the temporal key often (provides 1 Key) TKIP is recommended for home users.
WPS870G User Guide Item Description Cancel Click to cancel any changes. Printer Settings Printer Settings allows you to update print server parameters to work with different printer networks. Configure Server Click Printer Settings to access the window. The Configure Server window is displayed: Item Description Print Server Name Change the name of the Print Server to a recognizable name. AppleTalk Click to use AppleTalk on your network. NetBEUI Click to use NetBEUI on your network.
WPS870G User Guide Protocol Settings Protocol Settings allows you to update print server parameters to work with different printer networks. AppleTalk® Click Protocol Settings to access the AppleTalk window. The AppleTalk window is displayed: Item Description AppleTalk zone Type the name of the AppleTalk zone to which you wish to connect. An asterisk “*” allows you to connect to any AppleTalk zone.
WPS870G User Guide Item Description Apply Click to save your settings. Cancel Click to cancel any changes. NetBEUI Click Protocol Settings > NetBEUI to access the NetBEUI window. The NetBEUI window is displayed: Item Description Domain Name Type the designated work group to be serviced by the Wireless Print Server. This field is not case sensitive, so identical names with different cases are considered to be the same name. Response Time (0.1 secs) Sets how quickly jobs are sent to the printer.
WPS870G User Guide Control Panel Control Panel allows you to adjust the password to the WPS870G and to update the unit’s firmware. Device Security Device Security enables you to change the password of the Web-based GUI of the WPS870G as well as the Login Idle Time. Click Control Panel to access Device Security. The Device Security window is displayed: Item Description Login Password Type a new password. There is a minimum of 0 characters and a maximum of 16.
WPS870G User Guide Updating Firmware The Firmware Update window allows you to update your Print Server’s firmware (the mechanism that controls your Print Server’s hardware). Click Login Settings > Firmware Update to access the Firmware Update window. To check for a firmware update, access this website www.motorola.com/broadband/networking. New firmware can be found under the "Support and Downloads" link.
User Guide WPS870G Section 5: Alternate Client Computer Configurations This section describes possible client configurations that LAN clients can use for the printer or printers attached to the WPS870G when not using the Print Server utility. Use one of these methods only if you are unable to use the Printer Server’s utility. Overview Before performing client configuration, the WPS870G must be installed on your LAN and configured as described in Section 2:Installation.
WPS870G User Guide Checking Your Network Protocols (Windows 9x) Your computer must have either TCP/IP or NetBEUI protocols installed. All versions of Windows after Windows 95 already have TCP/IP installed by default. You must verify that the desired protocols are available, as follows: 1 2 3 From your computer, click Start > Settings > Control Panel > Network.
User Guide WPS870G Windows IP Printing You can set up your computer(s) to print from your applications using an IP address instead of the WPS870G’s Printer Utility. To accomplish this, you need to add and configure a printer port on your computer with the appropriate information. With this printing method, print jobs are stored (queued) on your computer, and then sent to the WPS870G when it is available. What Is Required To enable this feature you need the following: An installed and connected WPS870G.
WPS870G User Guide Windows 98SE/ME IP Printer Port Setup This section installs the IPP client and configures your port for IP printing. 1 Insert the CD-ROM supplied with your WPS870G. Navigate to the IPP folder and double-click the IPP_Client.exe file to install the program. 2 Once finished, navigate to the program by clicking Start > Programs > IPP Port Monitor > Add IPP Port. The Configure IPP Port window is displayed: 3 In the IP address field, type the IP address or URL of the WPS870G.
User Guide WPS870G The AddPort window is displayed: 6 If desired, you can click Add New Printer to add a new printer for the IP port. Highlight the printer you want to use for the IP port and click OK. The ADDPORT window is displayed: 7 Click OK. Your printing port is now configured for IP Printing. To print from any application, select the printer configured for the port. Note: If using the Epson Spooler Manager, this program must be disabled, as follows: 1 Run the Epson Spooler Manager.
WPS870G User Guide Windows 2000/XP IP Printer Port Setup The recommended printing method is to use the LPR protocol for IP printing: 1 Open your Printers folder (usually Start > Settings > Printers), right-click the desired printer and select Properties. The Properties window is displayed: 2 Select the Ports tab and click Add Port. The Printer Ports window is displayed. 3 Choose Standard TCP/IP Port and then click New Port.
User Guide WPS870G The Add Standard TCP/IP Printer Port Wizard window is displayed: 4 Enter the IP Address of the Print Server in the Printer Name or IP address field and click Next. The Additional Port Information Required window is displayed: 5 Select Custom and click Settings.
WPS870G User Guide The Configure Standard TCP/IP Port Monitor window is displayed: 6 7 On the Port Settings tab: – Select LPR – Enter a Queue name (L1 for Port 1 (Parallel), L2 for Port 2 (USB)) – Ensure the LPR Byte Counting Enabled setting is selected. Click OK to confirm your changes and close this window. Follow the prompts to complete the Wizard. IP printing is now enabled. Print Jobs Management Print jobs can be managed like any Windows printer.
User Guide 3 WPS870G If Windows responds that a printer is still using the port, apply another port to the selected printer and try deleting the port again. Advanced Port Options 1 Click Start > Settings > Printers to open the Printers folder. 2 Right-click the desired printer and select Properties. 3 On either the Details or Ports tab (depending on your version of Windows), click Port Settings.
WPS870G Banner User Guide Check Enable Banner to print a banner page before each print job. If using a PostScript Printer, click to enable for printing a banner. The User Name will be printed on the banner page. Windows SMB Printing This method requires no additional software to be installed, but either the NetBEUI or TCP/IP protocol must be installed on your computer. If you need to change the Domain name of your WPS870G, run the Installation Wizard again.
User Guide WPS870G 5 To install a printer, right-click the desired printer icon, and choose Install, as shown below. This starts the Add Printer wizard. 6 Follow the prompts to complete the installation. – Select the Printer Manufacturer and Model to match the printer connected to this port on the Wireless Print Server, and complete the Wizard. This printer now appears in your Printers folder (Start > Settings > Printers) and can be used like any other printer.
WPS870G User Guide Windows with Server-based Print Queues With a Server-based Print Queue, the WPS870G is installed on an existing Network Server (Windows, Unix, or NetWare), rather than on your computer. If your Network Administrator uses this system, each Windows client must be set up to work with your network server as follows: 1 Open your Printers folder, and start the Add Printer Wizard by clicking Start > Settings > Printers. 2 Double click Add Printer.
User Guide WPS870G 7 Select the correct printer Manufacturer and Model, as advised by your Network Administrator and click Next. 8 Follow the prompts to complete the Wizard. The new printer will be listed with any other installed printers, and may be selected when printing from any Windows application.
WPS870G User Guide Macintosh® (AppleTalk) The Wireless Print Server supports AppleTalk (EtherTalk), PAP, ATP, NBP, ZIP and DDP protocols, enabling Macintosh computers on the network to view and use the Wireless Print Server as a regular AppleTalk printer. Software Requirements Mac OS 9.x or newer. AppleTalk Setup 1 Click the apple icon and choose Control Panel > AppleTalk. 2 Ensure that Ethernet is selected under AppleTalk Connection. 3 Click Chooser. The Chooser panel opens.
User Guide WPS870G Macintosh OS X If using LPR printing, you need to ensure the Wireless Print Server has a valid IP address before configuring your Mac as follows (see IP Assignment for details). LPR Printing Setup Use the following procedure to enable a printer: 1 Select the Printer List icon. The Printer List window is displayed: 2 Click Add Printer. The Printer List window displayed. 3 Select LPR Printers using IP. 4 In the LPR Printer's Address field, enter the IP address of the Print Server.
WPS870G User Guide Section 6: Internet Printing Protocol (IPP) This section covers the Internet Printing Protocol for the WPS870G. Overview Your WPS870G uses a special protocol, IPP (Internet Printing Protocol), to allow remote printing to any printer on your network, or if your network allows, from anywhere on the Internet. To gain access to the IPP feature, you must install the IPP software on computers not running Windows 2000 or XP (they already include the necessary software).
User Guide WPS870G IPP Client Configuration – Windows 98SE/ME To configure the IPP client in Windows 98SE/ME: 1 Navigate to the program by clicking Start > Programs > IPP Port Monitor > Add IPP Port. The Configure IPP Port window is displayed: 2 Enter the IP Address or URL of the IPP Server. If using a router with forwarding capabilities, then enter the router’s IP address. If you are assigned a public IP address from your ISP, enter that IP address.
WPS870G User Guide The AddPort window is displayed: 6 Either select an existing printer to use the new port and click OK, or Click the Add New Printer button to create a new printer to use the IPP port. This will start the Add Printer wizard. Follow the prompts to complete the process. Ensure that the new printer uses the IPP port. Installation is now complete. To create additional IPP Ports, repeat the entire procedure. Note: The Proxy Server and other options are set individually for each IPP Port.
WPS870G User Guide The Locate your Printer window is displayed: 3 Select Connect to a printer on the Internet or on your intranet and enter the URL of the WPS870G as follows: ip_address represents the IP address of the IPP Server and 631 is the port number. Port 1 (Parallel) ip_address:631/ipp/P1 Port 2 (USB) ip_address:631/ipp/P2 Note: These entries are case sensitive. They must be entered as shown, with "ipp" in lower case, and P1 and P2 in UPPER case.
WPS870G User Guide Changing the IPP Port Settings After the IPP port is created, you can access the Configure IPP Port window using the Windows Port Settings button: 1 Open the Printers folder by clicking Start > Settings > Printers. 2 Right-click the IPP Printer and select Properties. 3 Locate and click Port Settings (Details or Port tab, depending on your version of Windows).
User Guide WPS870G Section 7: Troubleshooting This section describes some situations that may arise and the solutions to them. Contact Information If you encounter printing difficulties, please refer to the appropriate section. If, after following the advice below and the Wireless Print Server still does not function properly, please access our website at http://www.motorola.com/broadband/consumers for the latest information. You can also reach us 7 days a week, 24 hours a day at 1-877-466-8646.
WPS870G User Guide Ensure that the computer used for configuration has the TCP/IP network protocol installed. Test its network connection by seeing if you can locate other LAN devices from the computer. (For example, Use Network Neighborhood and try to browse the network.) Note: you must power off the Wireless Print Server before connecting or disconnecting the LAN cable when switching between wireless and wired interfaces.
User Guide WPS870G My EPS file does not print with the correct fonts. This is a problem that occurs in some application programs. Try downloading the fonts contained in the EPS file before printing the saved EPS file. I cannot select the "Remaining from:" item in the print dialog box. If you have selected the Layout value, "2 Up," or "4 Up," you cannot access the Remaining from item. Choose other selections. A cover page prints either on the first or the last page of the document.
WPS870G User Guide Windows Printing Solutions The Installation Wizard cannot detect my Print Server in Windows XP. You may need to disable your built-in firewall in Windows XP. You must be logged on to your computer with an administrator account in order to enable/disable the firewall. Follow the directions here: http://www.microsoft.com/windowsxp/home/using/howto/homenet/icf.asp I cannot print in Windows XP. You may need to disable your built-in firewall in Windows XP.
User Guide WPS870G 3 Enter a dummy value such as shown for the “Network path or queue name.” Select No for "Do you print for MS-DOS programs?" and click Next. 4 The printer wizard displays a message stating that "The Network Printer is off-line". This is OK. Continue the Add Printer Wizard until finished. If prompted about sharing the printer, do not enable Sharing. 5 Once finished, navigate to the Printers folder (Start > Settings > Printers).
WPS870G User Guide 6 Right-click the Printer and select Properties, then the Details tab, as shown below. 7 Click Add Port. On the Add Port window, select Other, then Printer Server, as the port to add, as shown below.
User Guide 8 Click OK. The Configure PrintServer window is displayed: 9 Click Browse, select the desired Wireless Print Server, and click OK. WPS870G 10 Click OK to return to the Printers folders and right-click on the Printer. Ensure that the “Work Offline” option is NOT checked. The Printer should no longer be grayed out, and is ready for use. Note: The windows shown above are from Windows 98. Other versions of Windows may look slightly different, but the process is identical.
WPS870G 3 Select the Ports tab. 4 Uncheck the Enable bidirectional support checkbox. 5 Click OK. User Guide When printing from some software applications such as PowerPoint, it takes a long time and the printout is incorrect. The problem is due to the printer, which is configured to Start printing after the first page is spooled. To change this setting: 1 Navigate to Start > Settings > Printers and click and highlight your printer.
User Guide 2 Right-click the Wireless Print Server's Printer, and select Properties. 3 On the Details tab, click Capture. WPS870G The Capture Printer Port window is displayed: 4 Select the Device, normally LPT1 (parallel port 1). Enter or select the Path to the printer: \\printer_name\P1 Where printer_name is the actual name of your printer. The printer_name is MOT appended with the last 7 digits of the device’s MAC address (see the MAC label on the bottom of your device).
WPS870G User Guide I have set up IPP Printing using my router but can no longer print. If your ISP uses a DHCP server to assign you an IP address, it is likely that the IP address has changed. Reconfigure your IPP Printer Port to use the new IP address. See Section 6: Internet Printing Protocol (IPP) for details on how to configure.
User Guide WPS870G Unix® Troubleshooting Print Server is not recognized. Check the following: The network cable is OK. There are no routers between the Print Server and the UNIX host during IP address assignment. There are no NetWare File Servers without TCP/IP support between the Print Server and the UNIX host. You have used the correct hardware address, as shown on a sticker on the base of the device. Use the ping command to see if the Print Server is a valid device on the network.
WPS870G User Guide Appendix A: Specifications General Specifications Wireless Print Server WPS870G Power Consumption 5.5w max. External Power Adapter 12V DC LEDs 4 Parallel Port 1 Centronic female DB-25 connector USB Port (1.1 & 2.0) 1 Ethernet Connector 10/100BaseT FCC / CE FCC, CE.
WPS870G User Guide Pin Signal Name Direction 8 +Data 6 To printer 9 +Data 7 To printer 10 - ACK To Server 11 + Busy To Server 12 + Paper End To Server 13 + Select To Server 14 - Auto Feed To printer 15 - Error To Server 16 - Init To printer 17 - Select In To printer 18-25 GND Ground Protocol Support Model TCP/IP NetBEUI AppleTalk WPS870G √ √ √ Feature Support Model HTTP Setup E-mail Printing IPP Support AutoIP WPS870G √ √ √ √ PAGE 83
WPS870G User Guide Appendix B: Windows Server Configuration Windows NT 4.0 Server If using Windows NT 4.0, Microsoft TCP/IP Printing Support must be installed. If it is already installed, add a TCP/IP Remote Printer, as described below. Otherwise, install TCP/IP printing support and then add a TCP/IP Remote Printer. Adding TCP/IP Printing Support 1 Navigate to Start > Settings > Control Panel > Network. 2 Click the Service option and ensure that Microsoft TCP/IP Printing is enabled.
User Guide WPS870G Windows 2000/2003 Server 1 Click Start > Settings > Printer and start the Add Printer wizard. 2 Select Network Printer then click Next to browse for the Wireless Print Server. 3 Locate and double-click the Wireless Print Server, select the desired port and click Next. The Connect to Printer message is displayed: Windows 2000 Message Windows 2003 Message 4 Click OK and select the correct Manufacturer and Model for this printer.
WPS870G User Guide Appendix C: Unix Systems Overview Your Wireless Print Server supports the LPD Unix printing method, which is supported by all common Unix systems. You must configure both the Wireless Print Server itself and your Unix system, as described in the following sections. Wireless Print Server IP Address Configuration Because it supports dynamic IP address allocation using DHCP or BOOTP, the Wireless Print Server ships with an IP address of 0.0.0.0. This is NOT a valid IP address.
WPS870G User Guide LPD Configuration Configuration for the most common platforms is described below. LPD on IBM AIX 4.15 Before proceeding, ensure that the Wireless Print Server has been assigned an IP address. To setup your AIX system for LPD printing, perform the following steps. 1 Add the Wireless Print Server to /etc/hosts.lpd, using the name you assigned to the Wireless Print Server.
WPS870G User Guide LPD on System V Before beginning LPD Setup, ensure that an IP address has been assigned to the Wireless Print Server. Keep the following points in mind: The remote host name is the name of the Wireless Print Server. The remote printer name is the print queue name for the Logical Printer. Logical printers also need to be configured on the Wireless Print Server itself. If your UNIX asks for the LPD type, be sure to identify the service type as BSD.
User Guide WPS870G Adding Remote Printers A remote printer is added by inserting the following line in the /etc/printcap file. Note: The entry is really one line, but can be entered as shown. Use a TAB character where shown. Printer_name|Remote_Printer_Alias:\ [TAB] :lp=:\ [TAB] :rm=PS_NAME:\ [TAB] :rp=Logical_Printer_name:\ [TAB] :sd=Spooler_directory:\ [TAB] :mx#0: Where: Printer_name is the Print Queue name used to store jobs for the corresponding logical printer.
WPS870G User Guide Field Data Name Enter a name for this printer Spool Directory /var/spool/lpd/name_of_printer File Limit 0 (no limit) Remote Host Name or IP address of Wireless Print Server for example, MOT000014 Note: host file entry is required to use the name instead of IP address Remote Queue Ln Where n is the Logical Printer number By default, L1 is port 1, and L2 is port 2. 5 Save this data and exit the Printer Configuration.
WPS870G User Guide LPD on BSD Before continuing, ensure that an IP address has been assigned to the Wireless Print Server. Remember the following: The remote host name is the name of the Wireless Print Server. The remote printer name is the logical printer (for example, L1) on the Wireless Print Server. If asked for the LPD type, enter the service type as BSD.
WPS870G User Guide Where: Printer_name is the Print Queue name used to store jobs for the corresponding logical printer. PS_NAME is the Wireless Print Server name defined in /etc/hosts. Logical_Printer_name is the logical printer name on the Wireless Print Server (for example, L1). Spooler_directory is the directory created.
User Guide WPS870G Appendix D: NetWare Overview The Print Server must be configured as a valid device on your TCP/IP network. This printing method uses LPR over TCP/IP, not the Netware protocol. To use NDPS (Novell® Distributed Printing Services), the Novell server must be running Novell NetWare 5, and the computers (clients) must be running IntranetWare Client V2.2. or later. The following procedure is designed to enable Public Access Printing under NDPS.
WPS870G User Guide 7 Browse the Database Volume and select where you want the NDPS Manager database to be assigned (for example, TECH_50_SYS.TeSupp in the window above). 8 Click Create. The new NDPS Manager will appear in the main browser window. Starting NDPS To start the NDPS Manager, enter the following command at the console: LOAD NDPSM then select the NDPS Manager object. To start the NDPS Manager whenever you bring up the server, add a command similar to the following to your server's AUTOEXEC.
User Guide WPS870G 7 Select Remote (LPR on IP) in the Connection Type. 8 Click Next to display the Configure Port Handler window. 9 In the Host address IP field, enter the IP Address previously assigned to the Print Server device. 10 In the Printer Name field, enter the Logical Port name on the Print Server (L1 for port 1, L2 for port 2). 11 Click Finish then select appropriate drivers for appropriate versions of Windows as required.
WPS870G User Guide Glossary A Access Point (AP) A device that provides wireless LAN connectivity to wireless clients (stations). Adapter A device or card that connects a computer, printer, or other peripheral device to the network or to some other device. A wireless adapter connects a computer to the wireless LAN. Address Translation See NAT. Ad-Hoc Network A temporary local area network connecting AP clients together, usually just for the duration of the communication session.
User Guide WPS870G BSS Basic Service Set. A configuration of Access Points that communicate with each other without resorting any infrastructure. Also known as Ad-Hoc networks. Also see ESS. C Channel The part of the wireless spectrum you use when transmitting or receiving wirelessly. Hint: Channel 1 can be a poor choice since it is close to the frequency used by cordless phones.
WPS870G User Guide DHCP A Dynamic Host Configuration Protocol server dynamically assigns IP addresses to client hosts on an IP network. DHCP eliminates the need to manually assign static IP addresses by “leasing” an IP address and subnet mask to each client. It enables the automatic reuse of unused IP addresses: A DHCP server at the system headend assigns a public IP address to a router. Routers contain a built-in DHCP server that assigns private IP addresses to clients. DMZ DeMilitarized Zone.
User Guide WPS870G to a spreading ratio. The chipping code is a redundant bit pattern for each bit that is transmitted, which increases the signal's resistance to interference. If one or more bits in the pattern are damaged during transmission, the original data can be recovered due to the redundancy of the transmission. Dynamic IP Address An IP address that is temporarily leased to a host by a DHCP server. The opposite of Static IP Address.
WPS870G User Guide G Gateway A device that enables communication between networks using different protocols. See also router. GUI Graphical User Interface H Hexadecimal A base-sixteen numbering system that uses sixteen sequential numbers (0 to 9 and the letters A to F) as base units before adding a new position. On computers, hexadecimal is a convenient way to express binary numbers. Host In IP, a host is any computer supporting end-user applications or services with full two-way network access.
WPS870G User Guide Internet A worldwide collection of interconnected networks using TCP/IP. IP Internet Protocol is a set of standards that enable different types of computers to communicate with one another and exchange data through the Internet. IP provides the appearance of a single, seamless communication system and makes the Internet a virtual network. IP Address A unique 32-bit value that identifies each host on a TCP/IP network. TCP/IP networks route messages based on the destination IP address.
WPS870G User Guide MTU The Maximum Transmission Unit is the largest amount of data that can be transmitted in one discrete message on a given physical network. The MTU places an upper bound limit on the size of a message that can be transferred by the network in a single frame. Messages exceeding the MTU must be fragmented before transmission, and reassembled at the destination. Multicast A data transmission sent from one sender to multiple receivers. See also broadcast and unicast.
User Guide WPS870G reachable over the network. It also stands for “Packet InterNet Groper.” Port Triggering A mechanism that allows incoming communication with specified applications. PPP Point-to-Point Protocol is used to transport other protocols, typically for simple links over serial lines. It is most commonly used to access the Internet with a dial-up modem. PPPoE Point-to-Point Protocol over Ethernet. Used by many DSL Internet Service Providers for broadband connection.
WPS870G User Guide Roaming The ability to transfer your wireless session from one AP to another AP seamlessly. ROM Read-Only Memory. Router On IP networks, a device connecting at least two networks, which may or may not be similar. A router is typically located at a gateway between networks. A router operates on OSI network Layer 3. It filters packets based on the IP address, examining the source and destination IP addresses to determine the best route to forward them.
WPS870G User Guide Subnet Mask A methodology that determines what the router will examine for the destination of an IP address. A router delivers packets using the network address. Switch On an Ethernet network, a switch filters frames based on the MAC address, in a manner similar to a bridge. A switch is more advanced because it can connect more than two segments.
WPS870G User Guide Unicast A point-to-point data transmission sent from one sender to one receiver. This the normal way you access websites. See also multicast. UPnP Universal Plug and Play USB Universal Serial Bus is a computer interface for add-on devices such as printers, scanners, mice, modems, or keyboards. USB supports data transfer rates of 12 Mbps and plug-and-play installation. You can connect up to 127 devices to a single USB port.
WPS870G User Guide WEP Wired Equivalent Privacy encryption protects the privacy of data transmitted over a wireless LAN. WEP uses keys to encrypt and decrypt transmitted data. The access point must authenticate a client before it can transfer data to another client. WEP is part of IEEE 802.11b. Wi-Fi® Wireless fidelity (pronounced why'-fy) brand name applied to products supporting IEEE 802.11b/g. WLAN Wireless LAN. WPA Wi-Fi Protected Access.
Visit our website at : www.motorola.