6864110R13-O_cvr.qxd 2/21/02 12:39 PM Page 1 Motorola, The Stylized M logo, Intelligence Everywhere, Professional Radio - As Dedicated As You Are, CDM Series, CDM1550•LS+, and Call Alert are trademarks of Motorola, Inc. LTR is a mark of E.F. Johnson Company. PassPort is a mark of Trident Micro Systems. © 2002 Motorola, Inc. All rights reserved. Printed in U.S.A.
6864110R13-OTOC.fm Page 1 Thursday, April 4, 2002 5:52 PM Computer Software Copyrights . . . . . . . . . 6 Safety . . . . . . . . . . . . . . . . . . . . . . . . . . . . 7 User Safety, Training, and General Information . . . . . . . . . . . . . . . . . . 7 Compliance with RF Energy Exposure Standards. . . . . . . . . . . . . . . . . . . . . . . . . . 7 Operational Instructions and Training Guidelines . . . . . . . . . . . . . . . . . . . . . . . . . 8 Transmit and Receive . . . . . . . . . . . . . .
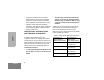
CONTENTS 6864110R13-OTOC.fm Page 2 Thursday, April 4, 2002 5:52 PM Programmable Buttons . . . . . . . . . . . . . . . 24 Audio Indicators for Programmable Buttons . . . . . . . . . . . . . . . . . . . . . . . . 28 Getting Started . . . . . . . . . . . . . . . . . . . . 29 Turning the Radio On or Off . . . . . . . . . . . Adjusting the Volume . . . . . . . . . . . . . . . . Selecting a Trunked Zone and Talkgroup. . . . . . . . . . . . . . . . . . . . . . Sending a Trunked Call . . . . . . . . . . . . . .
6864110R13-OTOC.fm Page 3 Thursday, April 4, 2002 5:52 PM Editing a Radio Call List K (LTR Trunked and Conventional Operation Only) . . . . . . . . . . . . . . . . . . . . Name and Call Tone Tagging (LTR Trunked and Conventional Operation Only) . . . . . . . . . . . . . . . . . . . . To Tag a Specific User’s Name. . . . . . To Tag a Type of Radio Call . . . . . . . . 55 CONTENTS Receiving a Call Alert Page (LTR Trunked and Conventional Operation Only). . . . . . . . . . . . . . . . . . . . .
CONTENTS 6864110R13-OTOC.fm Page 4 Thursday, April 4, 2002 5:52 PM All Group Scan (LTR Trunked Operation Only) . . . . . . . . . To Start or Stop All Group Scan Operation through a Preprogrammed Button . . . . . . . . . . . . . . . . . . . . . . . . . To Start or Stop All Group Scan Operation Through the Menu . . . . . . . System Scan G (LTR Trunked and Conventional Operation Only) . . . . . . . . . . . . . . . . . . . . When System Scan is Enabled . . . . . . To Start or Stop a System Scan Operation. . .
864110R13-OTOC.fm Page 5 Thursday, April 4, 2002 5:52 PM Audio/Tone Settings . . . . . . . . . . . . . . . . 87 Utilities . . . . . . . . . . . . . . . . . . . . . . . . . . . 89 Selecting the Display Language (LTR Trunked and Conventional Operation Only) . . . . . . . . . . . . . . . . . . . . 93 CONTENTS To Record a Voice Memo using the Menu . . . . . . . . . . . . . . . . . . . . . . . . . . 80 Recorded Message Playback . . . . . . . . . .
6864110R13-OTOC.fm Page 6 Thursday, April 4, 2002 5:52 PM CONTENTS COMPUTER SOFTWARE COPYRIGHTS The Motorola products described in this manual may include copyrighted Motorola computer programs stored in semiconductor memories or other media. Laws in the United States and other countries preserve for Motorola certain exclusive rights for copyrighted computer programs, including, but not limited to, the exclusive right to copy or reproduce in any form the copyrighted computer program.
SAFETY USER SAFETY, TRAINING, AND GENERAL INFORMATION READ THIS IMPORTANT INFORMATION ON SAFE AND EFFICIENT OPERATION BEFORE INSTALLING AND USING YOUR MOTOROLA MOBILE TWO-WAY RADIO IN A VEHICLE OR AS A CONTROL STATION. receiving (listening) or in standby mode. Note that the approved, supplied batteries for this radio are rated for a 5-5-90 duty cycle (5% talk5% listen - 90% standby), even though this radio complies with the FCC occupational exposure limits at duty cycles of up to 50% talk.
• Australian Communications Authority Radiocommunications (Electromagnetic Radiation - Human Exposure) Standard 2001 (applicable to wireless phones only) • ANATEL, Brasil Regulatory Authority, Resolution 256 (April 11, 2001) “additional requirements for SMR, cellular and PCS product certification.
Mobile Antennas Fixed Site Antennas • Install antennas at the center of the roof or the center of the trunk deck. These mobile antenna installation guidelines are limited to metal body vehicles.
SAFETY ELECTROMAGNETIC INTERFERENCE/COMPATIBILITY NOTE: Nearly every electronic device is susceptible to electromagnetic interference (EMI) if inadequately shielded, designed or otherwise configured for electromagnetic compatibility.
Driver Safety Potentially Explosive Atmospheres Check the laws and regulations on the use of radios in the area where you drive. Always obey them. Turn off your radio prior to entering any area with a potentially explosive atmosphere. Sparks in a potentially explosive atmosphere can cause an explosion or fire resulting in bodily injury or even death. When using your radio while driving, please: • Give full attention to driving and to the road.
SAFETY National Fire Protection Association standard, NFPA 58, for storage, handling, and/ or container information. For a copy of the LPgas standard, NFPA 58, contact the National Fire Protection Association, One Battery Park, Quincy, MA.
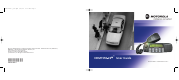
INTRODUCTION Welcome to Motorola’s CDM Series family of radio users. The CDM1550•LS+, the Intelligent Radio, combines the very latest in two-way technology while delivering outstanding functionality at the touch of a button. The CDM1550•LS+ mobile radio operates on PassPort and LTR trunked and conventional radio systems. TRUNKED RADIO SYSTEMS PassPort is an enhanced trunking protocol developed by Trident Micro Systems that supports wide area dispatch networking.
by making repeaters available to all users after every transmission. CONVENTIONAL RADIO SYSTEMS Conventional radio systems typically refers to unit-to-unit communications through a single channel. Conventional systems also allow radio users to extend communication coverage by relaying their messages through a repeater. To ensure coordinated use by multiple talkgroups, each radio user must monitor the channel or repeater before transmitting to verify that the system is not currently busy.
PassPort Zone Features (Cont.
INTRODUCTION Notes 16 English
03_Radio Overview.
03_Radio Overview.fm Page 18 Tuesday, April 2, 2002 5:48 PM RADIO OVERVIEW On/Off/Volume Control Knob Turns the radio on or off, and adjusts the radio’s volume. Double flashing green Indicates System, All Group Scan or PassPort Group Scan Operation LED Indicators Indicates power-up, scan, or receipt of a talkgroup or selective call (see table below): LED Color Left Button v and Right Button w • Used to scroll through the preprogrammed trunked and conventional zones.
03_Radio Overview.fm Page 19 Tuesday, April 2, 2002 5:48 PM Push-to-Talk (PTT) Button Exit Up Menu/ Select Left Down Right RADIO OVERVIEW Press and hold down this button to talk; release it to listen. Menu Buttons Microphone When sending a message, hold the microphone 1 to 2 inches (2.5 to 5 cm) away from your mouth, and speak clearly into the microphone. Menu/Select Button ) Used to enter Menu Mode. When in Menu Mode, this button is used to make menu selections.
03_Radio Overview.fm Page 20 Tuesday, April 2, 2002 5:48 PM RADIO OVERVIEW Display Indication G When the green LED is blinking, indicates that the System, PassPort Scan, or All Group Scan feature has been activated. The top display row displays menu and radio status information: Symbol A X-Pand B Power Level C Monitor D F Call Received 20 Scan When the green LED is off, indicates that non-prioritized Auto Group Scan has been activated.
03_Radio Overview.fm Page 21 Tuesday, April 2, 2002 5:48 PM J Talkaround K Indication You are not transmitting through a repeater (Conventional operation only). A Program list is being edited. Programming Mode U Clock M Signal Strength N PassPort Zone OPTIONAL DTMF MICROPHONE (RMN4026) Your radio may be ordered with an optional DTMF (Dual-Tone Multi-Frequency) microphone that has a direct-entry keypad.
RADIO OVERVIEW 03_Radio Overview.fm Page 22 Tuesday, April 2, 2002 5:48 PM DTMF Microphone Keypad 1 4 7 * A * 2 5 8 0 B * 3 6 9 # C * The keypad is used for: • Dialing a phone number • Entering a specific radio ID number when making an MDC radio call • Entering information when programming radio call, scan, and phone lists. • Directly accessing preprogrammed features ( , page 24]) , and buttons [see Each key can generate several different characters.
03_Radio Overview.
RADIO OVERVIEW 03_Radio Overview.fm Page 24 Tuesday, April 2, 2002 5:48 PM PROGRAMMABLE BUTTONS Your radio has several programmable buttons that can be programmed by your dealer as shortcuts to various radios’ features. Programmable buttons include: • The four front buttons (P1, P2, P3, and P4). • The three buttons (A. B, and C) of the optional DTMF microphone.
03_Radio Overview.fm Page 25 Tuesday, April 2, 2002 5:48 PM Feature Indicator Short Press Home Channel — Backlight Control — Monitor § C Enter/Exit permaOpen Squelch. nent monitor mode. Phone D Power Level B Radio Call LED Color Repeater/ Talkaround § J G Hold Down Page Button Directly access your favorite trunked zone and talkgroup or conventional channel.† — 35 Turn on your radio backlight.† — — Continually monitor channel. — Directly access Phone mode.
03_Radio Overview.fm Page 26 Tuesday, April 2, 2002 5:48 PM RADIO OVERVIEW Programmable Features (Continued) Feature Indicator Site/MIN View* — Displays the PassPort site number on which the unit is registered, the home site and unit’s MIN (Mobile Identity Number).† — 41 Speed Dial — Quickly access speed dial phone list.† — 71 Voice Storage Record/Playback — Playback recorded messages. — 82 Voice Storage Playback Exit — Exit Voice Storage Play Back mode.
03_Radio Overview.fm Page 27 Tuesday, April 2, 2002 5:48 PM Programmable Features (Continued) Indicator Short Press Long Press Hold Down Page Button Direct Channel Access — Direct access to a trunked talkgroup or conventional channel through a Smart Microphone † Horn and Lights — Toggles external alarm feature or cancels a triggered alarm.† — 35 Auxiliary Control (1/2) — Activates or deactivates a pin on the accessory connector.† — — Status§ — Direct entry to the message menu.
03_Radio Overview.
04_GetStarted.fm Page 29 Tuesday, April 2, 2002 4:38 PM ADJUSTING THE VOLUME GETTING STARTED TURNING THE RADIO ON OR OFF On/Off/Volume Control Knob OFF Push the On/Off/ Volume Control knob. Push the On/Off/ Volume Control knob until you hear a click and the display clears. If power-up is successful, you hear the Self-Test Pass Tone –or– 1 Hold down the Volume Set button (see page 26). You hear a continuous tone. 2 Turn the On/Off/Volume Control knob to the desired volume level.
04_GetStarted.fm Page 30 Tuesday, April 2, 2002 4:38 PM SELECTING A TRUNKED ZONE AND TALKGROUP GETTING STARTED Note: Throughout this manual there are features listed as trunked and conventional. Trunked indicates the feature functions in both PassPort and LTR zones unless otherwise noted. Conventional indicates the feature functions in Conventional zones only. Up to 15 PassPort and/or LTR trunked zones (containing 16 talkgroups each) can be programmed into your radio.
04_GetStarted.fm Page 31 Tuesday, April 2, 2002 4:38 PM 3 4 With the PTT button depressed, speak clearly into the microphone Release the PTT button to listen. DIRECT ZONE ACCESS The Direct Zone Access feature offers an alternative way of accessing a trunked or conventional zone. To Activate Direct Zone Access 1 Press the preprogrammed Direct Zone Access button (see page 27). Up to a total of 16 conventional channels, in one or more conventional zones, can be programmed into your radio.
04_GetStarted.fm Page 32 Tuesday, April 2, 2002 4:38 PM To Start Activate Direct Channel Access Using the DTMF microphone: Using the radio’s programmable buttons: 1 1 Press the preprogrammed Direct Channel button. The current talkgroup or channel flashes intermittently. The current talkgroup or channel flashes intermittently. GETTING STARTED YR TKGP ALIAS 2 3 YR TKGP ALIAS 2 Up or down arrow y or z to select the appropriate Trunked talkgroup or channel.
04_GetStarted.fm Page 33 Tuesday, April 2, 2002 4:38 PM SENDING A CONVENTIONAL CALL Note: In the United States, FCC regulations require you to monitor the conventional channels before sending a call. The monitor feature (see page 25) can be accessed through one of your programmable buttons. RECEIVING A TRUNKED OR CONVENTIONAL CALL Turn your radio on. 2 Adjust your radio’s volume (see page 29).
04_GetStarted.fm Page 34 Tuesday, April 2, 2002 4:38 PM REPEATER OR TALKAROUND J MODE (CONVENTIONAL OPERATION ONLY) Talkaround Mode enables you to communicate with another radio when either: • The repeater is not operating GETTING STARTED –or– • Your radio is out of the repeater’s range but within communicating distance of another radio. Note: The J symbol appears on the LCD screen when Talkaround Mode is selected.
04_GetStarted.fm Page 35 Tuesday, April 2, 2002 4:38 PM CALL LIGHT HORN AND LIGHTS (TRUNKED OPERATION ONLY) When you are away from your vehicle, the Horn and Lights feature notifies you when a call is received by activating your vehicle’s horn and lights. This feature can be triggered by a call alert in LTR mode. It also can be associated with call light in LTR and PassPort mode.
04_GetStarted.fm Page 36 Tuesday, April 2, 2002 4:38 PM To Activate Horn and Lights Programmed with Call Alert (LTR Trunked Operation Only) 1 Press the preprogrammed Horn and Lights button. When you receive a call alert, you can see the preprogrammed name or ID of the calling radio: GETTING STARTED YOUR NAME OR ID Note: 2 If preprogrammed, alert tones (either once or continuously) may sound. Press any buttons on the radio or the DTMF microphone to deactivate it.
04_GetStarted.fm Page 37 Tuesday, April 2, 2002 4:38 PM To cancel Remote Monitor, press any button on the radio. Note: Remote monitor automatically ceases after one transmit and one receive cycle.
04_GetStarted.
PASSPORT TRUNKING PassPort is an enhanced, wide-area trunking protocol developed by Trident Micro Systems. Up to 128 trunked sites can be linked together to form one PassPort system, which means that your communications can extend far beyond the reach of a single trunked site. SEAMLESS ROAMING Initial Registration Before communications with your talkgroup can begin, your radio needs to register on the PassPort system.
Note: If the radio performs a more extensive frequency search in order to attempt successful registration, you may see on the display: SEARCHING 4 Upon successful PassPort Registration, you see: REG SITE XXX Note: Your radio sounds a “Low-High” tone upon successful PassPort System registration. The XXX number indicates the site within the PassPort system on which you have registered.
3 The selected PassPort talkgroup alias appears and remains on the display. TLKGRP ALIAS The display indicates the Home Site Number (HSID) and Mobile Identity Number. IAM XXX-YYYYY XXX indicates the HSID, YYYYY indicates the MIN. SITE/MIN VIEW There may be circumstances when you want to view the number of the PassPort site on which you are registered as well as your Mobile Identity Number (MIN). Note: This message can be activated if the radio is not registered.
ROAM REQUEST Because of the RSSI feature, the CDM1550•LS+ radio automatically roams to a different site when the signal from the registered site becomes too weak for quality communication. This RSSI threshold is programmed by your dealer. However, if you believe the signal strength would be better on another site, you may want to manually initiate the roaming process. This feature is called Roam Request. To Start a Roam Request 1 Press the preprogrammed Roam Request button (see page 25).
4 The selected PassPort talkgroup alias appears and remains on the display: TLKGRP ALIAS To Cancel a Roam Request 1 Press and hold the preprogrammed Roam Request button (see page 25) again. You see: Note: Cncl Roam Req TROUBLESHOOTING While in PassPort zones, there are some specific display messages that indicate you should contact your dealer for assistance. Message What it Means “Invalid Group ID” Your dealer needs to verify talkgroup programming in your radio or the PassPort system.
PASSPORT TRUNKING Notes: English 44
RADIO CALLS MAKING A SELECTIVE CALL (LTR TRUNKED AND CONVENTIONAL OPERATION ONLY) You can make a selective call to a particular radio or to a group of radios, as programmed by your dealer. –or– Enter with the DTMF microphone the ID number of the radio you want to call. 7 Press the PTT button to send the call. To Make a Selective Call • The radio sounds a continuous tone, if programmed by your dealer. Press the preprogrammed Radio Call button (see page 25), and proceed to step 4.
RADIO CALLS RECEIVING A SELECTIVE CALL F To Send a Call Alert Page (LTR TRUNKED AND CONVENTIONAL OPERATION ONLY) Press the preprogrammed Radio Call button (see page 25) and proceed to step 4: When you Receive a Selective Call The display shows F and the preprogrammed name or ID of the calling radio. 2 y or z until Radio Call • The LED indicator flashes yellow, if programmed by your dealer. 3 ) to select Radio Call • You hear an alert tone.
you see: RECEIVING A CALL ALERT PAGE and the preprogrammed name or ID alternating on the display. • The LED alternates between a solid yellow and solid red while the call is in process. 8 If the Call Alert page is received by the target radio, you see: Acknowledge If not received, you see: No Acknowledge • The radio sounds a short alert tone if, programmed by your dealer.
RADIO CALLS RADIO CHECK (LTR TRUNKED AND CONVENTIONAL OPERATION ONLY) Radio Check allows you to determine if a radio is within the range of the trunked system and turned on, without disturbing the user of that radio. This feature can also be used when attempts with Selective Call and Call Alert fail. To Perform a Radio Check 1 ) to enter menu mode.
SENDING A MESSAGE To Send a Status ) to enter Menu Mode. 2 y or z until Status 3 ) to select Status 4 y or z to locate the desired status in the preprogrammed list. –or– when using the enhanced keypad microphone only, enter the number of the status you wish to send. –or– if programmed by your dealer (see page 27), (CONVENTIONAL OPERATION ONLY) This feature gives you the ability to send and receive preprogrammed messages.
RADIO CALLS 4 y or z to locate the desired message in the preprogrammed list. –or– when using the enhanced keypad microphone only, enter the number of the message you wish to send. –or– if programmed by your dealer (see page 27), press the button that has been preprogrammed for a specific message. RECEIVING A MESSAGE (CONVENTIONAL OPERATION ONLY) When your radio receives a message: • • You hear two alert tones. The yellow LED indicator flashes.
• • Note: All the choices listed above are dealer preprogrammed. See your dealer for more details.
RADIO CALLS • Timestamp of the Emergency Alert (example, 03:55). E 03:55 • Flashing the E icon (while decoding only; lights steady when encoding) Multiple Queued Emergencies Clearing the existing displayed Emergency shows the next in the queue, if one exists.The display updates and shows “Emerg (queued number) of (total number)”. If no additional Emergencies are queued, the radio exits Emergency mode and resumes normal mode. Three Minute Timer Responding to an Emergency starts a threeminute timer.
SENDING AN EMERGENCY REMOTE MONITOR (CONVENTIONAL OPERATION ONLY) (CONVENTIONAL OPERATION ONLY) To Clear an Emergency Alert As your radio responds to an Emergency Alert, only the Emergency Queue menu is available. 1 Press any button on the radio to cancel the Emergency Alert tone. 2 Press (or activate) an external pushbutton or foot switch. To access the Emergency Queue menu: 1 ) to enter Menu Mode.
RADIO CALLS SENDING AN EMERGENCY ALERT E (CONVENTIONAL OPERATION ONLY) A priority Emergency Alert can be sent to a specific radio or dispatch center by pressing: • • • A button preprogrammed by your dealer (see page 27). The foot switch A pushbutton accessory Emergency Alerts have priority over all other calls. The E symbol will appear on the display when your radio is in the Emergency Alert state.
The amount of time that the radio remains in receive mode or in transmit mode is set by the Remote Monitor Command and the time settings in the radio. When in this state, touching any button on the radio takes it out of the Remote Monitor mode. See your dealer for more details. Note: When your radio has been disabled by the base station, all controls will be inoperative except for the On/Off button.
RADIO CALLS 3 ) to select Program Lists 4 y or z until RadioCall List 5 ) to select RadioCall List 6 y or z until Edit Entry? 7 ) to select Edit Entry? NAME AND CALL TONE TAGGING (LTR TRUNKED AND CONVENTIONAL OPERATION ONLY) You can program your radio to sound a particular alert tone when a specific user is calling (name tone tagging), or when receiving a particular type of radio call (call tone tagging). Note: 8 y or z until you locate the desired entry. 9 ) to select the entry.
7 ) to confirm the selection, you see: 8 ( to return to Name Tone Set Name Tone Tag –or– Hold down ( to exit menu mode. To Tag a Type of Radio Call 7 ) to confirm the selection. 8 y or z until you see and hear the tone you want to use for this type of call. 9 ) to confirm the selection, you see: 10 ( to return to Call Tone Set RADIO CALLS 6 y or z until you see and hear the tone you want to use for this name. Call Tone Tag –or– Hold down ( to exit menu mode. 1 ) to enter menu mode.
RADIO CALLS Notes: 58 English