
User's Manual


Table Of Contents
- Declaration of Conformity
- Notes
- Important Safety Information
- Software Version
- Computer Software Copyrights
- Getting Started
- Identifying Radio Controls
- Identifying Status Indicators
- Receiving and Making Calls
- Advanced Features
- Radio Check
- Remote Monitor
- Scan Lists
- Scan
- Contacts Settings
- Call Indicator Settings
- Call Log Features
- Call Alert Operation
- Emergency Operation
- Text Messaging Features
- Privacy
- IP Site Connect
- Security
- Lone Worker
- Utilities
- Setting the Squelch Level
- Setting the Power Level
- Turning the Option Board Feature(s) On or Off
- Turning the Voice Operating Transmission (VOX) Feature On or Off
- Turning the Public Address System On or Off
- Turning the External Public Address System On or Off
- Controlling the Display Backlight
- Turning Horns/Lights On or Off
- Turning the Radio Tones/Alerts On or Off
- Setting the Tone Alert Volume Offset Level
- Turning the Talk Permit Tone On or Off
- Turning the LED Indicators On or Off
- Turning the Introduction Screen On or Off
- Accessing General Radio Information
- Keypad Microphone Features
- Using the Keypad
- Additional Advanced Features
- Selecting a Zone by Alias Search
- Initiating a Radio Check by Manual Dial
- Initiating Remote Monitor by Manual Dial
- Making a Private Call by Manual Dial
- Making a Group, Private or All Call with the Programmable Number Key
- Making a Group, Private, Phone or All Call by Alias Search
- Viewing an Entry in the Scan List by Alias Search
- Editing the Scan List by Alias Search
- Storing an Alias or ID from the Missed Call List
- Making a Call Alert by Manual Dial
- Text Messaging
- Dual Tone Multi Frequency (DTMF)
- Security
- Password Lock Features
- Accessories
- Appendix: Maritime Radio Use in the VHF Frequency Range
- Limited Warranty
- Notes
Getting Started
English
2
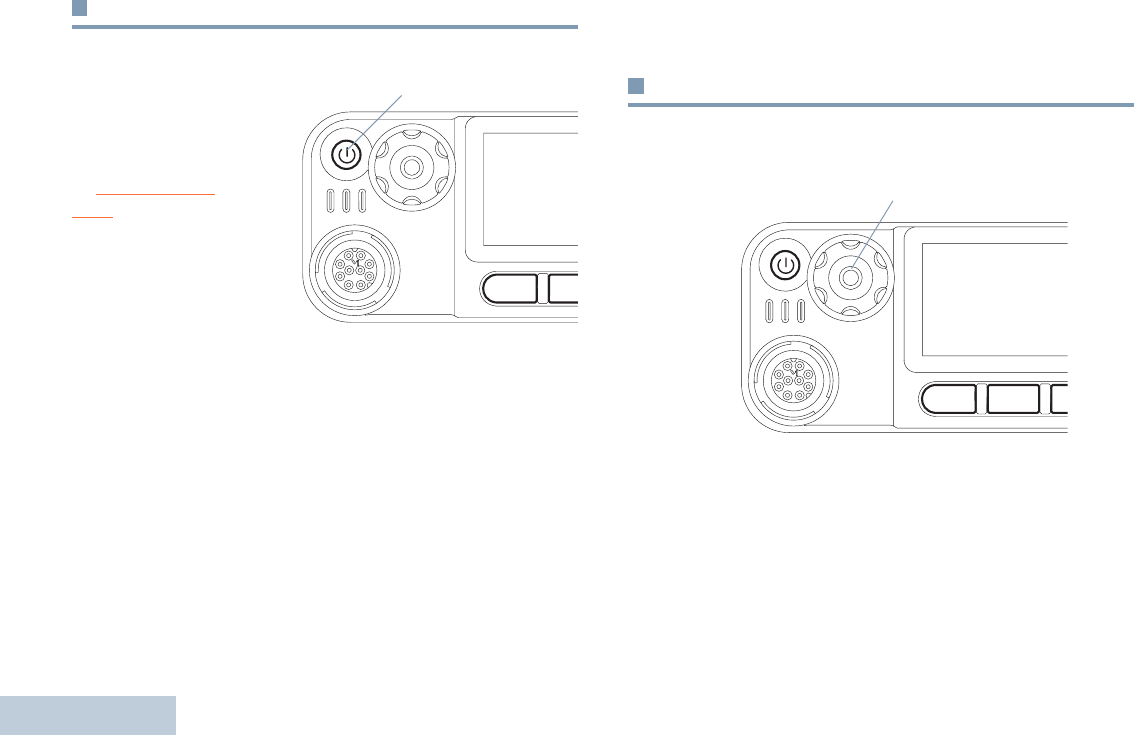
Powering Up the Radio
Press the On/Off
Button briefly. You see
Motorola and
MOTOTRBO (TM) on the
radio’s display
momentarily, followed
by Motorola once
morea welcome
message or welcome
image.
The green LED blinks
and the Home screen
lights up if the backlight
setting is set to turn on
automatically.
NOTE: The Home screen does not light up during a power up if
the LED indicators are disabled (see Turning the LED
Indicators On or Off on page 75).
A brief tone sounds, indicating that the power up test is
successful.
NOTE: There is no power up tone if the radio tones/alerts
function is disabled (see Turning the Radio Tones/
Alerts On or Off on page 73).
If your radio does not power up, contact your dealer.
To turn off the radio, press and hold the On/Off Button until you
see
Powering Down
on the radio’s display.
Adjusting the Volume
To increase the volume, turn the Volume Knob clockwise.
To decrease the volume, turn this knob counterclockwise.
NOTE: Your radio can be programmed to have a minimum
volume offset where the volume level cannot be turned
down fully. Check with your dealer or system
administrator for more information.
P 1 P 2 P 3 P 4
O K
MENU
On/Off Button
P 1 P 2 P 3 P 4
O K
MENU
Volume Knob