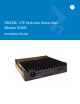
VML700 - LTE Vehicular Subscriber Modem (VSM) Installation Guide
VML700 - LTE VSM Installation Guide 6802987C90 Revision A June 2011
ii VML700 Installation Guide © 2011 by Motorola Solutions, Inc. All rights reserved. No part of this publication may be reproduced or used in any form, or by any electrical or mechanical means, without permission in writing from Motorola. This includes electronic or mechanical means, such as photocopying, recording, or information storage and retrieval systems. The material in this manual is subject to change without notice. The software is provided strictly on an “as is” basis.
Revision History Changes to the original manual are listed below: Change A Date Description Initial release
iv VML700 Installation Guide
Table of Contents Patents ........................................................................................................................... ii Warranty ........................................................................................................................ ii Legal Notice ................................................................................................................... ii Revision History .............................................................................
Table of Contents Chapter 3: Configuring and Monitoring the VML700 Introduction ................................................................................................................... 3-1 Prior to Configuration .................................................................................................... 3-1 The Configuration Wizard ............................................................................................. 3-2 Changing the Login Password ................................
About This Guide Introduction The VML700 LTE VSM Installation Guide provides general instructions for installing, setting up, operating, and troubleshooting the VML700. NOTE The names LTE VSM and VML700 are interchangeable and they are both used in this manual.
Chapter Descriptions Topics covered in this guide are as follows: • Chapter 1, VML700 Description provides the product overview. • Chapter 2, Installation provides unpacking instructions and all required procedures for installing the VML700. • Chapter 3, Configuring and Monitoring the VML700 provides the procedures that enable configuring the VML700 for best operation.
About This Guide vi The following conventions are used in this document: • Italics are used to highlight the following: • Chapters and sections in this and related documents • Dialog box, window and screen names • Drop-down list and list box names • Check box and radio button names • Bold text is used to highlight the following: • Key names on a keypad • Button names on a screen.
Safety Before installing/using this product, the installer/operator must be familiar with the RF energy awareness information and operating instructions in the “Product Safety and RF Energy Exposure Booklet” enclosed with the VML700 LTE VSM (Motorola Publication part number 6881095C99) to ensure compliance with Radio Frequency (RF) energy exposure limits. FCC Interference This device complies with Part 15 of the FCC Rules.
Chapter 1 VML700 Description The VML700 Unit The Motorola VML700 - LTE Vehicular Subscriber Modem (VSM) is a high/medium power infrastructure modem. The following model is available: • F4080A: LTE, EVDO, WiFi and GPS See Figure 1-1.
1-2 VML700 Installation Guide 1 3 2 1 Modem 2 LED Indicator Panel (Front Panel) 3 Connectors Panel (Back Panel - not shown) Figure 1-1 VML700 - General View For detailed specifications of the VML700 unit, see Appendix A: Specifications. Modem The modem has a Connectors panel (back panel) and a LED Indicator panel with On/Off button (front panel).
VML700 Description • USB 2.0 high speed– Micro AB type connector (HW ready) • Power – 9-pin DTYPE connector 1 2 3 4 5 1 6 RF SMA female type connector (LTE) RF SMA reversed female type connector (DIV/WiFi) RF TNC female type connector (EVDO) Figure 1-2 Connectors Panel 4 RF SMC female type connector (GPS) 5 LAN/Ethernet communication connector (RJ45) 6 Micro AB type connector (USB 2.
1-4 VML700 Installation Guide LED Indicator Panel with On/Off Button and SIM Card Door A set of six LEDs is used for diagnostics and testing of the unit (see Figure 1-3).
1-5 LED Indicators Functions Table 1-1 describes the functions of the LED indicators on the VML700 front panel.
1-6 VML700 Installation Guide
Chapter 2 Installation Unpacking and Inspecting the Shipment Unpack your shipment and check the contents to ensure that you have received all the specified items. Thoroughly inspect the equipment for shipping damage as soon as possible after delivery. Report any damage you find to your Motorola Customer Service representative immediately. Safety and General Information A properly installed VML700 unit minimizes service calls.
• Only qualified personnel may install communication equipment. • Ensure secure tightening of cable connectors. Install this product in a vehicle in accordance with the vehicle manufacturer’s guidelines and the instructions detailed in this manual. Use only the Motorola parts specified in this manual. Check the required mounting locations. It might be necessary to penetrate the bulkhead to reach the battery.
Planning is the key to fast, easy and safe installation. MPORTANT Take the following points into consideration when selecting a location and planning the installation. Installation Constraints Refer to the Safety Instructions in “Product Safety and RF Energy Exposure Booklet for Mobile Two-Way Radios in Vehicles or as Fixed Site Control” P/N 6881095C99. The LTE VML700 must be installed in the car’s trunk, on the floor or the side walls (cooling fins facing up, or to the side).
Figure 2-2 gives the VML700 dimensions. 1 1.71” 4.35cm 7.87” 20cm 8.07” 20.5cm VML700 - Dimensions Cables Routing • Before running a wire or drilling a hole, inspect the vehicle and determine how and where you intend to mount the antenna, modem, and the input/output device. • Plan wire and cable routing to provide maximum protection from overheating, battery acid, moving parts and sharp edges. • Keep cables away from ignition circuits to reduce noise pickup in the radio equipment.
• If you must drill holes, verify not to damage other wiring, break lines or gas lines. • When drilling a hole in the roof, take care not to snag the roof liner. • To prevent rusting after drilling, remove all metal burrs and residue, and completely clean the area to ensure the removal of all steel dust. • Insert rubber grommets in all drilled holes to protect cables.
Antennas Main Antenna The main antenna is constructed of three antenna types (LTE, EVDO and GPS) on a single mount. • Kit No. FAF5266A The antenna is provided with two short flexible coaxial cables (threads) coming out of the antenna bottom side (LTE and EVDO). Two 12ft jumper coaxial cables are also provided in order to connect between these threads and the modem connector. The GPS antenna is provided with 12ft coaxial cable. (see Figure 2-3).
Diversity Antenna The Diversity antenna is used to enhence the reception capability in poor reception areas. It also enables WiFi reception. • Kit No. FTN7651A The Diversity antenna is shown in Figure 2-4..
2-8 VML700 Installation Guide Cables The following cables are supplied with the VML700 (see Figure 2-5). Fuse Not Supplied 2 1 1 DC Power and Ignition cable LAN/Ethernet cable Figure 2-5 Cables Mounting Brackets Use the brackets (2 brackets are supplied) for mounting the VML700 securely on a flat surface. 7.4 (18.8 0” cm) 2.08” (5.3cm) 0.
2-9 Process 2-1 describes the steps for the modem installation. Process 2-1 Modem Installation Process 1 Ensure adequate space for the installation. (See Planning the Installation on page 2-3) 2 Install the antennas. (See Antennas Mounting on page 2-9). 3 Route the cables. (See Planning the Installation on page 2-3 and Cables Routing and Connection Procedure on page 2-10). 4 Install the brackets and the unit. (See Modem Installation Procedure on page 2-10.).
Modem Installation Procedure Process 2-3 describes how to install the modem on a flat surface. Process 2-3 How to Install the Modem on a Flat Surface 1 Position the two mounting brackets (1) on both sides of the modem (2) and fasten using 4 screws each. See Figure 2-7. 2 1 1 Figure 2-7 Mounting Brackets 2 Locate the VML700 with the mounting brackets attached on the dedicated flat surface. 3 Centerpunch the marked spots and fix the modem in position using the self-drilling supplied screws.
See Figure 2-8 before routing or connecting the DC Power and Ignition cable and use the following process. Red Lead Fuse Black Lead Power & Ignition Connector to Modem Green Lead To Battery (+) To Battery (-) To Ignition (+) Figure 2-8 DC Power and Ignition Cable Routing Into Engine Compartment Process 2-4 describes how to install the DC power and ignition cable.
Main Antenna Cables Installation Process 2-5 How to Install the Main Antenna Cables 1 The antenna is provided with two short flexible coaxial cables (threads) coming out of the antenna bottom side (LTE and EVDO). Two 12ft jumper coaxial cables are also provided in order to connect between these threads and the modem connector. The GPS antenna is provided with 12ft coaxial cable. Do not trim these cables after routing them. Form a service loop to any cable excess length.
Chapter 3 Configuring and Monitoring the VML700 Introduction The VML700 is basically a plug and play modem and will, most of the time, access the network without any configuration. Some service providers require special security configuration. Also, there are some basic configuration that may be done after first time installation.
5. The following login window appears. The default password is “motorola”. 6. Enter the password and click the “Login”. The following login banner appears after successful login. This is a default banner. Your service provider may provision your VML700 with a different one. 7. Click the “OK” button to enter the configuration wizard. The Configuration Wizard After login, the configuration wizard starts.
Configuring and Monitoring the VML700 Changing the Login Password 1. To change your login password, enter “New Login Password” and “Confirm New Login Password”. 2. Click “Apply” for the new password to take affect. Configuring the LTE VML700 Time Zone 1. The following window appears. 2. Using the pull-down menu, select the required Time Zone. 3. If required, check the “Auto Adjust for Daylight Saving Time” checkbox.
4. When finished, click “Next” to continue to LTE security configuration. Configuring the VML700 Security If required by your service provider, you will need to configure your VML700 security settings. 1. The following window appears. 2. Using the pull-down menu, select the required authentication method. Two Authentication Methods are available (check with your service supplier): EAP-TLS does not require user name and password, and EAP-TTLS/MS-CHAPv2 that require user name and password. 3.
2. Click the “Control Panel” menu item and select the “System” tab. The following window appears. 3. To enable Ignition Sense, check the “Enable Ignition Sense” checkbox. 4. Click the “Apply” button. Configuring WiFi 1. Click the “WiFi” menu item and select the “General” tab. The following window appears. 2. To enable the WiFi service, check the “Enable Wi-Fi Service” checkbox.
3. Select the Wi-Fi Mode using the drop-down menu. 4. Select the operating mode. The available operating modes are: 802.11b, 108.11g and 108.11b/g. 5. Click the “Apply” button. The following window appears. 6. Enter the Wi-Fi network name (SSID). The default value is “motorola”. 7. 8. Select the operating channel. The available values are 1 - 6, or Auto. 9. Click the “Apply” button. Monitoring the VML700 Operation Verify that the Status Utility is installed on your computer.
1. The following is an example of the icons displayed. Icon Description • E - EVDO active. • Signal strength bars - the more green bars, the better is the reception. • Bottom LEDs - in this example, Orange LED-LTE inactive, Green LED-EVDO connected, Red LED-WiFi is in fault state. L - LTE active, all bottom LEDs are green, full reception. No connection between the VML700 and the PC. 2. To access the status utility, double click the tray icon. 3.
4. Click the upper tabs to receive the required system information you need. 5. If you are configured as a WiFi Client, the following message appears about 50 seconds before your client status is terminated.
6. To minimize the status utility, click the “Minimize To System Tray” button on bottom of the screen.
Chapter 4 Troubleshooting Introduction Motorola has made every effort to ensure that this product is of excellent quality. However, if you experience any problems with the product, please contact your local Motorola representative with product related information. For complete information on ordering required parts and kits, contact your local customer service representative and refer to Appendix B, Reference.
No GPS reception. GPS cable (from Main antenna) is not connected. 1. Connect the GPS cable (refer to How to Install the Main Antenna Cables on page 2-12). 2. Verify that the GPS LED is blinking orange and then changed to solid green. No WiFi connection. Div/WiFi cable (from Diversity antenna) is not connected. 1. Connect the Div/WiFi cable (refer to How to Install the Diversity Antenna Cable on page 2-12). 2. Verify that the WiFi LED is blinking/solid green. No EVDO connection.
Chapter 5 Using the VML700 General The VML700 modem installed in your vehicle is a plug and play modem and requires no user intervention. The VML700 should be turned on automatically upon your vehicle ignition and operate properly. If you detect any malfunction in the VML700 operation, refer to Troubleshooting on page 4-1.
Appendix A Specifications Physical Dimensions (Modem) 8.07”x7.87”x1.71” (20.5cm x 20cm x 4.35mm + 1mm) Weight (Modem) 6 Pounds (2.5 Kg) Communication Ports Amphenol LAN – Ethernet 10/100 – RJ45 USB 2.
LEDs LED Name Power LAN LTE EVDO WiFi GPS LED Status OFF Power off No link Off Off Off Off Solid Green Power on Link is on Connected Connected Available Tracking Blinking Green Powering up TX/RX Activity Connecting/ Registering Connecting/ Registering TX/RX Activity -- Solid Orange No Ignition The user turns the power On (power button pressed) but ignition is off.
Specifications Main Antenna LTE Type Sleeve Dipole Frequency 746 - 798 MHz Physical Texin 285 and Geloy XP4025 UV Impedance 50 Ohms (nominal) Polarization Vertical Linear Height 17 inches (43cm) Azimuth pattern Omni-directional Elevation beamwidth 60 deg EVDO Type Folded monopole Frequency 821 - 896MHz, 1850 - 1990MHz Physical PCB Impedance 50 Ohm Polarization Linear vertical Height 65mm Azimuth pattern Omni-directional Elevation beamwidth 800MHz band - 60deg, 1900MHz band 40
Azimuth pattern Omni-directional Elevation beamwidth 35 deg RF Characteristics Frequency LTE 746-756 MHz, 777-787 MHz 758-768 MHz, 788-798 MHz EVDO BC0 824-849 MHz, 869-894 MHz EVDO BC1 1850-1910 MHz, 1930-1990 MHz WiFi 2401-2472 MHz Bandwidth LTE 5 MHz 10 MHz EVDO 1.3 MHz WiFi 20 MHz (802.11b/g) Output transmit power LTE 23.5 dBm EVDO 23.5 dBm WiFi 12.5 dBm Receiver sensitivity LTE 10 MHz -94dBm 5 MHz -97 dBm EVDO -105.5 dBm WiFi (802.
Appendix B Reference Replacement Parts Replace damaged parts with identical replacement parts. For complete information on ordering required parts and kits, contact your local customer service representative.
B-2 VM L700 Installation Guide Kit Replacement Parts List Kit/Part Number F4080A Description VML700, LTE VSM Modem
MOTOROLA and the Stylized M Logo and Symbol and the Symbol logo are registered in the U.S. Patent and Trademark Office. All other product or service names are the property of their respective owners. © Motorola, Inc.