
User's Guide


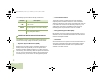


Table Of Contents
- Declaration of Conformity
- Important Safety Information
- Software Version
- Computer Software Copyrights
- Documentation Copyrights
- Disclaimer
- Getting Started
- Preparing Your Radio for Use
- Identifying Radio Controls
- Identifying Status Indicators
- General Radio Operation
- Advanced Features
- Advanced Call Features
- Contacts
- Scan Lists
- Scan
- Call Alert Paging
- Emergency Operation
- Automatic Registration Service (ARS)
- Text Messaging Service (TMS)
- Accessing the TMS Features
- Composing and Sending a New Text Message
- Sending a Quick Text Message
- Using the Priority Status and Request Reply Features
- Appending a Priority Status to a Text Message
- Removing a Priority Status from a Text Message
- Appending a Request Reply to a Text Message
- Removing a Request Reply from a Text Message
- Appending a Priority Status and a Reply Request to a Text Message
- Removing a Priority Status and a Reply Request from a Text Message
- Managing Text Messages
- Managing Sent Text Messages
- Secure Operations
- Security
- The Global Positioning System (GPS)
- Understanding the GPS Feature
- Enhancing GPS Performance
- Using the Outdoor Location Feature (Using GPS)
- Accessing the Outdoor Location Feature
- Saving a Waypoint
- Viewing a Saved Waypoint
- Editing the Alias of a Waypoint
- Editing the Coordinates of a Waypoint
- Deleting a Single Saved Waypoint
- Deleting All Saved Waypoints
- Measuring the Distance and Bearing from a Saved Waypoint
- Using the Location Feature While in Emergency Mode
- Trunking System Controls
- Ignition Switch Options
- Utilities
- Viewing the Recent Calls List
- Selecting the Power Level
- Selecting a Radio Profile
- Toggling the Day or Night Display Mode
- Selecting the Stealth Mode
- Turning Keypad Tones On or Off
- Turning Voice Mute On or Off
- Using the Time-Out Timer
- Using the Conventional Squelch Operation Features
- Using the PL Defeat Feature
- Using the Digital PTT ID Feature
- Using the Smart PTT Feature (Conventional Only)
- Accessing the General Radio Information
- Using the Directional Buttons
- Using the Siren Control Keyapad
- Using the Manual Siren Button for Manual Siren Tone
- Using the Manual Siren Button as Siren Types Selector
- Using the Public Address Button
- Using the Response Selector
- Using External Alarms (Horn and Lights)
- Using the Gun Lock
- Using the Voice Announcement
- Using the Action Consolidation Mode
- Helpful Tips
- Accessories
- Appendix: Maritime Radio Use in the VHF Frequency Range
- Glossary
- Commercial Warranty
- Notes

Getting Started
English
2
The following special notations identify certain items:
Additional Performance Enhancement
The following are some of the latest creations designed to
enhance the security, quality and efficiency of APX radios.
Dynamic System Resilience (DSR)
DSR ensures the radio system is seamlessly switched to a
backup master site dynamically in case of system failure.
DSR also provides additional indication e.g. failure detection,
fault recovery, and redundancy within the system to address to
the user in need. Mechanisms related to the Integrated Voice
and Data (IV & D) or data centric are all supported by DSR.
CrossTalk Prevention
This feature prevents crosstalk scenario from happening,
especially when a wideband antenna is used. This feature
allows the adjustment of the Trident Transmitting SSI clock rate
in the radio to be varied from the Receiving Frequency. This
subsequently reduced the possibilities of radio frequency
interfering spurs and prevents the issues of crosstalk.
Encrypted Integrated Data (EID)
EID provides security encryption and authentication of IV & D
data bearer service communication between the radio and the
Customer Enterprise Network.
SecureNet
SecureNet allows user to perform secured communications on
an Analog or Motorola Data Communication (MDC) channel.
The MDC OTAR feature will allow users to perform OTAR
activities on an MDC channel.
Example Description
Home button
or H
Buttons and keys are shown in bold print
or as an icon.
Phone
Menu entries are shown similar to the
way they appear on the radio’s display.
>
This means “Press the right side of the
4-way Navigation button.”
O9Head_68007024014_b.book Page 2 Wednesday, October 20, 2010 2:28 PM