
User's Manual
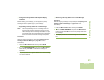
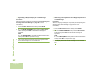


Table Of Contents
- Declaration of Conformity
- Important Safety Information
- Software Version
- Computer Software Copyrights
- Documentation Copyrights
- Disclaimer
- Getting Started
- Preparing Your Radio for Use
- Identifying Radio Controls
- Identifying Status Indicators
- General Radio Operation
- Advanced Features
- Advanced Call Features
- Multiple Control Head Features
- Contacts
- Scan Lists
- Scan
- Call Alert Paging
- Emergency Operation
- Automatic Registration Service (ARS)
- Text Messaging Service (TMS)
- Secure Operation
- Global Positioning System (GPS) Enabled
- Trunking System Controls
- Utilities
- Viewing Recent Calls List
- Selecting the Power Level
- Selecting a Radio Profile
- Enabling and Disabling the Radio Alias
- Controlling the Display Backlight
- Turning Keypad Tones On or Off
- Turning Voice Mute On or Off
- Using the Time-Out Timer
- Using the Conventional Squelch Operation Features
- Using the PL Defeat Feature
- Using the Digital PTT ID Feature
- Using the Smart PTT Feature (Conventional Only)
- Accessing General Radio Information
- Viewing Control Assignments
- Optional External Alarms (Horn and Lights)
- Helpful Tips
- Accessories
- Appendix: Maritime Radio Use in the VHF Frequency Range
- Glossary
- Commercial Warranty and Service
- Index

Advanced Features
English
62
Appending a Request Reply to a Text Message
Procedure:
After the outgoing message is composed (see Composing and
Sending a New Text Message on page 58 for more
information):
1 Press the Menu Select button directly below OPTN.
2 > or < to MARK AS NORMAL and press the Menu Select
button directly below SEL to indicate the message as
important.
AND
> or < to NO REQ REPLY and press the Menu Select button
directly below SEL to request for a reply.
3 The priority status and request reply icons appear beside
the normal message icon on the label bar.
Removing a Priority Status and a Reply Request from
a Text Message
Procedure:
After the outgoing message is composed (see Composing and
Sending a New Text Message on page 64 for more
information):
1 Press the Menu Select button directly below OPTN.
2 > or < to MARK AS NORMAL and press the Menu Select
button directly below SEL to indicate the message as
important.
AND
> or < to NO REQ REPLY and press the Menu Select button
directly below SEL to request for a reply.
3 The display shows the normal message icon on the label
bar.