
User's Manual
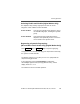

Table Of Contents
- Contents
- Introduction
- Basic Operating Procedures
- General Radio Features
- Often-Used Features
- Emergency Call and Alarm
- Scan Operation
- Turning On Scan
- Turning Scan On While Disregarding the Squelch Code (Conventional Modes Only)
- Viewing a Scan List
- Transmitting While Scan Is On
- Temporarily Deleting a Nuisance Mode with Scan On (W7 and W9 Control Heads Only)
- Restoring a Nuisance Mode (W7 and W9 Control Heads Only)
- Changing Mode Priorities While Scan Is On (W7 and W9 Control Heads Only)
- Restoring Mode Priorities in a Scan List (W7 and W9 Control Heads Only)
- Programming a Scan List
- Hang Up Box (HUB)
- Optional External Alarms (Horn and Lights)
- Time-Out Timer
- Push-To-Talk Identification (PTT-ID)
- Telephone Interconnect List (Conventional and Trunking)
- Unlimited Telephone Interconnect (W7 and W9 Control Heads Only)
- Call Alert Page (Conventional and Trunking— Digital Modes Only)
- Conventional Radio Features
- Trunking Operation
- Secure Operation
- Troubleshooting
- Glossary
- Index
- W7 and W9 Control Heads Foldout Page

86
Trunking Operation
Site-Button Operation
To check which site the radio has currently selected:
Press (W7) or (W9) momentarily.
The display momentarily shows the current site name and RSSI
(received signal strength indicator).
One of the following conditions can also occur:
• If the radio is not locked onto a site, but is scanning for a new
site, the display shows
SCANNING.
• If the radio has not yet received site ID information for the
current site, the radio displays
SITE XX.
Note: You can also initiate scanning to another site by holding
down until the display shows
SCANNING.
Ste Site
Ste