
User's Guide
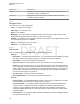
Table Of Contents
- Contents
- List of Figures
- List of Tables
- Declaration of Conformity
- Safety Information
- Notice to Users (FCC and Industry Canada)
- Copyrights
- General Information
- Getting Started
- 2.1 Product Technical Information
- 2.2 Before Power On
- 2.3 Controls and Indicators
- 2.4 Display
- 2.5 Status Icons
- 2.6 Powering On the Radio
- 2.7 PIN Code Authentication
- 2.8 Locking or Unlocking the Keys or Buttons
- 2.9 Holding Your Radio
- 2.10 High or Low Audio Toggle
- 2.11 During a Call
- 2.12 Entering TMO or DMO Mode
- 2.13 Selecting Talkgroups
- 2.14 One-Touch Buttons
- Modes
- 3.1 Trunked Mode Operation
- 3.1.1 Entering TMO Mode
- 3.1.2 Making Group Calls in TMO
- 3.1.3 Receiving Group Calls in Idle
- 3.1.4 Receiving Group Calls during Ongoing Group Calls
- 3.1.5 Dynamic Group Number Assignment (DGNA)
- 3.1.6 Broadcast Call
- 3.1.7 Phone and Private Automatic Branch Exchange (PABX) Calls
- 3.1.8 Assistance Call
- 3.1.9 Call Modification
- 3.2 Local Site Trunking
- 3.3 Direct Mode Operation
- 3.3.1 Entering DMO Mode
- 3.3.2 Making Group Calls in DMO
- 3.3.3 Receiving Group Calls in Idle
- 3.3.4 Selecting DMO Communications Options
- 3.3.5 DMO Private Priority Call
- 3.3.6 Talkgroup for Individual Calls
- 3.3.7 Network Monitor
- 3.3.8 Communication through Repeaters
- 3.3.9 Communication through Gateways
- 3.3.10 Gateway and Repeater Synchronization
- 3.4 Transmit Inhibit Mode
- 3.5 Emergency Operations
- 3.5.1 Emergency Alarm
- 3.5.2 Emergency Group Call
- 3.5.3 Non-Tactical Emergency
- 3.5.4 Emergency Individual Calls (Private or MSISDN)
- 3.5.5 Emergency SDS Status
- 3.5.6 Emergency Hot Microphone
- 3.5.7 Alternating Hot Microphone
- 3.5.8 Silent Emergency Mode
- 3.5.9 Invisible Emergency
- 3.5.10 Emergency Alert
- 3.5.11 Disaster Alert
- 3.5.12 Exiting Emergency Operations
- 3.6 Repeater Mode
- 3.1 Trunked Mode Operation
- Main Menu
- 4.1 Scrolling through the Menu
- 4.2 Menu Icons
- 4.3 Messages
- 4.4 Contacts
- 4.5 Bluetooth
- 4.6 Browser
- 4.7 Man Down
- 4.8 Security
- 4.9 Setup
- 4.10 Group Setup
- 4.11 Individual Setup
- 4.12 Favorites
- 4.13 My Info
- 4.14 Recent Calls
- 4.15 Shortcuts
- 4.16 Networks
- 4.17 Location
- 4.18 Packet Data
- 4.19 Crypto Menu
- Features
- 5.1 Ambience Listening (AL) Call
- 5.2 Bluetooth
- 5.3 Buffer Full Overwrite Policy
- 5.4 Call-Out
- 5.5 Collaborative Messaging
- 5.6 Global Navigation Satellite System (GNSS) Location Service
- 5.7 Home Display Text Message
- 5.8 One-Touch Dial
- 5.9 MS-ISDN
- 5.10 Private Call
- 5.11 Phone and Private Automatic Branch Exchange (PABX) Calls
- 5.12 Phone/PABX Speed Dial
- 5.13 Radio Messaging System (RMS)
- 5.14 Radio User Assignment (RUA) and Radio User Identity (RUI)
- 5.15 SIM Card End-to-End Encryption
- 5.16 Short Number Dial
- 5.17 Talkgroup Dialing by Index
- 5.18 Terminal Permanent Disable
- 5.19 Terminal Temporary Disable or Enable
- 5.20 Writing Text
- 5.21 Wireless Application Protocol (WAP)
- 5.21.1 WAP Browser
- 5.21.2 Entering the Browser
- 5.21.3 Entering Browser Menu Panes
- 5.21.4 Tips for Browsing
- 5.21.5 Disabled Packet Data Service
- 5.21.6 Disabled Browser Entry
- 5.21.7 Browser Keys Usage
- 5.21.8 Browser Menu Panes Overview
- 5.21.9 Navigate Pane
- 5.21.10 Advanced...
- 5.21.11 Bookmarks Pane
- 5.21.12 History Pane
- 5.21.13 Tools Pane
- 5.21.14 Options Pane
- 5.21.15 Text Input Pane
- 5.21.16 WAP Push
- Appendix A: Tones
- Appendix B: LED Indications
- Appendix C: Troubleshooting
- Appendix D: Maintenance

Table 22: Other Keys
Key Description
Any numeric key
• In TAP press any key to reject word completion and continue with text
entry A new completion will be displayed, if available, after the time-out
for TAP expires.
•
Press and hold to enter Numeric mode from TAP or iTAP alphanumer-
ic.
* key
• Press to insert a space.
• In TAP press to dismiss a word completion and insert a space.
• Enter a newly created word into the user dictionary.
• Press and hold to enter a carriage return.
# key
• Press once to cycle through all entry modes (Symbol, Numeric, Pri-
mary, and Secondary (if configured).
• Press and hold to return to the default entry mode.
Select Press to select the highlighted choice and place it in the main text area.
Delete
• Press once to delete the last entered character.
• Press and hold to clear the entire main text area.
Up Navigation key
• In TAP press to reject word completion and scroll up.
• In TAP press to change previously entered small letter to capital.
Down Navigation key
• In TAP press to reject word completion and scroll within the text area.
• In TAP press to change previously entered capital letter to small.
Left Navigation key
• Press to navigate to the left. Press and hold to repeat.
• In TAP, if a word completion is available, press to reject the comple-
tion.
Right Navigation key
• Press to navigate to the right. Press and hold to repeat.
• In TAP if a word completion is available, press to accept the word.
Menu If a context-sensitive menu is active, opens the Context Sensitive Menu.
5.20.5
Writing in iTAP Alphanumeric
Prerequisites: Your radio displays the text entry screen.
When and where to use: It allows you to write quicker. For example, try to write David 232!
Procedure:
1 Press Menu → Entry Setup → Prim..
2 Select iTAP
English and press Back.
3 Press Menu → Entry Mode.
4 Select Primary.
MN001489A01-BF (en-US)
Features
133
DRAFT