
User's Manual
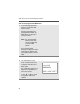


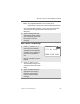
Table Of Contents
- Product Safety and RF Exposure Compliance
- Computer Software Copyrights
- Documentation Copyrights
- Disclaimer
- Important Rebanding Information
- Contents
- General Radio Operation
- Notations Used in This Manual
- XTS 2500 / XTS 2500I Model III Radio
- Physical Features of the XTS 2500 / XTS 2500I Model III Radio
- Programmable Features
- Display
- Backlight
- Status Symbols
- Menu Entry (Softkey)
- Menu Select Buttons
- Home Button (h)
- App Button (TMS Feature Button)
- 4-Way Navigation Button (o)
- Keypad
- LED Indicators
- Alert Tones
- Standard Accessories
- Universal Connector Cover
- Remote Speaker Microphone Adapter
- Radio On and Off
- Zones and Channels
- Receive / Transmit
- Common Radio Features
- Radio Lock
- Mute or Unmute Keypad Tones
- Conventional Squelch Options
- PL Defeat
- Time-out Timer
- Emergency
- Lists
- Edit a Call, Page, or Phone List Number
- Edit a Call, Page, or Phone List Name
- Scan
- Telephone Calls (Trunking Only)
- Private Calls (Trunking Only)
- Call Alert Paging
- Conventional Talkgroup Calls (Conventional Operation Only)
- Repeater or Direct Operation
- Special Radio Features
- ARS User Login and Text Messaging Features
- Helpful Tips
- Accessories
- Appendix: Maritime Radio Use in the VHF Frequency Range
- Glossary
- Commercial Warranty
- Index

94
ARS User Login and Text Messaging Features
Send a Predefined Message
The Quick Text Messages are messages that are predefined and
usually consist of messages that are used most frequently.
Note: When you receive a message on the XTS 5000 radio that
is flagged with the “Request Reply” icon, you must
manually respond to the sender that you have received
the message. The system will not automatically send
back a notification that the radio received such message.
Note: The “Priority” flag on a message does not imply that the
message will get higher priority over the other messages
when it is being transmitted. It is just an indication that
can be embedded into a message to let the receiver
know that the message is important.
6 When an address has been appended to the outgoing message,
press the PTT button to send your message.
OR
Press E below SAVE to save your message for sending at a
later time.
The message will be saved in the “Draft folder”. See “To Access
the Draft Folder” on page 97 for further details.
1 Press E below LIST to
use the predefined message
OR
Press on the preprogrammed
Quick Text button.
The first predefined message
appears.
QT 001/002
I’ll be late
ADDR
EDIT
BACK