
User's Manual
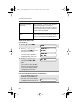

Table Of Contents
- Radio On/Off
- Zones/Channels
- Receive/Transmit
- Send Emergency Alarm
- Send Emergency Call
- Send Silent Emergency Alarm
- Display Status Symbols
- Menu Entries (Use With Menu Navigation)
- Contents
- Safety and General Information
- General Radio Operation
- Notations Used in This Manual
- Your XTS 5000 Model III Radio
- Physical Features of the XTS 5000 Model III Radio
- Programmable Controls
- Display
- Keypad
- LED Indicators
- Alert Tones
- Standard Accessories
- Radio On and Off
- Zones and Channels
- Receive / Transmit
- Common Radio Features
- Selectable Power Level
- Radio Lock
- Mute or Unmute Keypad Tones
- Conventional Squelch Operation
- PL Defeat
- Time-out Timer
- Emergency
- Lists
- Scan
- Individual Calls
- Status Calls (Trunked Radios Only)
- Repeater or Direct Operation
- Smart PTT (Conventional Only)
- Special Radio Features
- Helpful Tips
- Accessories
- Glossary
- Commercial Warranty
- Index

56
Common Radio Features
Conventional Scan Only
Make a Dynamic Priority Change
While the radio is scanning, the dynamic priority change feature lets
you
temporarily
change any channel in a scan list (except the priority-
one channel) to the priority-two channel. The replaced priority-two
channel becomes a non-priority channel. This change remains in
effect until scan is turned off, then scanning reverts back to the
preprogrammed state.
1 When the radio is locked
onto the channel to be
designated as priority-two,
press the preprogrammed
Dynamic Priority button.
Note: The priority-one
channel cannot be
changed to priority-
two.
2 The radio continues
scanning the remaining
channels in the list. To
resume scanning the
preprogrammed priority-two
channel, you must leave and
re-enter scan operation.
95C08-O_XTS5k_800MHz_Mdl3.book Page 56 Monday, August 27, 2001 9:09 AM