
User's Manual
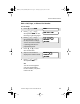
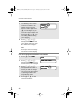
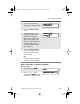
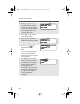

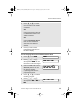
Table Of Contents
- Contents
- Safety and General Information
- General Radio Operation
- Notations Used in This Manual
- Your XTS 5000 Model III Radio
- Physical Features of the XTS 5000 Model III Radio
- Programmable Controls
- Display
- Keypad
- LED Indicators
- Alert Tones
- Standard Accessories
- Radio On and Off
- Zones and Channels
- Receive / Transmit
- Common Radio Features
- Selectable Power Level
- Radio Lock
- Mute or Unmute Keypad Tones
- Conventional Squelch Operation
- PL Defeat
- Time-out Timer
- Emergency
- Lists
- Scan
- Individual Calls
- Status Calls (Trunked Radios Only)
- Repeater or Direct Operation
- Smart PTT (Conventional Only)
- Special Radio Features
- Helpful Tips
- Accessories
- Glossary
- Commercial Warranty
- Index

ASTRO Digital XTS 5000 Model III 47
Common Radio Features
5 Press V or U to find the
member you want.
6 Press D, E, or F
directly below SS
SS
EE
EE
LL
LL
or DD
DD
EE
EE
LL
LL
or
RR
RR
CC
CC
LL
LL
.
SS
SS
EE
EE
LL
LL
= add the currently displayed channel to the scan list.
DD
DD
EE
EE
LL
LL
= delete the currently displayed channel from the scan list.
RR
RR
CC
CC
LL
LL
= view the next member of the scan list.
When adding a priority chan-
nel
, press D, E, or F
below SS
SS
EE
EE
LL
LL
additional times to
see T or S or S.
T = this channel is in the scan list.
S = this channel is in the scan list as the
priority 2
channel.
S (dot flashing) = this channel is in the scan list as the
priority 1
channel.
OR
When deleting a priority channel
, the scan indicator T turns off.
7 Press V or U to select
more channels to be added
or deleted.
OR
Use the keypad to go directly
to additional channels to be
added or deleted.
OR
Use the 16-Position Select
knob to select additional
channels to be added or
deleted.
SS
SS
EE
EE
LL
LL
or DD
DD
EE
EE
LL
LL
or RR
RR
CC
CC
LL
LL
T or S or S
95C08-O_XTS5k_800MHz_Mdl3.book Page 47 Thursday, August 23, 2001 2:52 PM