fire feature www.montigo.com Installation Operation & Maintenance Manual Check local codes and read all instructions prior to installation. L42DF Gas Fireplace Series L42DF Indoor L42DF Indoor Shown Warning: Improper installation, adjustment, alteration, service or maintenance can cause injury or property damage. Refer to this manual. For assistance or additional information consult a qualified installer, service agency or the gas supplier.
L42DF Flush Indoor Gas Fireplace fire feature Warning: Read this manual before installing, operating or troubleshooting this appliance. Please retain this owner's manual for future reference. Congratulations Congratulations on selecting a FireFeature gas fireplace, an elagent and well designed gas fireplace built to your specifications. The Firefeature gas fireplace you have selected is designed to provide the utmost in safety, reliability, and engineering standards.
L42DF Flush Indoor Gas Fireplace fire feature Introduction Thank You for choosing a Montigo Gas Fireplace. About this Fireplace: The L42DF is a fireplace with a linear-style burner. This fireplace can be converted to both a Top Vent or Rear Vent application, and is currently available in the models below. The L42-DF is rated for Natural Gas and Propane at 32,000 BTU/H (9.97 Kilowatts) Input. ► L42DF; Top or Rear Vent, Millivolt Pilot. ► L42DF-I; Top or Rear Vent, Intermittent Pilot (HSI).
L42DF Flush Indoor Gas Fireplace fire feature Installation Installing The Fireplace Shell Framing The fireplace may be installed in any location that maintains proper clearances to air conditioning ducts, electrical wiring and plumbing. Safety, as well as efficiency of operation, must be considered when selecting the fireplace location. Try to select a location that does not interfere with room traffic, has adequate ventilation, and offers an accessible pathway for Direct Vent installation.
L42DF Flush Indoor Gas Fireplace fire feature Installation Installing The Gas Line The gas line must be installed before finishing the L42DF Fireplace. Natural Gas requires a minimum inlet gas supply pressure of 5.5" W.C. & a manifold pressure of 3.5" W.C. Propane Gas requires a minimum inlet gas supply pressure of 11" W.C. & a manifold pressure of 10" W.C. Provision must also be made for a 1/8" N.P.T.
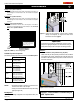
L42DF Flush Indoor Gas Fireplace fire feature Installation Installing Terminations with Built-In Frames Installing Heat Guards over Terminations 11 PTO-3F (5"/8") 11 PTKOG (5"/8") Figure 5a. Installing a PTO termination. Figure 5d. Installing a PTO termination heat guard. 1. Frame the termination opening to 11" x 11". 2. Fasten the termination to the studs using a minimum of 4 screws. Installing Terminations with MSR Frames 12 MSR 1.
L42DF Flush Indoor Gas Fireplace fire feature Installation Installing the Nailing Flange Extension Once the fireplace is placed into the rough framed opening, and the supplied steel lintel is in place, (Part No. L42087) (see Figure 2), the supplied nailing extension must be placed along the top edge of the fireplace and securely fastened in place to the metal lintel, and combustible wood framing.
L42DF Flush Indoor Gas Fireplace fire feature Installation Example A: (Acceptable Installation) If the vertical dimension from the hearth is 84" and the horizontal run to the wall flange of the vent termination is 36", this would be an acceptable installation. Example B: (Acceptable Installation) If the vertical dimension from the hearth is 90" and the horizontal run to the wall flange of the vent termination is 126", this would be an acceptable installation.
L42DF Flush Indoor Gas Fireplace fire feature Installation 45° or less Corner Installation. (Only available using Top Vent.) Use a PTO-3 termination and an PFL-1 or PFL-2 (12" or 24" compressed length) and a frame, if appropriate. Flex may be turned to obtain desired degree of angle required but must not exceed 45°. RHS8 Figure 14. Extended Installation using a combination of solid and flex venting. Use the vent graph to determine your allowable run, then select appropriate components. RHS8 Figure 12.
L42DF Flush Indoor Gas Fireplace fire feature Installation Example: 1 MIN 1 MIN. Both sides Typical Typical vent installation. 20' vertical vent RHS8 Heat Shield 1 MIN Figure 16a. RHS8 Installation. (Install by sliding over vent pipe where it passes through the combustible construction. RHS101 Heat Shield, Outer Section. Drywall RHS101 Heat Shield, Inner Section.
L42DF Flush Indoor Gas Fireplace fire feature Installation Rear Vent Venting Runs The L42DF Rear Vent has three possible installations which do not require vertical lift, all of these installations require that you install the RHS101 heat shield. Heat Shield The heat shield (RHS101) must be used on all installations straight through the wall, at the point where the vent pipe connects to the termination. With the heat shield, proper vent clearances can be maintained.
L42DF Flush Indoor Gas Fireplace fire feature Installation 1. Straight Installation. Example C: (Unacceptable Installation) The height from the hearth to the center of the termination is 26 5/8". For straight installations use a 12" extension pipe (PXT-12) with female/female connections. For shorter installations, cut the PXT-12 to the desired length. Refer to figure 19a.
L42DF Flush Indoor Gas Fireplace fire feature Installation Reduced Vertical Installation Finishing Around the Fireplace (Available with Linear LDVPV47 Power Vent Combustible mantels and mouldings may be safely installed over the top and on the front of the fireplace provided that they do not project beyond shaded area shown in Figure 24. Side wall clearances are 3". Combustible surrounds may be installed with 3" clearance to the side of the fireplace as shown in Figure 25.
L42DF Flush Indoor Gas Fireplace fire feature Installation Non-Combustible Facing Material Combustible Construction allowed in shaded area Combustible Facing Material Drywall/Sheetrock Header 6” Non-Combustible Facing Material Steel Stud construction allowable within this area Top of fireplace 3” Horizontal Run (in) Figure 24. Combustible mantles and facings.
L42DF Flush Indoor Gas Fireplace fire feature Installation Wiring Removing and Installing the Door Gas Control and Pilot Wiring Removing the door: Honeywell (Q3450) Pilot Assembly The doors are removed in a few simple steps. Follow the Steps shown to remove the Horizontal access panel, unlatch the door buckles, remove the door, then replace in reverse order.
L42DF Flush Indoor Gas Fireplace fire feature Installation WARNING! Step 5: Do not attempt to clean glass when hot. Ensure the tool is firmly in the lower end of the slot, (as shown), Then pull toward you (Caution: hold the tool securely). Do not clean glass with abrasive materials as any glass etching may cause premature glass failure. 2 Do not operate this fireplace without the glass door, or with a broken glass door. Installing the Glass Beads and Optional River Rocks Figure 28d.
L42DF Flush Indoor Gas Fireplace fire feature Operation - Model L42DF L42DF with Continuous Pilot For Your Safety - READ BEFORE LIGHTING: WARNING: If you do not follow these instructions exactly, a fire or explosion may result causing property damage, personal injury or loss of life. A. This appliance has a pilot which must be lighted by hand. When lighting the pilot, follow these instructions exactly. B. BEFORE LIGHTING smell all around the appliance area for gas.
L42DF Flush Indoor Gas Fireplace fire feature Operation - Model L42DF-I L42DF-I with Honeywell Electronic Ignition For Your Safety - READ BEFORE LIGHTING: WARNING: If you do not follow these instructions exactly, a fire or explosion may result causing property damage, personal injury or loss of life. A. This appliance is equipped with an ignition system that lights the pilot burner automatically. Do not attempt to light the pilot by hand. B. BEFORE LIGHTING smell all around the appliance area for gas.
L42DF Flush Indoor Gas Fireplace fire feature Operation - Model L42DF-A B-Series BF-A L-Series DF-I L42DF-A with American Flame Electronic Ignition with American For Your Safety - Flame READElectronic BEFORE Ignition LIGHTING: WARNING: If you do not follow these instructions exactly, a fire or explosion may result causing property damage, personal injury or loss of life. A.
L42DF Flush Indoor Gas Fireplace fire feature Operation Maintenance Lighting Instructions General See pages 15, 16, and 17. QQ Have the fireplace and installation inspected yearly. The inspection must include, but is not limited to, the following: Burner Adjustment The L42DF is equipped with an adjustable burner, allowing you to raise or lower the flames. To adjust the flames, locate the black knob marked 'Hi-Lo', in the centre of the gas control valve (See Figure 32).
L42DF Flush Indoor Gas Fireplace fire feature Maintenance Gas Control Valve Troubleshooting L42DF-I Power Generator Pilot Adjustment Screw Wall Switch Inlet Pressure Manifold Pressure Test Connection Figure 33. Sit Nova 820 gas valve. Pilot Burner Adjustment 1. Locate Pilot Adjustment Screw. (See figure 33.) 2. Adjust pilot screw to provide properly sized flame as shown in figure 34). 3. After installing or servicing, leak test with a soap solution with main burner on.
L42DF Flush Indoor Gas Fireplace fire feature Maintenance Spare parts - L42DF L42DF L42DF-I L42DF-A NG Gas Valve RGC1006 RGC1004 RGC3033 LP Gas Valve RGC1005 RGC1003 RGC3034 NG Pilot RPA020 RPA003 RPA052 LP Pilot RPA021 RPA004 RPA053 Burner NG RBL4201 Burner LPG RBL4202 Orifice NG ROR1153 ROR1153 ROR1153 Orifice LPG Door ROR1154 ROR1154 ROR1154 RDTL42 RDTL42 RDTL42 RLG550 RLG550 RLG550 Base Page 22 Part No.
L42DF Flush Indoor Gas Fireplace fire feature Warranty The Warranty The Companies warrants the Montigo Gas Appliance to be free from defects in materials and workmanship at the time of manufacture. On the Montigo, there is a ten-year warranty on the firebox and its components, a five-year warranty on the main burner and pilot burner, and a one-year warranty on the gas control valve and fibre logs. Glass, plated/painted finishes, and refractory lining are exempt.
L42DF Flush Indoor Gas Fireplace fire feature Appendix A - Termination Locations A = clearance to the termination frame above grade, veranda, porch, deck, or balcony [16 inches (41 cm) minimum] N= B = clearance to door, or sides and top of window, that may be opened [16 inches (41 cm) minimum for appliances ≤100 000 BTU/H (30kW)] P = clearance under veranda, porch, deck, or balcony [16 inches (41 cm) minimum‡ to non-combustibles] [22 inches (56 cm) minimum‡ to combustibles] clearance above paved side
L42DF Flush Indoor Gas Fireplace fire feature Appendix B - State of Massachusetts Amendment (Gas Fireplace / Equipment sold in the State of Massachusetts) 5.08: Modifications to NFPA-54, Chapter 10 (1) Revise NFPA-54 section 10.5.4.
fire feature XG0181 - 081009 Canadian Heating Products Inc. Montigo Del Ray Corp.