
Installation Guide


31-2000891 Rev. 1
Installation Instructions
Custom Handle
or Original Handle
8
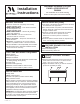
REINSTALL ORIGINAL HANDLE
OR OPTIONAL CUSTOM HANDLE
Ŷ$FXVWRPKDQGOHQRWVXSSOLHGPD\EHLQVWDOOHG
Ŷ'ULOOSLORWKROHVWKURXJKWKHIURQWRIWKHFXVWRPSDQHO
and through the metal panel to match the chosen
handle.
NOTE:7KHKDQGOHVFUHZVVKRXOGEHLQVWDOOHGWKURXJK
WKHPHWDOSDQHOWKHFXVWRPSDQHODQGLQWRWKHFXVWRP
or original handle.
9
INSTALL CUSTOM INNER PANEL
TO THE DRAWER
Ŷ/LQHXSWKHFXVWRPLQQHUSDQHOIURPWKHFXVWRP
panel kit with the screw holes in the drawer body
VLGHVDQGERWWRP7KHFXVWRPLQQHUSDQHOVKRXOG
have the moisture slide knob at the top with the knob
accessible from inside the drawer.
Ŷ$WWDFKWKHWRSOHIWDQGWRSULJKWVFUHZVNHSWIURP
UHPRYLQJWKHRULJLQDOLQQHUSDQHOWRKROGWKHSDUWVLQ
place.
Ŷ6HFXUHWKHFXVWRPLQQHUSDQHOWRWKHGUDZHUERG\
using the remaining 4 side screws and 4 inside
bottom screws from the kit.
10
INSTALL ASSEMBLED PANEL TO
THE DRAWER
Ŷ'HWHUPLQHZKLFKKROHVLQWKHPHWDOSDQHOOLQHXS
with the holes in the exposed drawer front and
marked the screw hole locations onto the custom
panel.
Ŷ'ULOO´GHHSKROHVLQWRWKHFXVWRPSDQHOIRU
FOHDUDQFHWRWKHVFUHZV7KHVFUHZVZLOO
extend into the custom panel slightly.
Ŷ8VLQJWKHVFUHZVVXSSOLHGLQWKHEDJLQVWDOOWKH
custom panel assembly to the exposed custom inner
panel with seven screws.
Ŷ7KHRULJLQDOVFUHZVDUHQRWQHHGHG
NOTE:3URGXFWLPSURYHPHQWLVDFRQWLQXLQJHQGHDYRU
DW0RQRJUDP$SSOLDQFHV7KHUHIRUHPDWHULDOV
appearance and specifications are subject to change
without notice.