
Specifications

18
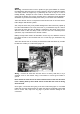
Mounting
-
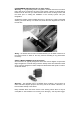
As these sensors usually have an external microphone to detect noise
the microphone must be mounted so it
can ‘hear’ the whole vehicle. Do not hide the
microphone under the dashboard. Mount the control module under the dashboard
but somewhere accessible so sensitivity adjustment can be made after installation.
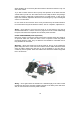
Wiring
-
The same guidelines as previous apply.
The best advise for any sensor placement is to follow the recommendations of the
manufacturer of the product. Every manufacturer has a different opinion on how
sensors should be mounted.
There is no substitute for proper testing. It is crucial for the pro
per installation of a
sensor. It’s better to spend an extra five minutes testing the unit than to come back
and be embarrassed with the customer there.
11 Sensor Techniques to Avoid Common Pitfalls
1) Know what the sensor does.
2) Don’t expect too much
from the sensor.
3) Find out exactly what the customer wants the sensor to do. Ask lots of
questions.
4) Avoid improper placement of the sensor: e.g. installing a shock sensor in the
drivers kick panel, where it will be too sensitive on one side of the v
ehicle and not
sensitive enough on the other.
5) Never mount alarm system components near computers.
6) Always test. There is no substitute for proper testing.
7) There is no optimum spot where a certain type of sensor can be installed in
every car. Placem
ent should be made on an individual basis.
8) Never mount multiple microwave sensors too close to one another since this
can cause interference.
9) Always read the manual.
10) Fix sensors solidly to the mounting surface. Avoid over
-
tight shock sensor
mount
ings as body creak can trigger them.
11) Use sensors from the same manufacturer as the alarm for compatibility and to
avoid possible voiding of the warranty.