
User Manual Part 3


Reports Tab
SpectraGuard® Enterprise User Guide
152
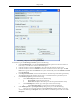
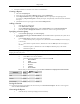
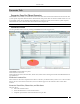
Click Add to open Additional Email Addresses dialog where you can specify a custom
email address for a non-system user who will receive a scheduled report. In this dialog, you can
add multiple email addresses one at a time.
Specifying Additional Email Addresses for Report Delivery
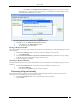
7. Click OK to close the Additional Email Addresses dialog.
8. Click OK to close the Report Delivery dialog.
9. To schedule the report, click Save.
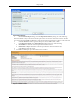
Editing a Report Schedule
The system enables you to edit a report schedule in response to your requirements. Use the following steps to edit a
report schedule:
1. From the List of Reports table, select the report whose schedule you want to edit.
2. Click Edit Schedule.
3. On the Generation and Delivery Options for Selected Location dialog, make the necessary changes
using the steps given in the Setting a Report Schedule section.
4. To save the changes, click Save.
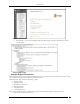
Canceling a Report Schedule
The system enables you to cancel a report schedule based on your requirements. Use the following steps to cancel a
schedule:
1. From the List of Reports table, select the report whose schedule you want to cancel.
2. Click Cancel Schedule.
3. Click Yes on the Confirm dialog to cancel the schedule.
Generating a Report Instantly
The system enables you to generate a report instantly to display detailed information about your WLAN for a
selected period. Use the following steps to generate a report:
1. From the List of Reports table, select a report that has at least one section.
2. Click Generate.