
User's Manual


SS‐300‐AT‐C‐60InstallationGuide
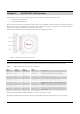
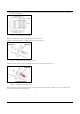
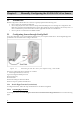
Figure 8. Final positioning of the Sensor
4.2.1. 2 WallorE le ctr ica lBoxMo unting
Toinstallthedeviceonawallorelectricalbox,usethemountingbracketthatcomeswiththedevice.Followthesesteps:
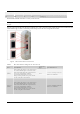
1. Followingtheseguidelines,screwthemountingbrackettoawallor electricalbox(NEMAenclosure):
• Themountingbrackettabsshouldbepointingupward.
• Ifmountingtodrywall,
usethe4screwsand4wallanchors.
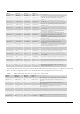
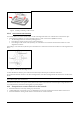
• IfmountingtoanEUelectricalbox(60.3mm),use2threadedscre wsandinsertintotheholesmarked“A” inthe
diagramshownbelow.
IfmountingtoaUSelectricalbox(83.3mm),use2threadedscrewsandinsertintotheholesmarked
“B”inthediagramshown
below.
Figure 9. Holes for inserting screws
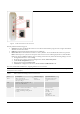
ConnecttheEthernetcable(forpowerandnetworkconnection)totheLANportonthebackofthedevice.
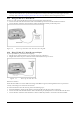
TomounttheSS‐300‐AT‐C‐60deviceontothemountingbracket,insertthemounting‐brackettabsintotheslotsonthebackof
theAP.
IMPORTANT:Ifyouaremounting
thedeviceonawall,youcannotusetheslotsonthebottomnarrowedgeofthedevice.Instead,the
slotsonthebackofthedevicemustbeused.
ASS‐300‐AT‐C‐60devicecanbepoweredonby802.3afClass0PowerOverEthernetofNominalinputvoltage48VDC.You
canconnectthedevicetothenetworkusingPoEorapoweradapter.
4.2.2 Prerequisitestoconnectthedevicetothenetwork
1. EnsurethattheServerisalreadyrunningonyournetwork.
2.AddtheDNSentry‘wifi‐security‐server’onallDNSServers.ThisentryshouldpointtotheIPaddressoftheServer.
3. EnsurethatDHCPisrunningonthesubnettowhichthedevicewillbeconnected.