
User's Guide


AirTight Management Console User Guide
58
To configure captive portal settings, do the following.
1.
Select the Enable Captive Portal check box to display a portal page to be shown to the client on
using the guest network.
2.
Select the mode of access to the Internet through the captive portal. Do one of the following:
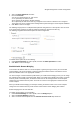
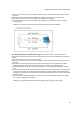
(a) Select the AP Hosted Splash Page with click through option. You must create a .zip file of the
portal page along with any other files like images, style sheets etc and upload this file. The zip file
must satisfy the following requirements for the portal to work correctly.
a. The zip file should have a file with the name “index.html” at the root level (i.e., outside of
any other folder). This is the main portal page. It can have other files and folders, (and
folder within folders) at the root level that are referenced by the index.html file.
b. The total unzipped size of the files in the bundle should be less than 100 KB. In case,
large images or other content is to be displayed on the page, this content can be placed
on an external web server with references from the index.html file. In this case, the IP
address of the external web server must be included in the list of exempt hosts (see
below).
c. The index.html file must contain the following HTML tags for the portal to work correctly:
x A form element with the exact starting tag: <form method="POST"
action="$action">
x A submit button inside the above form element with the name “mode_login”. For
example: <input type=”image” name=”mode_login” src=”images/login.gif”>The
exact tag: <input type="hidden" name="redirect" value="$redirect"> inside the
above form element.
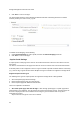
You can download the factory default portal bundle file and use it as a template to create a
custom portal bundle. Click Download Sample to download the factory default portal bundle
file.
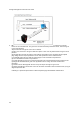
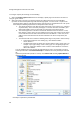
Upload the portal bundle (default or custom). Click Choose File following Upload Bundle to
upload the bundle.
Click Open to upload the portal bundle.