
Installation Guide


MOHAWK TECHNICAL SERVICES – HARD SURFACE | MOHAWK_TECH@MOHAWKIND.COM | 888.387.9881 1603_2020 | ES | 09/2020 | 10 of 12
Floating Installation Instructions (cont'd)
Expansion Space
An expansion space equal to the plank thickness must be maintained around the perimeter of the room, all pipes, counters, cabinets, replace hearths,
doorframes and any other xed vertical objects in the room. Doorway or archways 48 inches or less and rooms larger than a 26΄ x 33΄ are required to
have a T-molding.
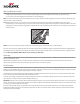
Glue and Glue Placement
The recommended glue for oating installation is Performance Accessory Tongue & Groove D3 Rated Floating Floor Glue. The glue must be placed on every plank
along the topside of the groove and bottom side of the tongue for the full length of the side and end. Apply only a 3/32" bead of glue. If the groove is lled with
glue, it will be difcult to close the seam, preventing a tight t.
Getting Started
The installation begins with three rows of ooring glued together and held in place with low adhesion delicate surface painters tape with the groove side
facing the wall. Spacers must be used to establish the expansion space from the walls equal to the plank thickness. These three rows must be straight, square
and in rack because they establish the alignment of the rest of the oor. After putting these three rows together, allow the glue to set 15 to 45 minutes before
proceeding with the installation. With the tongue facing out, the planks can be tapped together with a tapping block on the tongue to make a snug t. After
installing eight or ten rows of ooring, stand back and check for crowning or heaving due to tension strapping or any damage caused by improper taping.
Clean as you go: If any glue squeezes out of the seam between the planks allow it to dry for 10 to 15 minutes and then lightly scrape it away with a plastic
scraper or putty knife, any glue left may be cleaned with a damp cloth. Do not allow the glue to dry on the face of the ooring; it will be very difcult to clean off.
Row 1: It is necessary to work from right to left when installing tongue and groove engineered hardwood ooring. Plank 1 should be a full length board, laid in
the right hand corner of the room. Lay the plank with the groove of the long side facing the wall. Use wood wedges to maintain spacing around the perimeter of
the room equal to the plank thickness. Place each plank rmly against the wood wedges. Slide the end tongue of the board to be installed into the end groove.
of the board previously installed. After setting the rst row and making sure you’re working against a rm starting point, lay out three to four rows before starting
to install. Lay the rest, plank after plank, in this manner until you have completed the rst row. Cut the last plank accordingly. Ensure that this rst row is straight
using the wedges to maintain proper expansion space from the wall. Planks may require scribing and cutting to t wall curvature if present.
Row 2: When possible, use leftover plank from the rst row to begin the second row to minimize waste. Initial layout of material will allow you to check your
end seams to ensure they are not too close. End joints on adjoining rows should be offset by no less than 6". Align this plank and lock the side into place against
the rst plank in row 1. The next plank is aligned with the end joint rst into the previous plank in row 2. The side of plank is then tapped lightly against the
previously laid row. Continue laying in this way across the entire row. Remove the tting wedge and press in the row of planks with a light pressure on the long
side. The tapping block may be required to ensure a tight t of all long-side joints. The planks are now laid row after row in this sequence.
Row 3 and remaining rows: Move rows if necessary to ensure that you are not showing any undesirable joint patterns. The rest of the row’s end joints should
be random throughout the oor. Your rst three rows are staggered, ensuring that offset of previous row with end joints are no closer than 6" (or longer for wider
width products) from one another. When the planks are being placed, a non-random pyramid or stair step pattern is used to ensure the planks remain engaged
through the force of the tapping. Stretch and stick low adhesion delicate surface painters tape across every 3 to 5 rows of planks approximately 2΄ apart from
each other to hold the oor in place until the glue sets. Remove tape within 24 hours.
Installer’s Responsibility: Warranty for separation of planks and damage caused by the use of incorrect tape or length of time tape remained on the oor is the
responsibility of the installer.