
Installation & Assembly

Installation Instructions
For 3/8”, 1/2”, and 9/16” Mohawk oors with Enhanced Engineered Construction
™
©2019 mohawkflooring.com | 800.833.6954 | 0824. SV | 11.2019 | Page 11/16MOHAWK TECHNICAL SERVICES DEPARTMENT | 508 EAST MORRIS STREET, DALTON, GA. 30721 | 888.387.9881
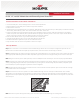
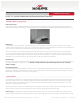
Secure your starter rows with a straight edge. Once the remainder of the floor has been installed, go back to the beginning and remove the straight edges
and spread adhesive on the remainder of the open subfloor. Remember, planks closest to the wall may have to be scribed and cut to fit due to irregularities
along the wall. When using Mohawk’s M92X adhesive, it is not necessary to roll the floor.
Clean Up
Use clean white terry cloth towels to clean as you go along with mineral spirits. It is easy and convenient to use. Adhesive that has cured on the surface of
the flooring can be difficult to remove.
Light foot traffic is allowed after 12 hours, but wait 24 hours after installation to remove the low adhesion delicate surface painters tape. Once the tape is
removed, clean any adhesive residue left from the tape using mineral spirits on a clean white terry towel.
Final Touches
Trim excess underlayment (floating installation only) and install or re-install any transition pieces, reducer strips, T-moldings, thresholds, bases and/or quarter
round moldings. Trims and moldings should be nailed into the wall or subfloor, not the floor. Install the proper trim molding at the doorways to achieve the
transition and along the walls to cover the edges of any gaps along the wall due to irregularity.
Complete the job by using the wood filler that coordinates with the installed engineered flooring for minor corrections or areas where brad nails were used in
the trim or the flooring. Clean the finished floor with Performance Accessories Cleaner.
To prevent surface damage, avoid rolling heavy furniture and appliances on the floor. Use plywood or appliance lifts if necessary. Use protective castors/
castor cups or felt pads on the legs of furniture to prevent damage to the flooring.
IMPORTANT: If the floor is to be covered, the floor should be thoroughly cleaned prior to covering to prevent grit damage to the finish. Do not cover with
plastic, red rosin, felt or wax paper or previously used cardboard. Inks from printed cardboard could damage the hardwood floor. Instead use a breathable
material such as clean, dry, plain uncoated cardboard or Kraft paper.
A common reinforced builder’s paper is a good choice. Any covering should be taped using a low-adhesion tape to base or shoe moldings. Avoid taping to
finished flooring. When taping paper or sheets together, tape them to each other, not to the floor. The floor must be completely covered to eliminate uneven
ambering from exposure to UV light.
Staple Down Instructions
Thickness Fastener Gauge Side Spacing End Spacing
3/8"
20 4"-6" 1"
1⁄2" 18 not less than 1-1/2" in length 4"-6" 1"
9/16" 18 not less than 1-1/2" in length 4"-6" 1"
3⁄4"
15.5 g staple or 16 or 18 g cleat 4"-6" 1"