
Installation & Assembly


Installation Instructions
For 3/8”, 1/2”, and 9/16” Mohawk oors with Enhanced Engineered Construction
™
©2019 mohawkflooring.com | 800.833.6954 | 0824. SV | 11.2019 | Page 10/16MOHAWK TECHNICAL SERVICES DEPARTMENT | 508 EAST MORRIS STREET, DALTON, GA. 30721 | 888.387.9881
General Information for Glue Down Installations
1. Use cement-based patch, skim coat leveling products to correct substrate imperfections.
2. Regulate temperature and humidity 72 hours before, during and after installation.
3. Install and secure starter row.
4. Spread adhesive using recommended trowel, ensuring 95% to 100% adhesive contact. Wet-lay method: press ooring rmly into adhesive immediately
after troweling. After the ooring is place, roll the entire installation with a 75 lb. smooth roller.
5. Inspect the installation and remove any adhesive smudges or drops immediately using mineral spirits. NOTE: Urethane adhesive is very difcult to
remove once dry and cured. Make every effort to prevent adhesive from getting on the ooring surface. For best results, keep a urethane adhesive
cleaner or mineral spirits nearby to remove any adhesive smudges or drops during installation.
6. Clean tools while adhesive is fresh using a urethane adhesive cleaner or mineral spirits.
7. Avoid light/regular trafc for at least 12 hours. Avoid heavy trafc for at least 24 hours.
8. See adhesive manufacture guidelines for open time on the adhesive container.
9. Proper ventilation within the room must be provided. An electric fan is helpful.
Wet Lay Method
Step 1: Select a starter wall. It is recommended to start the installation along an exterior wall. It’s more likely to be straight and square with the room.
Measure out from the wall the width of two planks plus the plank thickness, mark each end of the room and snap your chalk line.
Step 2: Spread adhesive from the chalk line to the starter wall using the recommended trowel size. It is important to use the correct trowel at a 45° angle to
get the proper spread of adhesive applied to the subfloor and produce a proper and permanent bond. Improper bonding can cause loose or hollow spots.
NOTE: Change the trowel every 2,000 to 3,000 square feet (or sooner as needed) due to wear of the dimples. This assures the proper spread of adhesive.
Step 3: Install the first row of starter planks with the tongue facing the starter wall and secure into position. Alignment is critical and can be achieved by
securing a straight edge along the chalk line (a 2 by 4 works well) or by top nailing the first row with finishing nails (wood subfloor) or adjustable spacers
(concrete subfloor). This prevents slippage of the planks that can cause misalignment.
NOTE: The planks along the wall may have to be scribed and cut to fit in order to maintain a consistent expansion space since most walls are not straight.
Try to maintain at least 2” on the scribed plank.
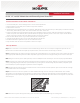
Step 4: Once the starter rows are secure, spread 2-1/2 to 3 feet of adhesive the length of the room. Never lay more adhesive than can be covered in
approximately 1 hour. Place tongue into groove of plank or strips and press firmly into adhesive. Never slide planks or strips through adhesive. Use Uniclic
tapping block if necessary to fit planks snug together at side and butt ends. Clean any adhesive off the surface before it cures using clean terry cloth towels
and mineral spirits.
NOTE: Never work on top of the flooring when installing. If you must work on top of the newly laid flooring, use a kneeling board.
2 ½ - 3'