Electric Coil Ranges Safety Information . . . . . . . . . . 2-4, 12, 14 Operating Instructions 4 Surface Units. . . . . . . . . . . . . . . . 6-7 Oven . . . . . . . . . . . . . . . . . . . . . . Owner’s Manual and Installation Instructions Coil Top Models MCAS724 Care and Cleaning Shelves . . . . . . . . . . . . . . . . . . . . . 8 Surface Units and Drip Pans. . . . 8 Cooktop . . . . . . . . . . . . . . . . . . . 8,9 9 Broiler Pan and Grid. . . . . . . . . . 9 Oven Door . . . . . . . . . . . . . . . . .
Safety Instructions IMPORTANT SAFETY INFORMATION. READ ALL INSTRUCTIONS BEFORE USING. WARNING! For your safety, the information in this manual must be followed to minimize the risk of fire or explosion, electric shock, or to prevent property damage, personal injury, or loss of life. WARNING ANTI-TIP DEVICE Operating Instructions All ranges can tip and injury could result. To prevent accidental tipping of the range, attach it to the wall by installing the Anti-Tip device supplied.
Safety Instructions COOK MEAT AND POULTRY THOROUGHLY. . . Cook meat and poultry thoroughly-- meat to at Ieast an INTERNAL temperature of 160°F and poultry to at least an INTERNAL temperature of 180°F. Cooking to these temperatures usually protects against foodborne illness. Operating Instructions WARNING! SAFETY PRECAUTIONS Use only dry pot holders-moist or damp pot holders on hot surfaces may result in burns from steam. Do not let pot holders touch hot surface units or heating elements.
OVEN Operating Instructions Safety Instructions IMPORTANT SAFETY INFORMATION. READ ALL INSTRUCTIONS BEFORE USING. Pulling out the shelf to the stop-lock is a convenience in lifting heavy foods. It is also a precaution against burns from touching hot surfaces of the door or oven walls. Do not heat unopened food containers. Pressure could build up and the container could burst, causing an injury. When using cooking or roasting bags in the oven, follow the manufacturer's directions.
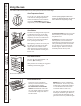
Throughout this manual, features and appearance may vary from your model. Surface Cooking Controls Your surface units and controls are designed to give you a variety of heat settings for surface unit cooking. Switching heats to higher settings always shows a quicker change in temperature than switching to lower settings. How to Set the Controls Push the control knob in. 2 Turn either clockwise or counterclockwise to desired heat setting. Control must be pushed in to set only from the 0FF position.
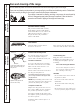
The OVEN TEMP knob is located on the control panel on the front of the range. OVEN BR OI L 500 4 25 0 50 40 0 350 30 Operating Instructions Oven Temperature Control TEMP OFF 200 Safety Instructions Using the oven. 0 Oven Shelves Care and Cleaning The shelves are designed with stop-locks so when placed correctly on the shelf supports, they will stop before coming completely out of the oven and will not tilt when you are removing food from them or placing food on them.
Safety Instructions Adjust the oven thermostat—Easy to do yourself! You may find that your new oven cooks differently than the one it replaced. Use your new oven for a few weeks to become more familiar with it. If you still think your new oven is too hot or too cold, you can adjust the thermostat yourself. Do not use thermometers, such as those found in grocery stores, to check the temperature setting of your oven. These thermometers may vary 20—40°F.
Be sure electrical power is off and all surfaces are cool before cleaning any part of the range. Proper care and cleaning are important so your range wiII give you efficient and satisfactory service. Follow these directions carefully in caring for your range to assure safe and proper maintenance. lf your range is removed for cleaning, servicing or any reason, be sure the anti-tip device is reengaged properly when the range is replaced.
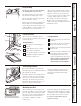
Clean the area under the cooktop often. Built-up soil, especially grease, may catch on fire. To make cleaning easier, the cooktop may be lifted up and propped open. Be sure all surface units are turned off before raising the cooktop. Lift-Off Oven Door Slot To replace the door: Firmly grasp both sides of the door at the top. 2 Insert and seat the upper and lower hinge arms into the oven slots. 3 Push the hinge locks down from the hinge hooks.
Control knobs The control knobs may be removed for easier cleaning. Make sure the knobs are in the OFF positions and pull them straight off the stems for cleaning. Operating Instructions Safety Instructions Care and cleaning of the range. Replace the knobs in the OFF position to ensure proper placement. Painted Surfaces Care and Cleaning Painted surfaces include the sides, control panel, door and kick panel. Clean these with soap and water or a vinegar and water solution.
Safety Instructions Most cleaning can be done with the drawer in place. However, the drawer may be removed if further cleaning is needed. Use soap and warm water to thoroughly clean. Storage Drawer Removal. To remove the storage drawer: To replace the storage drawer: Insert glides at the back of the drawer beyond the stop on range glides. Tilt up the front and remove it. Lift the drawer if necessary to insert easily. Let the front of the drawer down, then push in to close.
InstaIlation Instructions 24” Moffat Electric Ranges Questions? Call 1.800.561.3344 or consults our web page: www.moffatappliances.ca BEFORE YOU BEGIN FOR YOUR SAFETY: Read these instructions completely and carefully. All rough-in and spacing dimensions must be met for safe use of your range. Electricity to the range can be disconnected at the outlet without moving the range if the outlet is in the preferred location (remove lower drawer).
Installation Instructions PREPARE TO INSTALL THE RANGE TOOLS YOU WILL NEED Drili with 1/8” Bit 2 PREPARE THE OPENING Allow 2” spacing from the range to adjacent vertical walls above the cooktop surface. Allow 30” minimum clearance between the surface units and the bottom of unprotected wood or metal top cabinet, and 18” minimum between the countertop and adjacent cabinet bottom.
Installation Instructions ELECTRICAL CONNECTIONS ELECTRICAL REQUIREMENTS CAUTION: For personal safety, do not use an extension cord with this appliance. Remove house fuse or open circuit breaker before beginning installation. This appliance must be supplied with the proper voltage and frequency, and connected to an individual properly grounded branch circuit, protected by a circuit breaker or fuse having amperage as specified on the rating plate. The rating plate is located under the cooktop.
Installation Instructions INSTALL THE RANGE 3 ANTI-TIP DEVICE INSTALLATION 3 ANTI-TIP DEVICE INSTALLATION (cont.) WARNING: Range must be secured with an approved Anti-Tip device. Unless properly installed, the range could be tipped by you or a child standing, sitting or Ieaning on an open door. After installing the Anti-Tip device, verify that it is in place by carefully attempting to tilt the range forward.
Safety Instructions Before you call for service... Troubleshooting Tips Problem Possible Causes What To Do Operating Instructions Coil Cooktops Surface units not functioning properly The surface units are not plugged in solidly. With the controls off, check to make sure the surface unit is plugged completely into the receptacle. The surface unit controls improperly set. Check to see the correct control is set for the surface unit you are using. The drip pans are not set securely in the cooktop.
Safety Instructions Food does not broil properly Oven is not set to BROIL. On models with a temperature knob, make sure you turn it all the way to the BROIL position. On models with a BROIL pad, make sure it is turned on. Door not open to the broil stop position as recomended. See the Using the oven section. Improper shelf position being used. See the Broiling guide. Food being cooked in a hot pan. Use the broiling pan and grid that came with your range. Make sure it is cool.
Safety Instructions Operating Instructions Care and Cleaning Installation Instructions Consumer Support Troubleshooting Tips Before you call for service... Troubleshooting Tips Problem Possible Causes Oven temperature too hot or too cold Oven thermostat needs adjustment. See the Adjust the oven thermostat—Easy to do yoursefl! section. Clock and timer do not work Plug on range is not completely inserted in the electrical outlet.
Possible Causes “Burning” or “oily” odor emitting from the oven vent This is normal in a new oven and will disappear in time. To speed the process, set a self-clean cycle for a minimum of 3hours. See the Using the self-cleaning oven section. Strong odor An odor from the insulation around the inside of the oven is normal for the first few times the oven is used. This is temporary. What To Do Operating Instructions The drawer is out of alignment. Fully extend the drawer and push it all the way in.
parts Looking For Something More? To inquire about purchasing a part or an accessory for yor appliance, call our National Parts Center at 1.800.661. 1616. Operating Instructions Safety Instructions Accessories.
Please place in envelope and mail to: Veuillez mettre dans une enveloppe et envoyez à: OWNERSHIP REGISTRATION P.O.
For Canadian Customer Pour les Consommateurs Canadiens CUT ALONG THIS LINE AND RETURN CARD- -THANKS OWNERSHIP REGISTRATION CERTIFICATE - FICHE D’INSCRIPTION DU PROPRIÉTAIRE Please register your product to enable us to contact you in the remote event a safety notice is issued for this product and to allow for efficient communication under the terms of your warranty, should the need arise. www.geappliances.ca REGISTER ON-LINE: ENREGISTREMENT SUR INTERNET A: www.electromenagersge.
Safety Instructions Electric Range Warranty. All warranty service provided by our Factory Service Centers, or an authorized Customer Care technician. To schedule service, 24 hours a day, calI 1.800.561.3344. Please have serial number and model number available when calling for service. Staple your receipt here. Proof of the original purchase. date is needed to obtain service under the warranty.
Consumer Support. 6 5 12 24 13 21 22 28 23 29 30 31 Schedule Service Expert repair service is only one step away from your door. Call 1-800-561-3344, 24 hours a day, 7 days a week. Parts and Accessories parts To inquire about purchasing a part or an accessory for your appIiance, call our National Parts Center at 1-800-661-1616. Contact Us www.moffatappliances.
electriques, à éléments en serpentins Cuisinières Consignes de sécurité . . . . . . . 2-4, 12, 14 Surface de cuisson des éléments MCAS724 Mode d'emploi Éléments de surface. . . . . . . . . . . Four . . . . . . . . . . . . . . . . . . . . . . . Manuel d’utilisation et instructions d’installation 4 6-7 Entretien et nettoyage Éléments de surface et cuvettes de propreté. . . . Grilles . . . . . . . . . . . . . . . . . . . . . Surface de cuisson. . . . . . . . . . . . Lèchefrite et sa grille . . . . . . .
AVERTISSEMENT! Pour votre sécurité et pour minimiser les risques d’incendie ou d’explosion, de décharge électrique, de dommages matériels ou corporels, ou même d’accidents mortels, les utilisateurs doivent se conformer aux instuctions présentées dans ce manuel. AVERTISSEMENT DISPOSITIF ANTIBASCULEMENT Mode d’emploi Consignes de sécurité INSTRUCTIONS DE SÉCURITÉ IMPORTANTES. LISEZ LES INSTRUCTIONS QUI SUIVÉNT AVANT D’UTILISER VOTRE APPAREIL.
Consignes de sécurité CUISEZ BIEN LA VIANDE ET LA VOLAILLE... Cuisez bien la viande et la volaille—la viande jusqu’à une température INTERNE d’au moins 70 °C (160 °F) et la volaille jusqu’à une témpérature INTERNE d’au moins 80 °C (180° F). La cuisson à ces températures protège habituallement contre les maladies d’origine alimentaire.
FOUR Mode d’emploi Consignes de sécurité INSTRUCTIONS DE SÉCURITÉ IMPORTANTES. LISEZ LES INSTRUCTIONS QUI SUIVENT AVANT D’UTILISER VOTRE APPAREIL Tenez-vous à l’écart de la cuisinière en ouvrant la porte du four L’air chaud ou la vapeur qui s’en échappent pourraient brûler les mains, le visage et/ou les yeux. Si vous utilisez des sachets de cuisson ou de rôtissage dans le four, suivez les instructions du fabricant. Ne chauffez pas de contenants d’aliments non ouverts.
Utilisation des éléments de surface Commandes de la surface de cuisson Les éléments de surface et les commandes de cet appareil sont conçus pour vous offrir un grand nombre de réglages de températures de cuisson. Réglage des commandes 1 Enfoncez le bouton de commande. 2 Tournez-le vers la gauche ou vers la droite jusqu'au réglage désiré. LO HI (ÉLEVÉ) Démarrer rapidement la cuisson; amener l'eau à ébullition.
Le bouton OVEN TEMP (TEMPÉRATURE DU FOUR) est situé sur le panneau de commande, à l'avant de la cuisinière. OVEN BR OI L 500 4 25 0 50 Mode d’emploi Commande du four TEMP OFF 20 0 Consignes de sécurité Utilisation du four 40 0 350 0 30 Le voyant de fonctionnement du four reste allumé jusqu'à ce que le four ait atteint la température sélectionnée, puis s'allume e s'éteint de façon intermittente pendant la cuisson.
OVEN TEMP OFF Pour régler le thermostat avec ce type de bouton BR OI L 200 500 40 25 0 0 45 0 350 30 0 LOOSE NS C WS RE TO ROTATE Pour augmenter la température du four, déplacez la vis supérieure vers la droite. Vous entendrez un « clic » à chaque cran. Une fois le réglage effectué, resserrez bien les vis pour, mais pas à l’excès. Remettez le bouton en place, en positionnant la surface plate du bouton au-dessus de l’axe, et vérifiez la performance du four.
Assurez-vous que l'alimentation électrique est coupée et que toutes les surfaces sont froides avant de nettoyer toute partie de la cuisinière. L'entretien et le nettoyage adéquats sont importants et contribuent au fonctionnement efficace et satisfaisant de votre cuisinière. Suivez ces consignes attentivement pour vous assurer d'un entretien sécuritaire et adéquat de votre cuisinière.
Lavez souvent la zone située sous la surface de cuisson. Les résidus accumulés, particulièrement la graisse, peuvent prendre feu. La surface de cuisson peut être relevée et rester ouverte pour faciliter le nettoyage. Assurez-vous que tous les éléments de surface sont arrêtés avant de relever la surface de cuisson. Porte de four amovible Fente Bras inférieur de la charnière Pour remettre la porte en place : 1 Tenez fermement le haut de la porte, des deux côtés.
Consignes de sécurité Entretien et nettoyage de la cuisinière Boutons de commande Les boutons de commande peuvent être enlevés pour faciliter le nettoyage. Mode d’emploi Assurez-vous que les boutons sont à la position OFF (arrêt) et tirez-les hors des tiges pour les nettoyer. Les boutons peuvent être nettoyés au lave-vaisselle ou avec de l'eau et du savon. Assurez-vous que l'intérieur des boutons est sec avant de les replacer.
Consignes de sécurité La grande partie du nettoyage peut se faire avec le tiroir en place. Cependant, le tiroir peut être retiré si un nettoyage plus minutieux est nécessaire. Utilisez de l'eau tiède savonneuse pour bien nettoyer. Enlèvement du tiroir de rangement. Pour enlever le tiroir de rangement: Tirez complètement le tiroir. Insérez les rails situés à l’arrière du tiroir en dépassant l’arrêt sur les guides de votre cuisinière. Soulevez le tiroir le cas échéant pour le faire entrer plus facilement.
Instructions d'installation Cuisinières électriques moffat et 24 po (61 cm) Des questions? Téléphonez au 1-800-561-3344 ou consultez notre site Web au www.electromenagersmoffat.ca AVANT DE COMMENCER POUR VOTRE SÉCURITÉ : Lisez attentivement toutes ces instructions. Toutes les dimensions de raccordement et d'espacement doivent être respectées pour une utilisation sécuritaire de votre cuisinière.
Instructions d'installation PRÉPARATION À L'INSTALLATION DE LA CUISINIÈRE OUTILS DONT VOUS AUREZ BESOIN Perceuse avec mèche de 1/8 po 2 PRÉPARER L'OUVERTURE Laissez un espace de 2 po (5,08 cm) entre la cuisinière et les murs verticaux adjacents situés au-dessus de la surface de cuisson.
Instructions d'installation RACCORDEMENTS ÉLECTRIQUES EXIGENCES ÉLECTRIQUES Renseignez-vous auprès des services publics locaux pour savoir quels sont les codes électriques applicables dans votre région. Ne pas raccorder votre four conformément aux codes en vigueur pourrait se révéler dangereux.
Instructions d'installation INSTALLATION DE LA CUISINIÈRE 3 INSTALLATION DU DISPOSITIF ANTIBASCULEMENT 3 INSTALLATION DU DISPOSITIF ANTIBASCULEMENT (suite) AVERTISSEMENT : Installez la cheville métallique dans le trou percé, puis visez la vis à bois en la faisant traverser le dispositif antibasculement. La vis doit être correctement serrée, comme recommandé pour ce type de quincaillerie. La cuisinière doit être maintenue par un dispositif antibasculement agréé.
Consignes de sécurité Avant d’appeler le réparateur...
Consignes de sécurité Problème Solution Sur les modèles avec un bouton de température, assurez-vous de bien tourner ce bouton jusqu’à sa positon BROIL (GRILL) Sur les modèles avec une touche BROIL (GRILL), assurez-vous que cette touche a bien été mise. La porte n’est pas ouverte en position d’arrêt de grillade comme c’est recommandé. Voyez la section Utilisation du four. Mauvaise position de grille utilisée. Voyez le Guide de cuisson au gril. Aliments cuit dans un ustensile chaud.
Consignes de sécurité Mode d’emploi Avant d’appeler le réparateur... ConseiIs de dépannage Causes possibIes Température du four trop chaude ou trop froide Le thermostat du four a besoin d’être réglé. Voyez la section Réglage du thermostat du four—Faites-le vous-même! L’horloge et la minuterie ne marchent pas. La prise de la cuisinière n’est pas complètement insérée dans la prise d’alimentation. Vérifiez que la prise est insérée dans une prise murale sous tension, correctement mise à la terre.
Consignes de sécurité Solution Causes possibIes Odeur de brûle ou d’ huile venant de l’event Ces odeurs sont normales dans un four neuf et disparaîtront à l’usage. Pour accélérer le processus, réglez un cycle d’ autonettoyage d’au moins 3 heures. Voyez la section Utilisation du four autonettoyant. Forte odeur Une odeur venant de l’isolant autour et à l’intérieur du four est normale pendant les premières utilisations du four. Cette odeur est temporaire.
parts Vous cherchez autre chose? Pour vous renseigner sur l’achat d’une pièce ou d’un accesories pour votre appareil, applez notre centre national de piéces au 1.800.661. 1616. Mode d’emploi Consignes de sécurité Accessories.
Please place in envelope and mail to: Veuillez mettre dans une enveloppe et envoyez à: OWNERSHIP REGISTRATION P.O.
For Canadian Customer Pour les Consommateurs Canadiens CUT ALONG THIS LINE AND RETURN CARD- -THANKS OWNERSHIP REGISTRATION CERTIFICATE - FICHE D’INSCRIPTION DU PROPRIÉTAIRE Please register your product to enable us to contact you in the remote event a safety notice is issued for this product and to allow for efficient communication under the terms of your warranty, should the need arise. www.geappliances.ca REGISTER ON-LINE: ENREGISTREMENT SUR INTERNET A: www.electromenagersge.
Les services sous garanties sont dispensés par nos centres de réparation ou par nos réparateurs Customer Care autorisés. Pour prendre rendez-vous 24 heures sur 24, appelez le 1.800.561.3344. Veuillez fournir le numéro de série et le numéro de modèle lorsque vous appelez pour obtenir le service. R Agrafez votre reçu ici. Pour l’obtention des services sous garantie, il sera nécessarie de présenter un document attestant de la date d’achat initial de l’appareil.
Service à la clientèle. 6 5 12 24 13 21 22 28 23 29 30 31 Prise de rendez-vous Il est très facile de demander l’intervention d’un technicien expert en réparation. Appelez le 1-800-561-3344, 24 heures par jour, 7 jours par semaine Pièces et eccessoires parts Pour vous renseigner sur l’achat d’une pièce ou d’un accessoire pour votre appareil, appelez notre Centre national de pièces au 1-800-661-1616. Contact Us www.electromenagersmoffat.