
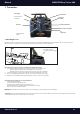
Instructions/manual Easy Trainer 600


F
Manual MODSTER Easy Trainer 600
www.modster.at 23
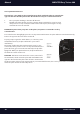
8.3 Landing
To land you y past the wind past the landing area. Now move gently in the wind direction, guide the landscaping and reduce the throttle
so that the aircraft enters a descending glide path. If necessary, add some gas to extend the glide path until you reach the runway. When
the model approaches and loses altitude, use the elevator to control the landing approach and altitude. Continue to change the height until
the model touches the ground. At this time, the height control should be pushed completely or almost completely forward. This causes the
aircraft to slow down and settle on the ground. Later, if you have more experience with your plane, you can y with pleasure and slow ybys
with raised landscaping.
WARNING: If the propeller jams during a rough landing and can not turn, the batteries and the speed control become very hot when
you try to give more gas. Turn the throttle lever down immediately to stop the engine. If you do not, the engine, speed control and /
or battery will be damaged.
8.4 After Flying
Disconnect the battery and remove it from the aircraft. Then turn o the transmitter. Allow the battery to cool before recharging, or allow
the engine to cool before installing a new battery for the next ight. Check the aircraft carefully to ensure that nothing is loose or damaged.
8. Start to Fly
Until you are familiar with your plane, you should not y if the wind speed exceeds 16 km / h.
Check Before Departure: Always check the correct response to input from your controller before each ight. Make sure the ailerons, elevator,
and rudder are working properly and that none of the functions have been reversed by mistake
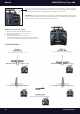
8.1 Hand Start
Until you can eciently y your model, you should always be supported by a second person at hand start. Your helper holds the model
at the bottom of the fuselage. When both have signaled "ready", move the throttle lever to full power. Your helper should take a few steps
with the aircraft high above the head, then throw the model quickly but controllably, either parallel to the ground or with tip up. At rst,
the model will still rise gently, but within a few seconds it will also reach enough speed to climb up high. Move the elevator to "up" (up) to
establish the ascent. Once you have reached a safe ight speed at a comfortable height (about 15 feet), use the
controls as necessary to make a gentle turn away from the runway.
8.2 The Flight
You should keep in mind that when the aircraft ies away from you, you have to move the aileron stick to the right, so that the aircraft is
moving to the right.
When the model ies towards you, move the aileron stick to the right and the aircraft moves to the left. Of course, the aircraft still responds
in the same way, it is only that your orientation has reversed. This should be kept in mind while they are learning to y (and it is also a good
reason to take ight hours from an experienced pilot!).
To make a turn, pull the elevator upwards while you operate the aileron to bring the model into a transverse position. To stop the turn, move
the aileron in the opposite direction.
As soon as you have lifted the aircraft to an appropriate altitude, your rst task will be to trim the model for the straight ahead ight. The
model ies best at about 3/4 gas. Adjust the trims of the transmitter so that small control surface adjustments can be made as required until
the aircraft ies straight without countersteering. Maybe your helper can adjust the trim for you.
Remember to keep the model high enough to have enough response time for corrections, but do not y too far away. Otherwise, it will be
dicult to detect airports and directions.
A nal check before landing: look at how the model will react when it's time to land and you turn o the engine. To do this, turn o the
engine while the aircraft is still in the air. The model should pass in a gentle, downward glide landing approach. Thus, the model should react
when it is actually time to land. Turn the engine back on and go back to your original altitude. Try again, this time adding landclasses. Give
gas to get back up, and take the landscaping away again. Practice this climb and glide a few more times to accurately assess the distance
you need to land.