
Specifications


Page 12
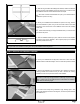
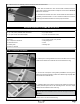
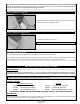
❑ While holding the stabilizer in place, draw a line on each side of the
stabilizer where it meets the top of the fuselage.
❑ Push the stabilizer into the mounting slot. To align it properly, the trailing
edge of the stabilizer should be even with the back edge of the fuselage and
the stabilizer should be pushed down rmly.
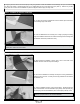
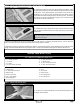
❑ Remove the stabilizer and carefully cut away the covering material from
below the lines you drew. Cut away the covering material from the base of
the stabilizer, too.
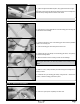
IMPORTANT Double-check that the elevator and rudder don’t interfere with each other when moved. If they do, enlarge the
elevator joiner relief notch in the rudder.
❑ Apply a generous amount of 5 minute epoxy to the gluing surfaces of both the stabilizer and the fuselage, then push the stabilizer
into place and realign it, double-checking all of your measurements once more before the epoxy sets up. Remove any excess
epoxy and use T-Pins to hold the stabilizer in place and aligned until the epoxy has fully cured.
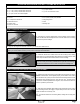
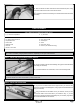
❑ Cut away the covering material from over the elevator joiner relief notch
in the leading edge of the rudder.
❑ Glue the stabilizer into place, using 5 minute epoxy. Double-check all of
your measurements once more before the epoxy sets up, then wipe away any
excess epoxy, and hold the stabilizer in place until the epoxy has fully cured.
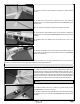
IMPORTANT Use a builder's triangle to make sure that the vertical
stabilizer is perpendicular to the horizontal stabilizer.