
Specifications


Page 11
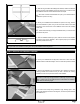
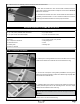
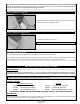
❑ With the wing mounted to the fuselage and centered, measure the distance
between the tips of the stabilizer and the tips of the wing. Pivot the front of
the stabilizer until both of these measurements are equal.
☞
When both of these measurements are equal, you're assured that the
stabilizer is square to the wing.
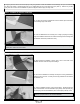
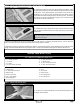
❑ When you're satised that the stabilizer is square to the wing, hold the
front of the stabilizer in place, using a T-Pin, then draw a mark on each side
of both the front and the back of the stabilizer where it and the fuselage
sides meet.
☞
These marks will help you realign the stabilizer after you remove it and
glue it back into place.
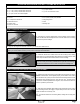
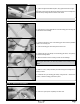
❑ With the stabilizer held rmly in place, look from the front of the airplane
at both the wing and the stabilizer. When aligned properly, the stabilizer
should be parallel to the wing.
IMPORTANT If the stabilizer is not parallel to the wing, remove it and use 220 grit sandpaper with a sanding block to sand down
the higher side of the stabilizer mounting slot, until you are satised with the alignment.
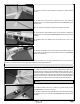
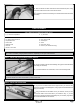
❑ Once you're satised with the alignment, draw a line on each side of the
stabilizer where it meets the fuselage. Do this on both the top and the bottom.
STEP 2: INSTALLING THE HORIZONTAL STABILIZER
WARNING When cutting through the covering to remove it in the next
procedure, cut with only enough pressure to cut through only the covering
itself. Cutting down into the balsa structure could weaken the stabilizer
and cause it to fail during ight.
❑ Remove the stabilizer from the fuselage, then carefully cut away the
covering material from inside the lines you drew. Remove the covering
material from both the top and the bottom of the stabilizer.
❑ To make it less messy during installation, apply masking tape to both
sides of the fuselage around the mounting slot, and to the top and bottom of
the stabilizer, too.