
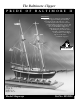
Instruction manual


Before painting the cast-metal fittings, clean them up by
removing all the mold-joint flash. To do this, use a No. 11
hobby blade to cut the flash, then file or sand with fine sand
-
paper. It is also suggested that you clean the fittings thor-
oughly with warm soapy water before applying primer.
Make sure they are rinsed thoroughly and allowed to dry
before painting.
6. Soldering & Working with Brass
The Pride of Baltimore II is a replica ship of a period that had
very little iron fittings. Consequently, you will not be
required to do much soldering. Many of the fittings are cast
Britannia. However, some items are difficult to cast or would
be too soft, so these items must be made from brass strip and
wire. Here are a few tips on soldering those or items you
decide to scratch build.
Brass sheet and strips can be cut with a small pair of tin snips
or heavy scissors. Heavier brass will require the use of a jew-
eler’s saw. After cutting, all edges should be smoothed with
needle files and fine wet-or-dry sandpaper. When cutting
slivers from the brass sheet, you may notice that shears tend
to bend the sheet sideways, as well as curl the piece. To
straighten the edges in both directions, grip them with a pair
of small pliers.
Drilling holes in brass can be accomplished using small drills
and a pin vise, which is a slow process. A Dremel Moto-Tool
mounted on a Dremel drill press is ideal. This tool is worth
the cost. Prior to drilling, use a small centerpunch to start;
otherwise, these small drills tend to wander. Lubricate with a
light oil and drill very slowly to avoid breakage. When using
the Dremel, clamp the pieces in place or hold them down
with a stick of wood. The brass will be very hot, so keep your
fingers off!
Soldering
: The key here is to keep all brass parts clean. Use a
solvent, or lightly sand, or both. Keep your fingers off to
avoid grease spots. Soldering is easy if care is taken to set up
your work area properly first. Use jigs or other holding
devices, so the parts do not move around. Soldering can be
done with a small torch or pencil soldering iron. First, add
flux to the joint; just enough to do the job. The solder will flow
where the flux is applied. Next, heat the joint.
This sequence is important. The larger the parts, the longer it
will take to heat the brass before the solder will flow. If you
get too much solder on the joint, file it off with needle files.
You’ll want the joint to look like the real thing, not a big glob
of fillets.
Solder
: Today, there are many lead-free solders available and
they are very strong. There is not much need to use pure sil
-
ver solder. It is much more difficult to use because of the high
melting temperature. Some of the lead-free solders have a
small percentage of silver in the composition but the melting
temperature is low.
9
PAINTING & STAINING THE MODEL
It may seem strange to begin an instruction manual with direc-
tions on applying the finishes to the model. Not so! Much time
and effort can be saved, and a more professional result can be
obtained, if the finishing process is carried out during construc-
tion. Proper timing in application of finishes and the use of mask
-
ing tape to define painted edges should eliminate unsightly glue
marks and splotchy stained surfaces. In the end, following these
general suggestions will be to your advantage.
Paint:
Use a flat-finish paint such as the excellent model paints made
by Model Shipways (www.modelexpo-online.com). You could
also use artist’s paints by Jo Sonja (used by many bird carvers)
or Holbein Acryla Gouache. These paints are a combination
acrylic-gouache.
Paint colors:
The color scheme used for the Pride of Baltimore II is given on the
plans. You will see color notes such as “color A.” In a notes col-
umn on plan sheet 3, the color A is described. In order to convey
a more accurate color, commercial Floquil ship model or railroad
model colors and stains, and Minwax stains are referenced. A
color was selected as close as possible to the real ship colors.
If you use a paint other than Model Shipways, match the Model
Shipways color referenced on the plans with the paint you select,
or get as close as you can.
Primer:
Use a grey primer. Model Shipways brand is excellent. The grey
color will highlight sanding scratches and other defects better
than white primer. Prime all woodwork to be painted, and prime
all metal fittings. Lightly sand the primed items. Use a spackling
compound, such as Pic-n-Patch brand, to fill any scratches and
defects, then re-prime. Careful! Do not prime parts to be stained
or varnished.
Stains & Finishes:
For natural finished wood, use a protective coating after staining,
such as low sheen polyurethane varnish or the Floquil coatings.
You can also use an oil-resin mix such as natural Minwax. Model
Shipways stain, or Minwax stains can be used to tone the wood.
Brushes & Procedures:
Use good quality soft sable or synthetic hair artist brushes. A
small pointed brush is good for details. For the main hull areas,
use a 1/4 to 1/2 inch flat brush.
Before painting, clean the model with a tack rag. Apply your
paint in smooth even strokes, overlapping the strokes as you go.
Thin the paint enough to eliminate brush strokes, but not run.
You will need four or five coats of the light colors to cover the
grey primer, and maybe only two coats of the dark. Check your
finish between coats, and sand or add spackle as necessary to get
rid of any blemishes.
You will be told how to mark the load waterline location later.
At this line, and anywhere else two colors meet, use masking
tape. Electrician’s black plastic tape is ideal. It leaves a nice edge
and is not overly sticky. Do not use drafting tape. The edges are
wrinkled and paint may run under the edge.