
Manual


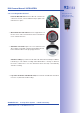

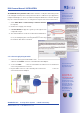


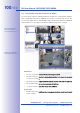
Table Of Contents
- Added Security Value
- Cost Benefits And Technical Advantages
- 2 INSTALLATION
- 3 OPERATING THE CAMERA
- 3.1 Manual And Automatic Operation - Overview
- 3.2 First Images And The Most Important Settings
- 3.3 Virtual PTZ
- 3.4 Correction Of Lens Distortion (L22 Only)
- 3.8 Additional Notes
- 3.8.1 Weatherproof Qualities
- 3.8.2 Password For The Administration Menu
- 3.8.3 Starting The Camera With The Factory IP Address
- 3.8.4 Reset The Camera To Factory Settings
- 3.8.5 Activate Event Control And Motion Detection
- 3.8.6 Deactivate Text And Logo Options
- 3.8.7 Deactivating The Daily Automatic Camera Reboot
- 3.8.8 Browser
- 3.8.9 Cleaning The Camera And Lens
- 3.8.10 Safety Warnings

www.mobotix.com • sales@mobotix.com
Manual And Automatic Operation
MOBOTIX cameras do not require any extra software. Thus, you can set up and operate the
MOBOTIX camera using a JavaScript-enabled browser on all common operating systems
(such as Window, Linux, Macintosh, etc.). As an alternative, you can also use the MOBOTIX
applications MxControlCenter and MxEasy. Follow these steps to set up the camera:
1. Power is supplied directly via the network
cable (see Section 2.13)
2.
• (see Section 3.2.1, then Section 3.2.2)
• (see Sections 3.2.3 and 3.2.4)
or (see Section 3.2.5)
3. using the browser-based user interface.
Every MOBOTIX camera comes preconfigured with a fixed IP address in the 10.x.x.x range
(e.g.
10.8.0.99). However, local computer networks usually have IP addresses in the
172 or 192 ranges. In order to access a MOBOTIX camera via the network, the camera
needs to obtain an IP address in the same address range. You can
: ,
using MxCC and or by .
Camera software
in the browser
Download the MxEasy
and MxControlCenter
software for free at
www.mobotix.com