
Manual


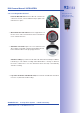

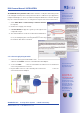


Table Of Contents
- Added Security Value
- Cost Benefits And Technical Advantages
- 2 INSTALLATION
- 3 OPERATING THE CAMERA
- 3.1 Manual And Automatic Operation - Overview
- 3.2 First Images And The Most Important Settings
- 3.3 Virtual PTZ
- 3.4 Correction Of Lens Distortion (L22 Only)
- 3.8 Additional Notes
- 3.8.1 Weatherproof Qualities
- 3.8.2 Password For The Administration Menu
- 3.8.3 Starting The Camera With The Factory IP Address
- 3.8.4 Reset The Camera To Factory Settings
- 3.8.5 Activate Event Control And Motion Detection
- 3.8.6 Deactivate Text And Logo Options
- 3.8.7 Deactivating The Daily Automatic Camera Reboot
- 3.8.8 Browser
- 3.8.9 Cleaning The Camera And Lens
- 3.8.10 Safety Warnings

www.mobotix.com • sales@mobotix.com
As soon as the camera's power supply has been established, the two LEDs will show the
progress of the startup sequence (see Section5.4.3
LED Signals and LED Configuration
in the
Software Manual
).
•
Immediately after connecting the power supply, the red LED lights
up, blinks for two seconds, then stays on permanently. The camera's boot loader
checks the hardware, unpacks and starts the operating system. Next, the camera
checks all of its applications for errors. In case of an error, the camera will start
using the backup operating system. Afterwards, both LEDs light up for four seconds.
• Waiting for key pressed: Both LEDs light up for four seconds. If you press the R or
during this time, the camera will execute the corresponding
function (see Sections 3.2.5 and 3.2.6).
•
Once the camera software has been started, the green LED is on permanently
and the red LED blinks. You can now reach the camera via the network using a
browser.
Notes
During the startup sequence of the camera, the LEDs will always light up, even if
they have been deactivated in .
1. Start
2. Key?
3. Ready