
Manual
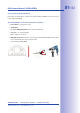
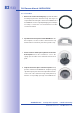

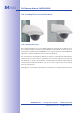


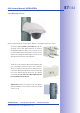
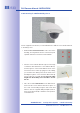
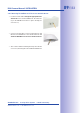

Table Of Contents
- Added Security Value
- Cost Benefits And Technical Advantages
- 2 INSTALLATION
- 3 OPERATING THE CAMERA
- 3.1 Manual And Automatic Operation - Overview
- 3.2 First Images And The Most Important Settings
- 3.3 Virtual PTZ
- 3.4 Correction Of Lens Distortion (L22 Only)
- 3.8 Additional Notes
- 3.8.1 Weatherproof Qualities
- 3.8.2 Password For The Administration Menu
- 3.8.3 Starting The Camera With The Factory IP Address
- 3.8.4 Reset The Camera To Factory Settings
- 3.8.5 Activate Event Control And Motion Detection
- 3.8.6 Deactivate Text And Logo Options
- 3.8.7 Deactivating The Daily Automatic Camera Reboot
- 3.8.8 Browser
- 3.8.9 Cleaning The Camera And Lens
- 3.8.10 Safety Warnings

www.mobotix.com • sales@mobotix.com
1. : Separate the black
mounting ring from the camera housing. This ring is not
required when mounting the camera to the Wall Mount. If
the D24M was not in its original packaging, then it may be
necessary to remove the outer shell with the four Allen
screws beforehand.
2.
The
bottom plate is used to hold the camera and is only
attached and screwed into place during a later step.
3.
bottom plate: Ensure the orientation is correct. The
spring clips should be on the underside of the bottom
plate.
4.
Firmly
push the camera into the Wall Mount. The plastic spring
clips will snap into place when the trapezoidal elements
on the rear of the camera housing exactly match up
with the corresponding openings on the Wall Mount.