
Manual

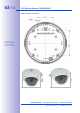
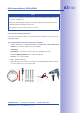


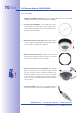
Table Of Contents
- Added Security Value
- Cost Benefits And Technical Advantages
- 2 INSTALLATION
- 3 OPERATING THE CAMERA
- 3.1 Manual And Automatic Operation - Overview
- 3.2 First Images And The Most Important Settings
- 3.3 Virtual PTZ
- 3.4 Correction Of Lens Distortion (L22 Only)
- 3.8 Additional Notes
- 3.8.1 Weatherproof Qualities
- 3.8.2 Password For The Administration Menu
- 3.8.3 Starting The Camera With The Factory IP Address
- 3.8.4 Reset The Camera To Factory Settings
- 3.8.5 Activate Event Control And Motion Detection
- 3.8.6 Deactivate Text And Logo Options
- 3.8.7 Deactivating The Daily Automatic Camera Reboot
- 3.8.8 Browser
- 3.8.9 Cleaning The Camera And Lens
- 3.8.10 Safety Warnings

www.mobotix.com • sales@mobotix.com
Notes
Use the fold-out template included at the end of the printed manual (valid for both
0° and 10° On-Wall Sets).
Make sure that the drilling template is not scaled or adjusted to the paper size when
printing the PDF file (enlarged or reduced).
The maximum torque for all screws is 1 to 1.2 Nm.
Please first check that all components supplied with the On-Wall Set are present in the
original packaging.
• Suitable materials for ceiling/wall installation:
(e.g. from the original camera packaging).
•
• for screw anchor holes needed for ceiling/wall mounting
• MOBOTIX (at the end of this manual)
• to cut out the template
• to mark the drill holes
• Materials and tools needed to connect the pre-installed MOBOTIX network cable in
the camera with the on-site network cable