
Manual


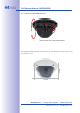
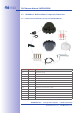

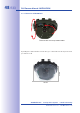
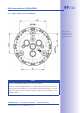

Table Of Contents
- Added Security Value
- Cost Benefits And Technical Advantages
- 2 INSTALLATION
- 3 OPERATING THE CAMERA
- 3.1 Manual And Automatic Operation - Overview
- 3.2 First Images And The Most Important Settings
- 3.3 Virtual PTZ
- 3.4 Correction Of Lens Distortion (L22 Only)
- 3.8 Additional Notes
- 3.8.1 Weatherproof Qualities
- 3.8.2 Password For The Administration Menu
- 3.8.3 Starting The Camera With The Factory IP Address
- 3.8.4 Reset The Camera To Factory Settings
- 3.8.5 Activate Event Control And Motion Detection
- 3.8.6 Deactivate Text And Logo Options
- 3.8.7 Deactivating The Daily Automatic Camera Reboot
- 3.8.8 Browser
- 3.8.9 Cleaning The Camera And Lens
- 3.8.10 Safety Warnings

www.mobotix.com • sales@mobotix.com
2.4
(MX-OPT-AP)
Consists of On-Wall Mount and mounting
supplies. Conforms to U.S. installation stan-
dards. Reliably protects the cabling and allows
additional modules to be integrated within
the On-Wall Mount (patch/installation cable
connector, IO extensions, WLAN, battery, ...).
(MX-OPT-AP-10DEG)
Consists of On-Wall Mount and mounting
supplies for inclined installation (10°) of a
camera. Conforms to U.S. installation stan-
dards. Reliably protects the cabling and allows
additional modules to be integrated within
the On-Wall Mount (patch/installation cable
connector, IO extensions, WLAN, battery, ...).
(MX-D24M-Vandal)
Consists of a stainless steel ring, security
screws and reinforced dome (3 mm poly-
carbonate). Ideally suited for surveillance at
critical locations.
In order for the camera to blend in better with
its environment, the Vandalism Set is available
in five dierent finishes: matt stainless steel,
polished, white powder-coated, black pow-
der-coated, silver-gray powder-coated.