
Manual
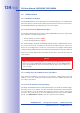


Table Of Contents
- Added Security Value
- Cost Benefits And Technical Advantages
- 2 INSTALLATION
- 3 OPERATING THE CAMERA
- 3.1 Manual And Automatic Operation - Overview
- 3.2 First Images And The Most Important Settings
- 3.3 Virtual PTZ
- 3.4 Correction Of Lens Distortion (L22 Only)
- 3.8 Additional Notes
- 3.8.1 Weatherproof Qualities
- 3.8.2 Password For The Administration Menu
- 3.8.3 Starting The Camera With The Factory IP Address
- 3.8.4 Reset The Camera To Factory Settings
- 3.8.5 Activate Event Control And Motion Detection
- 3.8.6 Deactivate Text And Logo Options
- 3.8.7 Deactivating The Daily Automatic Camera Reboot
- 3.8.8 Browser
- 3.8.9 Cleaning The Camera And Lens
- 3.8.10 Safety Warnings

www.mobotix.com • sales@mobotix.com
• By factory default, the MOBOTIX camera's
event control is disabled. Click the button to activate event control.
This will activate video motion detection and recording. Cameras with integrated
Flash memory (MOBOTIX R models and models with SD card) will use the Flash
memory by default to store the image and video data (recording target). If desired,
you can set additional events and adjust the settings of the recording and storage
parameters (, and Admin
).
=> (
Software Camera Manual Part 2
, Chapter 7 and Chapter 8)
• Upon detecting an event, the MOBOTIX camera can
trigger alarms. These alarms can be adjusted to your needs and you can assign
them to one or more events: playing back a sound alarm on the camera speaker,
showing the visual alarm in the camera live image, sending an e-mail or network
message with the alarm image, placing a phone call, uploading an alarm image to
an FTP server, switching a signal output line of the camera (e.g. for switching on the
lights/opening a door). To change the corresponding settings, refer to the following
dialogs: , and and
.
=> (
Software Camera Manual Part 2
, Chapter 7)