
Manual
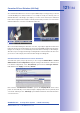


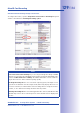
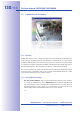
Table Of Contents
- Added Security Value
- Cost Benefits And Technical Advantages
- 2 INSTALLATION
- 3 OPERATING THE CAMERA
- 3.1 Manual And Automatic Operation - Overview
- 3.2 First Images And The Most Important Settings
- 3.3 Virtual PTZ
- 3.4 Correction Of Lens Distortion (L22 Only)
- 3.8 Additional Notes
- 3.8.1 Weatherproof Qualities
- 3.8.2 Password For The Administration Menu
- 3.8.3 Starting The Camera With The Factory IP Address
- 3.8.4 Reset The Camera To Factory Settings
- 3.8.5 Activate Event Control And Motion Detection
- 3.8.6 Deactivate Text And Logo Options
- 3.8.7 Deactivating The Daily Automatic Camera Reboot
- 3.8.8 Browser
- 3.8.9 Cleaning The Camera And Lens
- 3.8.10 Safety Warnings

www.mobotix.com • sales@mobotix.com
Overview
A MOBOTIX camera can be completely configured using a JavaScript-enabled browser
on all common operating system (such as Windows, Linux, Macintosh, etc.). The camera
provides a HTML-based user interface for this purpose. The camera executes the changes
you make to the camera configuration via HTTP commands using programs and scripts of
the embedded software. The settings are stored in the camera's Flash memory.
This section contains an overview of the general browser settings of the MOBOTIX camera,
as well as further configuration options. The Software Camera Manual Part2 contains
more detailed descriptions of the software features.
•
After booting the MOBOTIX camera for the first time,
accessing the administration menu (
Admin Menu
button) will automatically start
the Quick Installation. The Quick Installation assistant helps you in setting the most
important parameters of the camera. For security reasons, you should set your own
administrator password and disable public access to the camera.
=> (
Software Camera Manual Part 2
, Section 5.2)
Software Camera Manual Part 2
, Section 5.2)
Software Camera Manual Part 2