
Manual


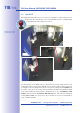

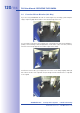
Table Of Contents
- Added Security Value
- Cost Benefits And Technical Advantages
- 2 INSTALLATION
- 3 OPERATING THE CAMERA
- 3.1 Manual And Automatic Operation - Overview
- 3.2 First Images And The Most Important Settings
- 3.3 Virtual PTZ
- 3.4 Correction Of Lens Distortion (L22 Only)
- 3.8 Additional Notes
- 3.8.1 Weatherproof Qualities
- 3.8.2 Password For The Administration Menu
- 3.8.3 Starting The Camera With The Factory IP Address
- 3.8.4 Reset The Camera To Factory Settings
- 3.8.5 Activate Event Control And Motion Detection
- 3.8.6 Deactivate Text And Logo Options
- 3.8.7 Deactivating The Daily Automatic Camera Reboot
- 3.8.8 Browser
- 3.8.9 Cleaning The Camera And Lens
- 3.8.10 Safety Warnings

www.mobotix.com • sales@mobotix.com
If you have an MxEasy installation CD, insert it into your CD/DVD drive. The assistant will
guide you through the installation process. If this is not the case or if you would like to
update to a newer version, you can download the latest MxEasy version for your operating
system from the MOBOTIX website (
system from the MOBOTIX website (
system from the MOBOTIX website (
in the
section).
section).
To start MxEasy, double-click the shortcut or the program file itself.
If you start MxEasy for the first time on a
computer, the Camera Selection dialog will
appear, showing all detected MOBOTIX
cameras. The camera list will be updated
automatically as soon as new cameras are
connected to or removed from the network.
MxEasy also automatically monitors and
displays the operating status of all cameras.
Cameras that are not on the same subnet
as the computer will get a dierently colored
symbol than the cameras that are on the
same subnet. Likewise, the cameras that
Download MxEasy
for free from www.
mobotix.com