
Manual


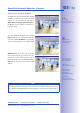


Table Of Contents
- Added Security Value
- Cost Benefits And Technical Advantages
- 2 INSTALLATION
- 3 OPERATING THE CAMERA
- 3.1 Manual And Automatic Operation - Overview
- 3.2 First Images And The Most Important Settings
- 3.3 Virtual PTZ
- 3.4 Correction Of Lens Distortion (L22 Only)
- 3.8 Additional Notes
- 3.8.1 Weatherproof Qualities
- 3.8.2 Password For The Administration Menu
- 3.8.3 Starting The Camera With The Factory IP Address
- 3.8.4 Reset The Camera To Factory Settings
- 3.8.5 Activate Event Control And Motion Detection
- 3.8.6 Deactivate Text And Logo Options
- 3.8.7 Deactivating The Daily Automatic Camera Reboot
- 3.8.8 Browser
- 3.8.9 Cleaning The Camera And Lens
- 3.8.10 Safety Warnings

www.mobotix.com • sales@mobotix.com
Once the MOBOTIX camera has been connected to the power supply and to the network,
you can access the user interface with the live camera image in the web browser. Internet
Explorer, Firefox, Safari, Konqueror, Opera, Camino or any other graphical browser with
activated JavaScript is suitable. It does not matter which operating system is used.
After entering the camera's IP address in the browser address bar, you will see the live
screen of the MOBOTIX camera with its user interface controls, such as softbuttons, buttons
for the dierent camera screens, pull-down menus (Quick Controls), symbols for access-
ing the online help and the camera status as well as status information elements above
and below the live image.
Notes
User Name: admin
Password: meinsm