
Technical data


115/148
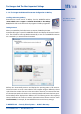
First Images And The Most Important Settings
© MOBOTIX AG • Security Vision Systems • Made in Germany
www.mobotix.com • sales@mobotix.com
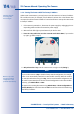
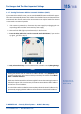
3.2.7 Starting The Camera With An Automatic IP Address (DHCP)
If your network has a DHCP server, you can start the MOBOTIX camera with DHCP support.
The camera automatically obtains an IP address from the DHCP server and announces the
new network data. Please note that this announcement can only be heard if the camera
is connected to an external speaker.
1. If the camera is powered on, disconnect the power supply by unplugging the cor-
responding cables and then reconnect the power supply.
2. Wait until both LEDs light up simultaneously for the first time.
3. Press the R key within the next four seconds and hold it down (if you need to
try again, go back to Step 1).
4. Only release the R key once the camera emits a double sound (”boing boing”).
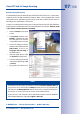
Notes
Starting the camera with an automatic IP address (DHCP) is only temporary. The
network configuration of the camera can be permanently set to DHCP under Admin
Menu> Ethernet Interface.
Make sure that the network has a functioning DHCP server when starting the camera
with DHCP support. If this is not the case, the camera cannot obtain a valid IP address
and will use its last IP address.
You should also make sure that the cameras always obtain the same IP addresses by
permanently assigning the MAC addresses of the cameras to the desired IP addresses.
R L
In case of an error,
the camera uses its
last IP address