Version 8.2 SeaMarks a.k.a. LoranGPS By Andren Software Co.
Contents I. INTRODUCTION 5 1. What can the SeaMarks program do? ....................................................................................5 2. Requirements .........................................................................................................................6 II. SETTING UP THE PROGRAM 7 1. Installation .............................................................................................................................7 1.1 Upgrading ................................
7. Tips and Tricks .................................................................................................................... 31 8. Error messages..................................................................................................................... 33 VI. Menu Reference 34 1. FILE MENU ........................................................................................................................ 34 1.1 New File ............................................................
5.1 Chart Whole File (Reset) .....................................................................................64 5.2 Center Chart on A Waypoint ...............................................................................64 5.3 Select New Chart Center .....................................................................................64 5.4 Select Area (To Expand) .....................................................................................64 5.5 Zoom 2X 1/2X 5X 1/5X Hot Keys F3 F4 F5 F6.....
I. INTRODUCTION 1. What can the SeaMarks program do? This computer program helps you organize your fishing spot data (waypoints, a.k.a. readings or marks) accumulated over many years and many trips. It also converts Loran TDs to GPS and offers the best conversion accuracy available. You can update and print a new book of waypoints whenever you need to. It has routines for organizing, displaying, printing, plotting, and planning that will make your wealth of data work better for you.
Search/Replace - Rapidly find waypoints by key words, phrases, or numbers. Replace numbers, words, or phrases easily Reduce duplicates - Identifies duplicate and near duplicate waypoints so that they may be combined or eliminated. Mapping - You can create maps of specific areas that you want to print every time you re-work your book. Maps can be made for any size area and with or without Loran or Lat/Lon lines. Maps are saved as map files for ready retrieval.
II. SETTING UP THE PROGRAM 1. Installation Insert the program disk in the CD-ROM drive or in a USB port if on a flash memory device. If it does not self-start, do the following: Go to the START menu and open the Computer. Locate the CD, DVD, or USB drive and open it. Locate the AndrenSetup8 application and double click it. AndrenSetup8 will create a folder called: C:\LoranGPS and automatically install the program files in it.
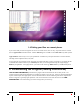
1.2 Getting Help The help system is available at any time by pressing key F1. The help system is derived from this manual and should be consulted whenever you have questions as it is easier to navigate. You can also print the complete manual from the copy in the program folder via the HELP menu. 1.3 Installing on a MAC with Crossover The SeaMarks program may run on an Intel based MAC under CodeWeaver's Crossover Program.
1.4 Putting your files on a smart phone. If you want to take your files of waypoints out to sea on a mobile device, there are ways. Export the file as a CSV file and use Apple Numbers described below. Similar Android apps are available such as Office Suite 7 by Mobi systems. . Apple Numbers makes it easy to view your spreadsheets. Numbers lets you import documents in common formats, including comma-separated-value (CSV) files.
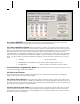
2.1 Printout HEADER: Enter the header for all the pages of your book printed by the program. If you don’t change what it initially says; the program will continue to nag you to set User Preferences. 2.2 Center Latitude/Longitude: Enter the general area you fish in. The program needs to know the general location of your working area in order to correctly do Loran to Lat/Lon conversions and to check for errors in data entry.
2.7 SAVE SETTINGS, and OK, DONE save the preferences and exit. If you mess up and want to reset to the original values or if the User Preferences file is corrupt, push RESTORE SETTINGS. This will open a dialog where you can find the original file on the CD and reset to those default settings. On exiting this screen the first time, the program will check the CD (or USB) for chart files and waypoint files it can move into the program folder. The CD contains a selection of NOAA charts you may need.
III USING THE PROGRAM 1. Introduction You will mainly use the program to create and maintain a book of waypoints (readings) containing your marine fishing navigation information. It comes with examples of the files you will set up for your book. This chapter gives information on how you can start your own files and work with them. Additionally, it can help you manage the waypoints in your GPS and/or move them from one brand to another. 2.
10. Go through the various menus and try all the operations that you might use. Don't be shy, if you mess up, nothing valuable is lost since the test file is all bogus data. 3. Building your own files To start your own file, select FILE>NEW FILE. Each new file will inherit properties from the User Preferences, but you can change them to suit the needs of this new file. Give the file a name and change the other properties as needed and push OK. Next, use EDIT>ADD WAYPOINTS to put in waypoints.
5. Reorganizing your data The program will sort on any column when you double click on the column header. Double clicking again will reverse the sort. For more complex sorts, check out File>Sort File. You can also use File>Combine Files or File>Split File to make up different groupings. After sorting the data, you can purge or merge duplicates with Edit>Find Duplicates. It will scan the file and show which waypoints have other waypoints very close by. 6.
missing any points. An easy way to get started with maps is to pan and zoom a chart to show what you want on the map and then use Chart Operations>Make this chart into a Map. This brings you to the Create Map screen with the map borders already determined. Keep in mind that the screen is landscape orientation and the map will likely be portrait orientation. For convenience, you can show the outlines of all your maps on the screen or paper at the same time with Map>Show All Maps>Show all in Folder.
the program on local data. Just enter waypoints where you know both the correct Loran and Lat/Lon information. Be sure that this is from a known source that used a Loran and a GPS on the same spot. Published data is questionable unless the provider guarantees that real hardware was used to collect the data and that it was not itself a conversion. We have seen many lists on the Internet that contained poorly converted Lat/Lon information.
IV Menu Choices 1.
Sort File Tracks Tag Waypoints Print Track Plotting Swap/Fill Fields Printing Format Charting Options Other Boat Position Last 3 files loaded Color all Waypoints Quit Harvest Sonar Log Most of the routines of this program perform work on the data files you create from your own numbers. Program routines and functions are controlled from the main window that displays the MENU at the top of the screen along with a spreadsheet or chart that displays the waypoints in the file you have open.
V. Additional Information 1. What Are ASF Correction Factors? ASFs (Additional Secondary Factors) are correction factors used in the Loran to Lat/Lon conversions to make it more accurate. They compensate for the fact that radio propagation over land and over water will distort the Loran signals as they travel to you. This distortion can be as much as + 5 microseconds and can cause the Loran to Lat/Lon conversions to be very inaccurate.
2 Calibrating the Conversions The program uses calibration waypoints to achieve the best accuracy in Loran to Lat/Lon conversions. It has the full set of Government Defense Mapping Agency (DMA) Additional Secondary Factor (ASF) tables that are stored in 5-minute (5-n-mile) increments. These tables have been derived from the printed books for the chains: 5930, 5990, 7960, 7980, 8970, 9940, and 9960. They were scanned into the computer and processed by optical character recognition (OCR).
Calculation Method 1 uses each of the calibration waypoints to adjust the DMA table values near them to achieve perfection. The influence of each calibration waypoints falls off with distance, so that distant ASF values will not get adjusted as much. The influence extends to at least 40 miles. This procedure creates a user adjusted ASF file called "ASFuser.bin" that contains the calibrated tables.
SeaMarks manual V.
SeaMarks manual V.
The versions of this program before 5.0 only used calculation method 3. Examine the government (DMA) tables for your area and see if all of the ASF factors are more or less the same over the area. This technique does very well in some areas and insures that even waypoints far from the calibration waypoints are adjusted. If the ASFs vary considerably over the coverage area, then consider splitting up your files to cover smaller areas that can have the same ASF over that area.
The user-adjusted table is, by the way, filled-in more than the DMA tables. The DMA tables are blank over land. This filling-in was done by extrapolation. It was done to help the program avoid a kink in the Loran lines for a map or chart when they extend over land. It was not meant to provide accurate conversions over land. When examining the ASF tables, note that they are arranged in 1-degree Lon/Lat blocks where the block designator is the upper left-hand corner of the block. This means that to see 74 20.
A calibration report is generated when you perform a calibration to show you what accuracy the process might achieve. It does this by taking all the calibration waypoints in the file and calculating the Lat/Lon from the Loran as if the Lat/Lon was not known. Then the distance from the calculated to the real position is figured for each one. The distances for all the calibration waypoints are averaged and both the average and worst distance is reported.
be created may be about twice as tall as the screen (unless you use landscape orientation) and may show more waypoints. Also use the MAP>Show All Maps feature. It shows all your saved maps as outlines on one chart. From this you can see where more maps are needed or where you need to make adjustments to maps to get the best coverage.
5. If you are given shorthand data like: 345.6, 654,3 (in Loran) that means that the fisherman knew that the leading two digits were easily guessed. Think of dates in years. If I give you the year of my kid's birth and say '05, then you know it is 2005. If I said '87, you will be sure that I am wrong. So, you need to know the usual range of the first and second number digits. Off Sebastian Inlet, FL, the loran numbers will be like 43600.0, 61926.0 or the GPS numbers will be 28 12.345 and 80 12.345.
If you still have trouble with conversion of your files, a conversion service is available at low cost. Several import routines have been developed for special file organizations, so we should be able to easily convert your database into the right form by using one of these programs. E-mail or call for information. 5. Where Did the Formulas come from? The program uses computational algorithms derived from a program written for the Navy by A. C.
want the fields filled. If nothing is specified for the Name field, it will be linked to the waypoint number. This linking allows you to name some of the waypoints and leave the rest linked. The way linking works is that unless you enter a name in the Name field, it behaves just like the number column on the left side of the spreadsheet. If you put in a Name (even if the name is a number), thereafter the Name sticks to that waypoint.
8. Error messages This is a list of common Windows generated error messages that you should not see unless the programmer did not anticipate these error conditions and handle them adequately. They basically mean that a program bug has been found and should be reported to the company. SeaMarks manual 1. Input past end of file. This means that the program read past the end of a file before it finished trying to input data. That is, it thought there was more data in the file than there really was. 2.
VI. Menu Reference 1. FILE MENU From here on in this manual, the emphasis changes from: "What menu item do I select to accomplish what I want to do?" to: "If I select this menu item, what does it do?". It's easier to tell you what the program does than to guess what you want to do and explain how to do it. The former is bounded by the number of menu items, whereas the latter is unbounded. The following information explains what each button or menu selection does.
1.1 New File This command is used to create a new file. Each file can cover a different geographical area so it may have different values for some reference parameters. As a minimum, change the name from "Untitled" to a name of your choice and verify or change the file properties before proceeding. The initial new file properties are taken from the Tools>User Preferences for your convenience. You can change this information now, or do it later using File>File Properties.
File name displays the name of the file that will be loaded when you select a file and click OK. The box above it will contain the list of files in the folder shown by: Look in:. If that is pointing to the wrong location, you can click the little inverted triangle on the right side of the white look-in bar to drop down a list of locations to choose from. To navigate through the folder structure, you click on the folder icons in the box or the Look in selection box.
1.4 Save File As If you want to change the file name or save the file to any drive and folder you choose, use this command. It can be used to make a backup of the file or to save it in another format. When you use SAVE FILE AS, you may be asked to confirm the file format to "save as" Data or Track. Track files have only 3 fields and Route files are like data files, but have "STRT" in the Rating field of the first route point for each route and the route name in the Group field. 1.
1.7 Delete A File Allows you to delete files from the disk one by one, including the one currently open. This will show a standard file selection dialog. Select a file to delete by double clicking on it or select it and push the Open (yes, it's not intuitive) button to delete it and then confirm the deletion. 1.8 Find Missing Files Allows you to find files you have misplaced. It will locate and let you open all data files that it finds in the target drive or folder.
1.10 Combine Files Combines another file with one already opened. The new file will be appended to the end of the open file and the combined file's 'properties' will be those of the first file. You will probably want to sort the file and purge or merge duplicates after combining. 1.11 Split File You can split files into two parts based on boundaries you set. The boundaries are Lat/Lon, Loran TDs, Range/Bearing, or record numbers.
left unchanged and remains open. If you want to ‘Cherry Pick’ records, consider using the Trip Planner. That function allows you to pick random records and save them as a file. 1.12 Sort File While you can sort a file by simply double clicking on the column header, there are cases where you want more control on how the sort is performed. The file can be sorted by any column of the spreadsheet as shown below.
1.13 Print File Hot Key Ctrl-P This selection lets you to print the waypoints in spreadsheet form. The printing dialog box gives you a chance to set some basic printing parameters relating to how the material is printed. It also includes a button to select a WINDOWS PRINTER SETUP dialog that presumably allows you to choose which printer to print on. This does not always work, so be sure to set up the desired printer as your default printer. To change what is printed, use PRINTING FORMAT below.
You can also choose either the line spacing or the number of waypoints per page. The program will try to fit as many waypoints on the page as possible given the font size, the line spacing, the orientation, and the field choices. If you do not like the number of waypoints per page it comes up with, you can set it to another number and the program will adjust the line spacing to accommodate you.
Once you have completed optimizing the printing settings, save them by pushing the SAVE SETTINGS button. The R/B reference point is not saved with these settings but will not change from what was shown until you change it elsewhere. 1.15 Last Three Files Opened The last three files you opened are displayed near the bottom of the File menu. To reopen any one, click on its' file name in this list. The program automatically opens the top one (most recent) whenever it is run.
2.3 Paste Hot Key Ctrl-V You can paste items from the Windows clipboard into single cells or any entry box. 2.4 Add Waypoints Hot Key Ctrl-A You can start this ADD WAYPOINTS dialog by one of three ways: from the EDIT menu, the hot key, or by just clicking on the spreadsheet in the row below the last waypoint (the row with the dashes).
If you have show Loran Features enabled, the Adding Waypoints screen looks like: You may enter your waypoints into the currently open file as either Loran TDs or Lat/Lon or both by selecting one of the radio buttons at the top of the window. When entering waypoints as both Loran and Lat/Lon, the program will want to know the source of the Lat/Lon information. Waypoints entered as both are considered calibration SeaMarks manual VI.
waypoints and Loran to Lat/Lon conversions are not done on them. They are used, instead, to derive calibration parameters (and, of course, as good waypoints). If you enter an out of range number, an alert message shows you what the estimated number at the center of the area would be and asks you to check your entry. Entries that are more than 200 miles or 1000 microseconds (both user definable) from the "area center" are challenged.
The Color selections are limited to those in the drop-down list and are carried in the file as the first letter of the color name. Any keyboard character can be used for the Symbol in addition to the ones available from the drop-down list. Symbol is a holdover from previous versions where the program did not have an Icon selection. The Datecode is normally set to the present date. The numerical extension gives you the total number of waypoints entered for that date.
2.7 Replace Hot Key Ctrl-H REPLACE lets you do a global search-and-replace or individual replaces in almost any field. For example, if an imported file has a certain icon translated to something you do not like, you can change all instances of that icon to a different one. 2.8 Find Next Hot Key Ctrl-N FIND NEXT (or Find Again) advances the FIND routine or the FIND DUPLICATES routine. A right mouse click will also advance the finder in Find Duplicates mode. 2.
delete them. Marking or unmarking a waypoint for deletion only requires left mouse clicking on the number of the waypoint in the left-hand column. Since the program does not scan the entire file for comparison to any given waypoint, it is necessary for you to make sure the file is pre-sorted by either Lat, Lon or Loran TDs. If the program finds any exact duplicates during its search, it will delete them automatically. You will see blanked waypoints if this happens. Exact duplicates are alike in every way.
3.1 DISPLAY WITH TDs & L/L Hot Key Ctrl-T This command puts the waypoints on a spreadsheet with columns and rows. This display has the Loran TDs occupying the 2nd and 3rd columns and the Latitude and Longitude occupying the 4th and 5th columns. Normally, the information will extend off the right side of the screen and require horizontal scrolling to see it all. In this display mode, the Range and Bearing fields are to the extreme right.
The Color column (label Cl) contains a single letter that is the first character of the color name. Colors are light and dark: Red, Green, Blue, Yellow, Cyan, Magenta, Orange, Gray, and, of course, black (indicated with a Blank so as not to be confused with Blue). To change a Symbol (in the Symbol column) (label Sy) to a character that is not one of the keyboard characters, you can paste one from another waypoint or from the Windows' CHARACTER MAP in the ACCESSORIES group of START>PROGRAMS.
focus up and to the left simultaneously. You can also use CENTER THE CHART ON A WAYPOINT to pan the map to show or find a particular waypoint. This is very handy if you are zoomed way in and get lost. Zooming in or out by factors of 2 or 5 can be done with the ZOOM command or by using the hot keys F3 to F6. See the CHART OPERATIONS>ZOOM sub section for more details. Coastlines are contained in files on the hard disk.
You can sort this display by single clicking on a column header. Columns accessed by scrolling to the right contain the chart upper left and lower right Lat/Lon for reference. This allows you to find a chart based on the area it covers instead of just using the name or number. The old Maptech Company supplied the utility used to display the NOAA charts to the Andren Software Co. with the understanding that no support would accompany it.
The chart displaying utility has another quirk in that if landscape orientation is chosen for printing by the program, it will not do it. However, if the printer is set to landscape directly, that is, in the printer dialog, it will. 3.8 Display on Google Earth Google Earth (GE) takes files with the extension KML and displays them at a zoom level sufficient to show all the points. In this mode, you must be connected to the Internet, both for GE and the Icon file on our web site.
3.9 Set R/B Reference This choice will allow you to temporarily change the current Range/Bearing reference point. To permanently change the R/B reference point for the file use FILE PROPERTIES instead. This command opens a dialog that lets you specify a reference point in one of four ways. It can be any Lat/Lon or TDs you enter, or any waypoint from the file, or from a list of stored reference points.
3.10 Number Formats Here, you specify the program's numbering format, the number of decimal places, and the use of leading zeros. This window has tabs for the Lat/Lon, Loran TDs, range and bearing formats. An example is shown on the bottom of each window to show how you what you have chosen will look. This window also allows you to set the warning limits for data entry. These alert you when the number entered during ADDING WAYPOINTS is not within a reasonable range.
4.1 Create Map / Modify Map These commands will allow you to create or modify a MAP. You fill in or modify the name and three borders of the MAP. The program will fill in the fourth border for you to insure that the MAP will fit the paper in the orientation you chose. You can also specify a coastline and/or a Features (points of interest) file that will be linked to the MAP when it is viewed or printed. See chapter IV.3 for more information on scaling and sizing MAPs. SeaMarks manual VI.
Once the MAP parameters have been specified, push OK MAKE MAP and the MAP will be stored in a MAP file along with the borders and associated COASTLINE and FEATURES file names. Even if you do not intend to use Loran lines, they are created in case they may be needed. Unless Loran features have been hidden, the window will display the program's choice of Loran line spacing and the number of Loran TD lines that will appear on the MAP for each station of the chain pair.
Since you can pan and zoom this display, you can see the size and extent of the Loran lines grid (if used) that is saved with the MAP. The area that will be printed is bordered in dark lines. You can also see if you have some waypoints that missed falling in the printed area. 4.3 Show All Maps This selection allows you to show all your MAPs on the screen as outlines with names to see if you have missed any areas or to find the name of the MAP that covers a specific area.
4.5 Print Map You can select one or more MAPs to print with this command. The MAP will be combined with the currently open waypoints file to make the printed MAP. MAPs are created with either portrait or landscape printing and will print that way. You can select multiple MAPs by holding down the Ctrl key while clicking on the MAP names to print (a standard WINDOWS technique). To select a block of MAP names, hold down the Shift key and click on the first and last MAP names to include in the block.
The Auto Name option makes a file name based on the upper left Lat/Lon and line spacing selected. . Note that the grid will not be trimmed to the borders of the specified area, but will encompass that area. SeaMarks manual VI.
4.8 Mapping Options There are several options for printing the MAP such as font size and the use of Lat/Lon lines, Loran lines, or Range/Bearing lines. The Mapping Options window is shown below.
The waypoints can be displayed as numbers, names, symbols, icons, or dots. The numbers are the list numbers in the waypoint file and the symbols are the symbols entered in the waypoints' Symbol field. If no symbol is entered for a waypoint, the list number is used instead when plotting symbols. The Name is the GPS short name and asterisks are used for the dots. Icons are printed with the waypoint number following. The Lat/Lon line spacing is specified in minutes.
modes. When in this mode, the viewpoint can be panned (left/right, up/down) with the cursor control keys. For more precise panning control, use some of the other CHART OPERATIONS routines like SELECT AREA. 5.1 Chart Whole File (Reset) When the DISPLAY CHART mode is first selected, the chart is scaled to fit all of the waypoints on the screen. After extensive zooming and panning, you may get lost and want to start over, so use this to restart.
5.5 Zoom 2X 1/2X 5X 1/5X Hot Keys F3 F4 F5 F6 These functions allow you to zoom in and out in ratios of 2 or 5. Learn these hot keys as they are very useful. 5.6 Identify Waypoint (On Chart) The Identify Waypoint command will print the description of a waypoint on the bottom line of the display with Loran or Lat/Lon depending on your display mode. You click on (or near) a waypoint on the screen. The cursor will change to cross hairs to let you know it is in this mode.
CHARACTER MAP that is a WINDOWS accessory. Be sure to use SYSTEM as the font for this function. Do not use the characters from 0 to 32, as they are reserved for commands instead of characters. To put labels on the MAP, you leave the RATING field blank and put the labels you want in the DESCRIPTION field. One features file should suffice for all your MAPs, but you can have as many as you like. The features are displayed on the MAP with the upper left-hand corner at the point determined by its’ Lat/Lon.
Data Connection Your first choice is which computer data COM port to use. When you push the SET Com Port button, the following window is shown. Select the COM port you think the cable is connected to. On an older desktop PC start with COM 1 and try others if that doesn't work. The other COM port parameters can be set to NMEA standards or to custom settings if your GPS is not standard. If you have no serial port on your computer, you will need a serial to USB converter device.
The example shows that the USB to serial converter is on COM 6. You can alternatively get to this from: Control Panel>System>Hardware>Device Manager. If no Ports selection is available, then the USB to serial converter is not installed properly. Go back through the new device installation again. Hardware Connections There are two types of connectors used on the PC. The old style is 9 pin serial and the newer one is USB. Look at the back of the computer to see which is available.
Function: Data: Ground: DB-9 pin 3 5 The pin connections for the GPS end of the cable can generally be found in the manual for that equipment. Once communications is established with your GPS, you will see the NMEA sentence traffic in the COMMUNICATIONS TEST window within the TRACK PLOTTING window. The sentences that start with either $LCGLL, $GPGLL, $LCRMC, or $GPRMC will be the ones used for plotting. The GPS usually outputs these sentences once per second.
If you select LORAN LINES, two more choices become visible, LABEL LORAN LINES and the CHAIN that will be displayed. You can change the chain choice by pushing the SET CHAIN button and the chart will then be re displayed in the new chain. When zooming out you will eventually get to the point where the lines are not completely displayed due to limitations in the algorithm and the geometry of the Loran lines. Colors for the lines on the CHART or MAP can be selected by pushing the CHOOSE COLORS button.
6.1 User Preferences The USER PREFERENCES screen under the TOOLS menu personalizes the program with information about the areas that you fish. The title of this dialog will change to SeaMarks User Preferences and some of the Loran based stuff will disappear if Loran features are disabled. Each user of the program will need to set up defaults for some important parameters with this screen. See the introductory information in chapter II section 2 for initial settings.
One of the main settings in User Preferences is the center Lat/Lon and Loran chains. Even if you do not expect to use Loran, it is better to set it up in case you get a list of data from someone that is in Loran. However, you can set Hide all Loran features and not be bothered with them. The setting of a center Lat/Lon gives the program a general idea as to where your fishing area is.
Restore Settings If your User Preferences data gets corrupted, you can restore the original copy that came with the program from the CD. Push this button and navigate to the appropriate drive where this information is held. This routine is also useful if a form disappears or cannot be accessed due to being moved off screen too far to grab. This happens sometimes if dual monitors are used and then one monitor is removed. In this case, the form locations can be on the missing monitor.
LORAN-C COVERAGE GUIDE Anomalies do exist in certain areas regarding the selection of a pair of stations. Local knowledge may suggest that a pair, other than those indicated below, is the better pair. THE GREAT LAKES The 9960 chain gives the best coverage in Lake Ontario and in Lake Erie. 9960W and 9960Z is the preferred pair in Lake Ontario. 9960Y and 9960Z is the preferred pair in Lake Erie. 8970X and 8970Y is the only reliable pair for Lake Superior and Lake Michigan.
There is some overlapping coverage between the Northeast chain (9960) and the Southeast Chain (7980). South of Cape Fear, N.C. to Brunswick, Georgia, 9960X and 9960Y can be used offshore. Closer inshore from Cape Fear to St. Catherine's Island, GA., 7980Y and 7980Z is the preferred pair. SOUTH FLORIDA AND THE GULF COAST From Fort Lauderdale around to Cape Sable the preferred pair is 7980W and 7980Z For the Keys, most people used 7980W and 7980Y.
To do custom chain selection, you need to know something about Loran. The Loran C system designates master/slave station sets by the names: Whiskey, X-ray, Yankee, and Zulu (and occasionally Victor). These are abbreviated to just the first letter. Each master/slave set gives you one Loran number and you need a pair of Loran numbers to navigate by. We will call such a pair of numbers a chain.
While selecting Loran A pairs, you check two station sets rather than two master/slave sets. While the Loran A chains have been out of service for many years, you will still find some fishermen hanging on to their old books of numbers. Loran A chains only gave 1000 ft. or so of accuracy and converting them does not improve on that accuracy. Nonetheless, these waypoints are a potentially useful source of information on reef and wreck locations.
The Perform Calibration Now selection on the Set Conversion Method dialog is to be used when you have a file with calibration waypoints and want to calibrate the conversion process or calculate ASFs. Set ASFs: This button only shows if you are using a single set of ASFs per file (choice 3 in the Conversion Methods selection).
6.2 Calibrate Conversions This procedure first determines which calibrations style best suits you. The choices are: Use the government tables calibrated with your calibration waypoints. Use the government DMA tables as-is to perform the conversions. This is the no calibration option. Use a single set of ASF values for all waypoints in the file based on either an entered value or the average of the calibration waypoints. See chapter V section 1 and 2 for details on how to chose the best method for you.
02-03-2010 16:17:26 This report is made every time you calibrate conversions. It contains information on the extents of the area covered by the calibration Waypoints and the calibration data found. The area that calibration was performed over is bounded by: Maximum Latitude: 29 35.104 Minimum Latitude: 29 24.338 Maximum Longitude: 84 42.09 Minimum Longitude: 84 29.33 CONVERSION ACCURACY At the center of the area considered, for the 2 primary slave stations; The spacing of 7980 W lines per 0.
6.3 Recalculate Lat/Lon If you change the center Lat/Lon or the ASF factors in a file or import a file from some source where you are unsure of the conversion accuracy of Loran to Lat/Lon use this routine. It will go through the file and recalculate the Lat/Lon of all Loran waypoints (except those entered as Lat/Lon or Loran+LL) using the current ASFs. 6.4 Convert to Loran This is the routine to convert Lat/Lon waypoints to Loran if they are not already converted.
6.6 Upload/Download GPS (using a cable) A limited selection of upload/download capabilities is incorporated into the program. It handles many older Lowrance, Eagle, Furuno, Garmin, or NorthStar, GPSs. There are two basic ways to transfer data to and from most GPSs. Serial cable connection was the way older GPSs were interfaced. This requires a direct cable connection between the PC and GPS. This is sometimes complicated by lack of a serial port on the PC necessitating a USB to serial converter.
Lowrance/Eagle When Lowrance/Eagle Upload/Download is selected, a window is displayed that allows you to initialize communications with the GPS, get product information, and upload/download waypoints, routes, plot trails, and icons. The icons and waypoints can be downloaded as standard data files, the routes as trip plans, and the plot trails as tracks. In the GPS, icons are waypoints that you have saved as icons as opposed to waypoints. Some other brands might call these Marks.
The Lowrance window will have information as to how many waypoints the specific GPS can store and so forth. For upload and download, the program places the Lat/Lon information in Lat/Lon field and the 8 to 10-character waypoint name in the NAME and DESCRIPTION fields. The first step you take should be to download whatever is in the GPS' memory to a file so that it can be saved, you can see what type of information is available, and see how an upload file should be configured.
2. Solder the power/data cable's Data Out to the Receive Data (RxD) pin 2 of the DB9. 3. Solder the power/data cable's Data In to the Transmit Data (TxD) pin 3 of the DB9. 4. Solder the power/data cable's Ground to the Signal Ground (SG) pin 5 of the DB9. Transfers to GP30 series except GP33 The GP30 and similar units operate as slaves in a master/slave communications relationship. This means that the PC controls the transfer.
- Select the Datum you are using with the GP30; normally WGS84. - Select the "Write Ozi" button to save these to an Ozi import/export file (Furuno DMX). -SeaMarks can import this file (it is in the Furuno DMX format). The option is in the Tools>Import Waypoints>Furuno DMX menu Upload (to the GPS) ------------------- Create a file with SeaMarks and export the waypoints into Furuno DMX format.
To start the transmission, follow the instructions found in the Furuno GP33 manual. After you get to stage 5 shown below, you press yes and the GPS will stop sending navigation messages and will begin sending waypoints to the Program. The last step in the above dialog is important. The data is fetched in 256 byte packets and the last waypoints may not fill the last packet. OK-ing the completion message restarts the normal tracking data flow and fills the packet needed to process the last few waypoints.
Most of the Furuno models use the proprietary sentences shown in the above display. The acronym stands for "Proprietary Furuno Electric Company, GPS WayPoint List". The GP1650, Raychart 725, Raynav 300, and the Simrad CP31 will use non-proprietary, standard NMEA $GPwpl sentences. That is, they will not have the $PFEC in front of the sentence. Reverse the procedure for sending points to the GPS but using the Upload to GPS button. The GPS should be set up as below so that it is ready for the transfer.
Garmin The newest handheld Garmins like the 78SC come with a USB cable and when plugged into a PC, look like a removable drive. Therefore, they can be treated just like a USB memory stick for transfer of data in and out. That is, you don’t use this Upload/Download menu choice, but instead use the Import/Export menu. Navigate to the Garmin/GPX folder and Import the GPX file into SeaMarks or export one from SeaMarks to the GPS directly.
You have several functions to choose from but the first should to be Get Waypoints so that whatever is stored currently in the GPS is backed up to the PC. Then you can send Waypoints to the GPS assuming you have set up a suitable file to upload (i.e. the one currently being displayed). In the Garmin, the waypoints are put in alphabetic order, so it is important to not have duplicate names. If you do not erase all waypoints from the GPS first, uploaded waypoints will overwrite waypoints of the same name.
The rest of this section is from a Garmin document: pcwiring.pdf. GARMIN offers PC Interface Cables for almost all of its' GPS units. If you do not have a suitable cable, follow these instructions. GARMIN GPS to PC Wiring Instructions Introduction: This document will outline the basics for connecting most GARMIN GPS receivers to a PC serial connector for data transfer.
5. Solder the power/data cable Ground to the Signal Ground (SG) pin 5 of the DB9. Note: If you are also supplying external power to the GPS, you will need to split the GPS Ground wire and attach it to both the PC Signal Ground (SG) pin and the negative (-) portion of your power source. The Ground is common to both power and data. Also, connect the positive (+) power lead to the positive side of your power source at this time.
Connecting a DGPS, GPS and PC: SeaMarks manual VI.
The wiring will be the same, with one exception. The GPS will only accept data input from one device at a time, but can output data to no more than 3 devices simultaneously. Since the DGPS and PC both need to utilize 2-way communication with the GPS, it is necessary to wire the GPS to only output data to the PC or install a SPDT (Single Throw, Double Pole) switch. This will allow you to alternate the input to the GPS between the PC and DGPS data outputs.
Northstar This support utility is available to upload and download Northstar GPSs. You also have the option of using NorthStar's own loader (DB_LOAD). If you use DB_LOAD.EXE, use the SeaMarks import/export routines to get the file created by it. Introduction The NorthStar loader is intended to upload and download waypoint files to and from NorthStar GPSs like the 941/951 and maybe the 961. It may work on the 6000i also.
All names and descriptions must be in upper case. The utility will convert them if they are not. Characters not available from the NorthStar's keyboard are removed before uploading to the NorthStar to avoid problems. The uploader will use the first 16 characters of the description as the waypoint description. The downloader will store the avoidance radius as the next 6 characters of the Comments field. On uploading, if the data in the Comments field is a number from 0.01 to 1.
If a number (0.01 to 1.00) is found in the second 6 characters of the Comments field it will be used as the avoidance radius. Note: you will not see the waypoint indicator on the NorthStar change immediately during the uploading process unless you cycle the view to refresh the screen. If you wait, it will catch up eventually.
Raymarine, Raynav, Raychart and similar series For this import use the Furuno GP32 importer but modified with the following instructions. From Chart mode press enter and then using the trackpad left/right, select Waypoints, then Waypoint List. Then select Wpt/Route Transfer and finally Send Waypoints. This applies to Raychart 425, HSB, L755, L760, Rannav 300 and others. Generally, only Lat/Lon and name are transferred this way.
6.7 Import Waypoints If you have a database of waypoints in some form and want to import it into the program, use one of the routines in this section. These files might have come from reading data cards written by your GPS. If you have a file with one of the extensions: ADM, GDB, GPX, HWR, MPS, RWF, USR, or XML you can open them with FILE>OPEN with Files_of_type set to *.* or TOOLS>IMPORT WAYPOINTS which will call one of the import routines that follow.
One of the stumbling blocks to transferring waypoints between brands has been the handling of icons. They do not have a standard set. Many brands have icons of no use to fishermen, so some of those I have translated as best as possible to useful icons in the SeaMarks set. Garmin, for example, has a large number of icons for many uses other than marine, so most of them are converted to a default choice like "X".
GPSUtility GPX HomePort for Garmin Humminbird PC Loran Locator LX or AX Lowrance GDM6, LS1 MaxSea (for Furuno) Mapsource *.MPS, *.GDB for Garmin Maptech marks.rec or mark32.txt NMEA GLL, RMC, GGA, GLC, WPL, RMA, CLF, NTI, and FEC Nobeltec ONF Northstar WinDBLoad (nswptldr.exe), DB_UNLOD.EXE *.PNTI Offshore Hunter text export Ozi-Explorer *.
8 fields in the source data, you must have 8 fields selected to put it into as shown in the example screen above. Some fields like Lat/Lon are inherently doubles and are counted as 2. If you count the commas, there should be one less than the number of fields. The above example has 5 commas for 6 fields. If, during the import, the program encounters a waypoint with more or fewer fields, it will announce the fact and allow you to make a decision as to how to proceed.
Import C-Map files Many GPSs use C-Map cartography and those usually save files to a chart card in C-Map format. For those units that use C-Map cartography (Furuno GP-7000, Furuno NavNet 1&2, Navman 8xxx, Northstar M series, and Sitex), you can use this program to import/export waypoints to them. For those units using an SD card, the import/export routines will read or write the data to the card. The file is named userimg.
To load data into a data card from a NavNet VX2 use the following string of commands. B stands for Button, SK for soft key, and T stands for track ball or rocker. Key B SK SK SK SK T SK T SK SK B B B name Menu System Configuration Data Transfer Upload/Download data Save data to data card Dn, Dn to turn waypoints "ON" Edit Up Enter Save Enter Enter Menu button Do the same for loading, but choose Load instead of Save.
We can set each panel to the appropriate location to do a transfer. For example, the above figure shows us ready to transfer a file from the SD card to the PC_Planner memory (internal database). Once in PC-Planner, the file then can be exported to the LoranGPS folder in the PC as an XML file for import into the program or shifted to an SD card (assuming it was on a C-Card) for direct import. XML files for PC_Planner have a unique naming convention. They have a name followed by .UP.
The menu arrangement of this model is somewhat different from previous models. Going from recollection, here is the sequence of operations to get your data saved to the SD card. Push the Menu button. This brings up a list of icons on the left side of the screen one of which is File. Use the rotary knob to scroll to the File icon and then push the knob to select it. This opens a screen with options like Export Points and Routes.
The NavNet 3D models sometimes lock up requiring a reboot when doing complex operations. In addition, they do not have obvious indications of completion for some file transfer or waypoint deletion operations. Instructions for Furuno Time Zero Touch transfers. The Time Zero units have different software from the NavNet 2 and 3D machines, but they do use SD cards for data transfers. The unit can hold up to 30,000 waypoints, about the same as this program.
IMPORT Garmin Mapsource or HomePort Some people prefer to use Mapsource or Homeport by Garmin to upload and download their receivers. If you have the Garmin proprietary card type, then this is a necessity. In Mapsource, the menu items are: Transfer>Send to Device or Transfer>Receive from Device. In HomePort, any ADM files on the SD card should show up in the "devices" column on the left. Once you see that the ADM file you want is there, just drag and drop it into the "Library" part of the left column.
Lowrance HDS units have a different way of doing business. To export a file from the HDS, press the Pages key and go to the Waypoints, Routes, and Trails page. Pick the Files sub page and then: Waypoints, Routes, and Trails. Select User data file version 4 (or one of the others). Select the memory card you want to put the file on. Then either pick a name or create a new name and export it from the GPS to the card. Version 4 files have 7 choices of colors and 70 choices of icons.
files does not match the program's so some liberties are taken in the translation. If the imported file's Lat/Lon fields are zero, use Tools>Recalculate Lat/Lon. Make sure the File Properties are OK by checking File>File Properties. IMPORT MAPTECH & NAV PRO The program will import the MARKS.REC files of RESOLUTION MAPPING's NAV PRO and MAPTECH programs. The Cap'n program fits into this category.
IMPORT Raymarine Raymarine has its' own proprietary file format that is named "Archive.fsh". The program can import/export that file structure. Since all files exported by a GPS may be called "Archive.fsh", you may need to get several cards if you have more than one file. Fortunately, small capacity cards like 128 MB are sufficient. If your GPS allows you to name the exported file, then you can place many files on one card.
To the extent that these units use C-Map cartography, like Sitex, you can use this program to import/export waypoints to them. For those units using an SD card, the import/export routines will read or write the data to the card. The file is named USERIMG.BIN and is a binary file with the capability of having multiple (up to 60) older sub files within the same file. The import routine will show the multiple sub files, if they exist, and allow you to select one or more to import.
Planner and write the finalized file to whatever card is required. It might not be the best way of doing things but it does work. PC Planner can get a little screwy at times though. If you have a program called Coastal Explorer by Rose Point Navigation Systems, data can be exchanged. It can import and export some of the file structures described above. You might use GPX, Nobeltec ONF, or Lowrance USR files to transfer data back and forth. 6.
can split the track into section files, delete bad points, or just examine the track raw data. Do not sort the file, as that will destroy the order. Import C-Map tracks Some GPSs use C-Map cartography and have C-Map formatted files for transfer. This routine takes track information from a GP7000, NavNet 1 & 2, Navman 8xxx, Northstar M series, Sitex, and Fish-12 GPSs. Use Tools>Import Tracks>C-Map userimg.bin and navigate to where the file can be found and import it.
Humminbird exports multiple files to the MMC/SD card. The waypoints are in an HWR file and the tracks are in files variously labeled 000.ht, 001.ht, etc. There are as many of these files as separate tracks. To get the tracks, Use Tools>Import Tracks>Humminbird .ht and navigate to where the file can be found and import it. Import Lowrance .USR tracks Navico related GPSs like Lowrance, Eagle, and Simrad that use the USR file format have track information that can be extracted.
The program will export waypoint files to a chip for entry into a GPS. They can also be imported by the routines listed above as a check to see that they were properly exported. It will not export all NMEA file types, just the WPL (WayPoint List) and NorthStar PNTI varieties. Most of these export routines will be exporting to low capacity SD or CF cards that can be picked up on Ebay cheaply. Get the lowest capacity cards available, as many GPSs, cannot handle high capacity cards (over 2 GB).
C-Map XML Eagle USR Fugawi TEXT Furuno NavNet CSV, TXT WITH DMX FIELD, BIN, PNT, TZD, or RAT/ROU Garmin/Mapsource GDB or MPS GARMIN USERDATA.ADM Garmin PCX5 Gardown10 GOOGLE EARTH (KML) GPX Humminbird HWR Lowrance USR Maptech Marks.dat, marks32.txt, marks.rec Navman NMEA WPL, PNTI Nobeltec ONF Northstar M series and 6000I (PNTI) Offshore Hunter text P-SEA WinPlot Raymarine Archive.fsh Raymarine TXT Raymarine Waypoint File RWF Raytheon NMEA WPL Simrad userimg.bin, USR Standard Horizon NMEA WPL Sitex userimg.
specifically name with a number does not have a corresponding automatically numbered name. That is, the program assigns names such as "0001" to any waypoint you do not enter a name for. Therefore if you name a waypoint you can use "001" or "W0001" but not "0001". By the way, Raymarine may require that names begin with a letter if you use groups. Some GPSs like Lowrance allow you to name the export file and have many exported files on the same SD data card.
come in three flavors, so you have to have the card reader that accepts your card. If the Furuno uses an FP or NC card you will probably have to forgo using the export method as card readers for these cards are no longer made. Andren Software Co. has one FP card reader (gray color) we can use to put your points onto a card for a one-time exercise. The same applies for a C-card, although C-Card readers (orange color) are readily available. .
targeted at marine interests and fewer than 36 of the GPSs icons are, some non-marine icons are used to represent marine ones. You may want to delete all the waypoints in the GPS prior to importing the file. To delete waypoints, select Waypoints, Routes, Trails on the Waypoints, Routes, Trails page. Then press Menu to get the delete files dialog. If you do not delete files, then any new waypoint that has the same Name as one already in the HDS will get a –2 added to the Name.
6.11 Export Routes A limited selection of exports are available for some GPSs and Google Earth (GE). Currently only Garmin ADM, GPX, Furuno NN3, Furuno GP1870, and KML formats are supported. These handle GPS file transfer support and Google Earth. The GE export makes a line showing the route(s) derived from a routes file. If you want the route points identified with names and icons in GE, then export the routes file also as a KML waypoint file and open both KML files in GE.
6.12 Export Tracks The only tracks export available at this time are for Google Earth and GPX. Generally, most people don't export tracks back to a GPS chart plotter anyway. 6.13 Tag Waypoints Whenever you combine waypoints from several sources, you will want some way of differentiating which are which because some sources may have bad waypoints. If you are typing them in yourself, you can give them distinctive names.
This dialog allows you to fill a range of Group names or to move group names from the Comments field. In the versions prior to 8.1, the group field did not exist. To capture group names, we used ‘Loc=Groupname’ as the first part of Comments. When you pick the first selection above, the ‘Loc=Groupname’ is removed from Comments and ‘Groupname’ is placed in the Group field. Exporting waypoints to Furuno NN3D will also do this.
6.17 Harvest Sonar Log Files Some Lowrance combo GPSs have a recording sonar that has the capability to log (save) all their sonar (depth recorder) data to a data card. This creates a very large file on the card (for example 250 MB) containing all the sonar data for a whole day's trip. You can use the free Lowrance SonarViewer to replay all this sonar data. This gives you the ability to find all the places where you passed over a ledge or wreck and save that data to a SeaMarks file.
7.1 New Trip This command resets the trip counter to zero and splits the screen into two spreadsheets. The upper sheet contains the waypoints in your file. The lower spreadsheet is the trip plan and shows the waypoints constituting the trip (or route). You can add waypoints to the trip in one of two ways. One way is to click on a waypoint on the upper sheet and it will be repeated on the lower sheet as the next trip point.
7.4 Print Trip If you want to print the trip, this command will print it with the present printing settings, but the range and bearing will be from one point to the next rather than all points to one point as in the regular printout. Be sure that R/B is one of the printing selections if you want it on the printout. The printed plan will also have the total mileage. 7.5 Quit Trip Plan This command returns you to the normal display modes and turns off the trip mode.
INDEX accuracy, conversion...........................................................................................................................................................78 add readings ...................................................................................................................................................................44 alert message........................................................................................................................................
Download..............................................................................................................................................................................5 duplicate..............................................................................................................................................................................48 duplicates ...................................................................................................................................
map, modify........................................................................................................................................................................57 maps, create ..........................................................................................................................................................................6 Maptech .........................................................................................................................................
Split file ................................................................................................................................................................................6 Subscript out of range .........................................................................................................................................................33 swap fields ....................................................................................................................................